Every project I take on, I try not to make it one of those Make Work projects. I look for simple solutions and fast results, without compromising on quality.
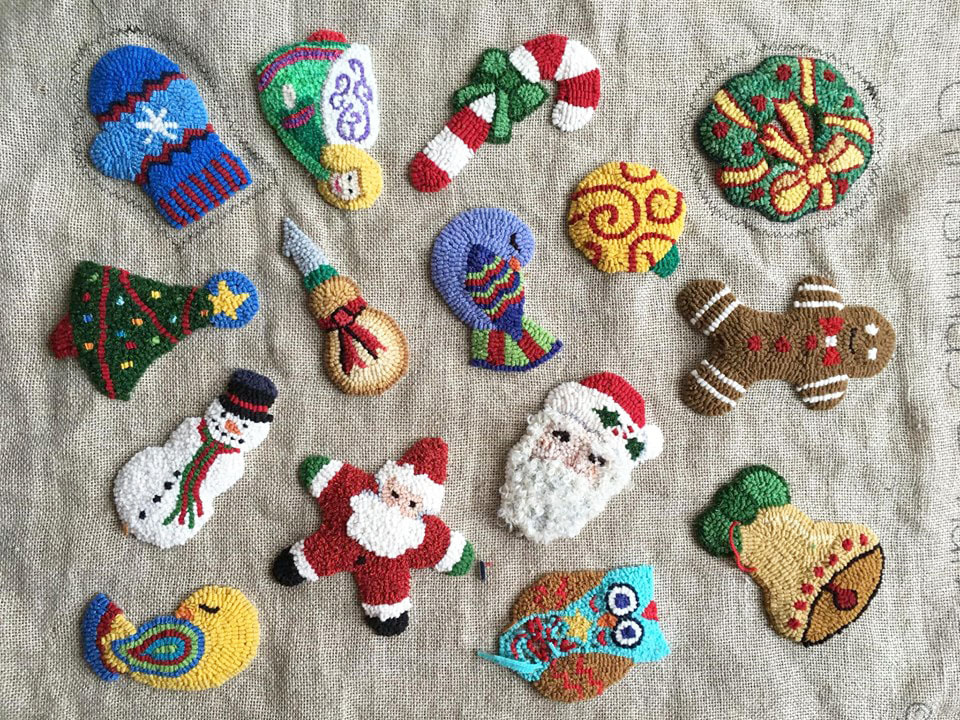
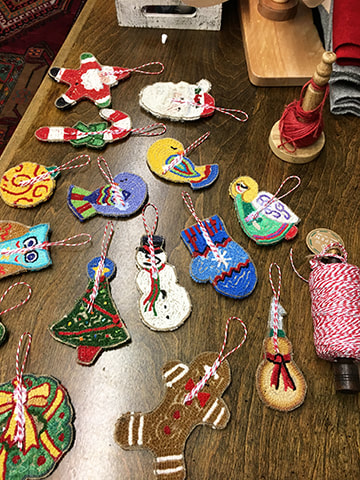
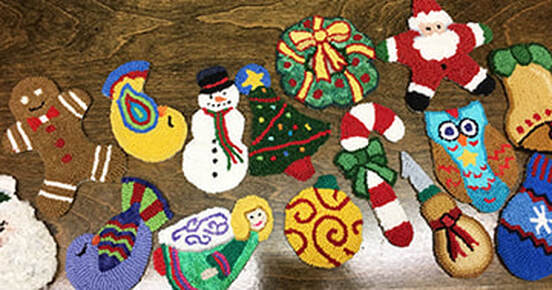
I took on our 15 Ornament pattern last year and got most of them hooked before the holidays but then Christmas came and went and New Years brought the business owner’s nightmare of inventory and year end and soon, they were forgotten. This year I picked them back up, determined to have them finished by Christmas and true to my word, they are hanging on the shop tree as of the 21st of December. That’s cutting it close but hey, they are done and will look fabulous in the shop all year long as a demo for the pattern on how great they are. (I also have drawn another 30 ornaments that will be ready to go after the holidays so in total there will be three patterns, each with 15 Christmas themed designs on the backing for a total of 45 lovely adornments for your tree, or gifts to give away. Stay tuned!
I’ve been asked how I planned to finish them so I took photos along the various steps to share so here goes. There are other ways to do this job that require sewing and any time I can avoid the needle, which seems to go hand in hand with blood and swearing, I’m good.
The first thing after any hooking project is completed is to steam it flat, especially for these small decorations to ensure that they will hang without curling.
Next buy a super tacky, fabric glue that dries clear, flexible and fast. Not all of them do, I bought one that said quick drying but it took hours to be at a stage where I could cut them out. Price seems to be the factor; the bottles were priced from $1.97 to $4.97 and I should have doled out the cash for the higher priced one. The $1.97 bottle proved you get what you pay for, didn’t follow the promise the label offered of a quick dry so it took longer to complete the project.
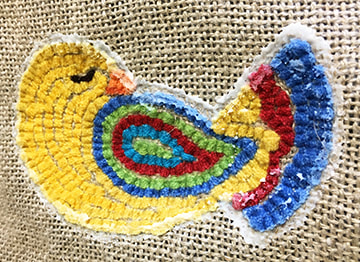
So, along the backside, glue around the ornament right to the edge of the outside row of hooking and smear it over the unhooked linen that surrounds it. You can smooth out any thicker clumps of glue so they don’t squeeze out when pressing the backing to the ornament. Keep a wet cloth handy for wiping your sticky fingers.
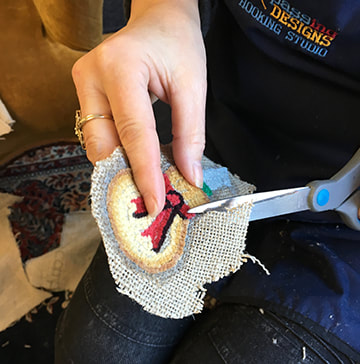
After the glue dries take a sharp pair of scissors and cut out the ornament, up close to the edge of the outside row of hooking. Don’t worry, the glue will hold the backing in place and the outside edge of hooking won’t be compromised or fray. Work from the back side and angle the scissor blades slightly outward as not to accidentally cut into the loops.
Once the ornament is cut out you can apply your hanger with glue. Use a decorative string, ribbon or jute hanger, even a strand of linen or burlap will do. The length you choose is a personal choice but keep in mind that you would need larger for longer needled trees and less length for shorter needles.
Once that dries you can cut the backings for each ornament. I chose a complimentary piece of wool to match the main colours used in the ornament top but it isn’t really seen so a fun Christmas colour like red will do or perhaps a seasonal feeling plaid or velvet. You need to put the ornament right side up on the material and then trace around the edge with a pen or fine marker, angling it so the drawn line is close to the backing edge. Remove the ornament and cut out the pattern, trimming off the marker line to guarantee that it is the exact size needed.
Now put glue all around the ornament edge on the backside. Do not leave gaps where the material won’t adhere to the ornament. Also add some of the glue to the inside of the back of the ornament so the material will fit snug everywhere and not bag or sag in the middle. Press firmly so it all sticks together, pinch the edges to make sure they are well adhered. You see a bit of the core of the backing along the edge sandwiched between the loops and the backing but it is hardly noticeable and does nothing to take away from the ornament. Of course, if you like to sew along the edges you can, just cut the material slightly larger around the shape of the ornament and then catch it along the edge and the edge of the loops and pull the thread to tug both sides together to close the gap. I opted out of doing it this way because the ornament had different colours along the edge and sewing the wool along it would show the areas where the colours didn’t match. And of course, there is that sewing thing that I struggle with.
A person told that me you can glue a thin piece of ribbon along the edge of the ornament to hide the backing but I really don’t think it is necessary as once they were hung on the tree the eye is too busy admiring the beautiful front than traveling to the lack luster edge.
The glue dries very quickly so I hung mine as soon as I had the backing on. They look fabulous and a Merry Christmas to the shop tree!
I took on our 15 Ornament pattern last year and got most of them hooked before the holidays but then Christmas came and went and New Years brought the business owner’s nightmare of inventory and year end and soon, they were forgotten. This year I picked them back up, determined to have them finished by Christmas and true to my word, they are hanging on the shop tree as of the 21st of December. That’s cutting it close but hey, they are done and will look fabulous in the shop all year long as a demo for the pattern on how great they are. (I also have drawn another 30 ornaments that will be ready to go after the holidays so in total there will be three patterns, each with 15 Christmas themed designs on the backing for a total of 45 lovely adornments for your tree, or gifts to give away. Stay tuned!
I’ve been asked how I planned to finish them so I took photos along the various steps to share so here goes. There are other ways to do this job that require sewing and any time I can avoid the needle, which seems to go hand in hand with blood and swearing, I’m good.
The first thing after any hooking project is completed is to steam it flat, especially for these small decorations to ensure that they will hang without curling.
Next buy a super tacky, fabric glue that dries clear, flexible and fast. Not all of them do, I bought one that said quick drying but it took hours to be at a stage where I could cut them out. Price seems to be the factor; the bottles were priced from $1.97 to $4.97 and I should have doled out the cash for the higher priced one. The $1.97 bottle proved you get what you pay for, didn’t follow the promise the label offered of a quick dry so it took longer to complete the project.
So, along the backside, glue around the ornament right to the edge of the outside row of hooking and smear it over the unhooked linen that surrounds it. You can smooth out any thicker clumps of glue so they don’t squeeze out when pressing the backing to the ornament. Keep a wet cloth handy for wiping your sticky fingers.
After the glue dries take a sharp pair of scissors and cut out the ornament, up close to the edge of the outside row of hooking. Don’t worry, the glue will hold the backing in place and the outside edge of hooking won’t be compromised or fray. Work from the back side and angle the scissor blades slightly outward as not to accidentally cut into the loops.
Once the ornament is cut out you can apply your hanger with glue. Use a decorative string, ribbon or jute hanger, even a strand of linen or burlap will do. The length you choose is a personal choice but keep in mind that you would need larger for longer needled trees and less length for shorter needles.
Once that dries you can cut the backings for each ornament. I chose a complimentary piece of wool to match the main colours used in the ornament top but it isn’t really seen so a fun Christmas colour like red will do or perhaps a seasonal feeling plaid or velvet. You need to put the ornament right side up on the material and then trace around the edge with a pen or fine marker, angling it so the drawn line is close to the backing edge. Remove the ornament and cut out the pattern, trimming off the marker line to guarantee that it is the exact size needed.
Now put glue all around the ornament edge on the backside. Do not leave gaps where the material won’t adhere to the ornament. Also add some of the glue to the inside of the back of the ornament so the material will fit snug everywhere and not bag or sag in the middle. Press firmly so it all sticks together, pinch the edges to make sure they are well adhered. You see a bit of the core of the backing along the edge sandwiched between the loops and the backing but it is hardly noticeable and does nothing to take away from the ornament. Of course, if you like to sew along the edges you can, just cut the material slightly larger around the shape of the ornament and then catch it along the edge and the edge of the loops and pull the thread to tug both sides together to close the gap. I opted out of doing it this way because the ornament had different colours along the edge and sewing the wool along it would show the areas where the colours didn’t match. And of course, there is that sewing thing that I struggle with.
A person told that me you can glue a thin piece of ribbon along the edge of the ornament to hide the backing but I really don’t think it is necessary as once they were hung on the tree the eye is too busy admiring the beautiful front than traveling to the lack luster edge.
The glue dries very quickly so I hung mine as soon as I had the backing on. They look fabulous and a Merry Christmas to the shop tree!
 Gluing the back of the ornament. Covering the outside hooked row and smearing it over the backing | 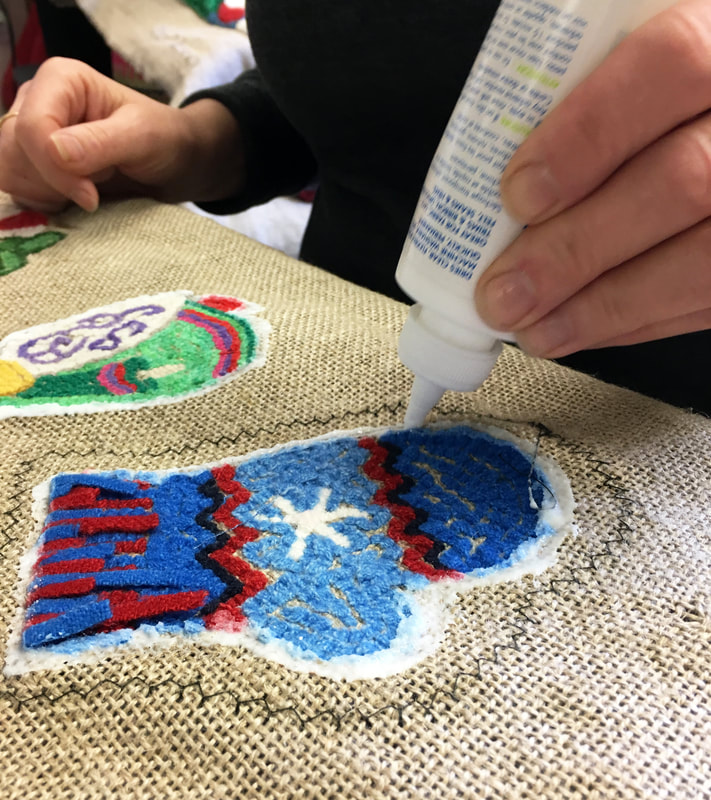 |
 |  |
Adhering the decorative hanger before the backing goes on.
Cutting off the excess edging, angling the scissors so they don't cut the loop tops on the
other side.
other side.
All cut out and waiting for the next step.
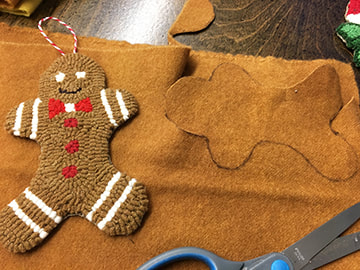 Mr. Gingerbread man has his backing cut out and is ready for gluing. I put glue all around the edge and inside the body so the backing clings to the ornament. | 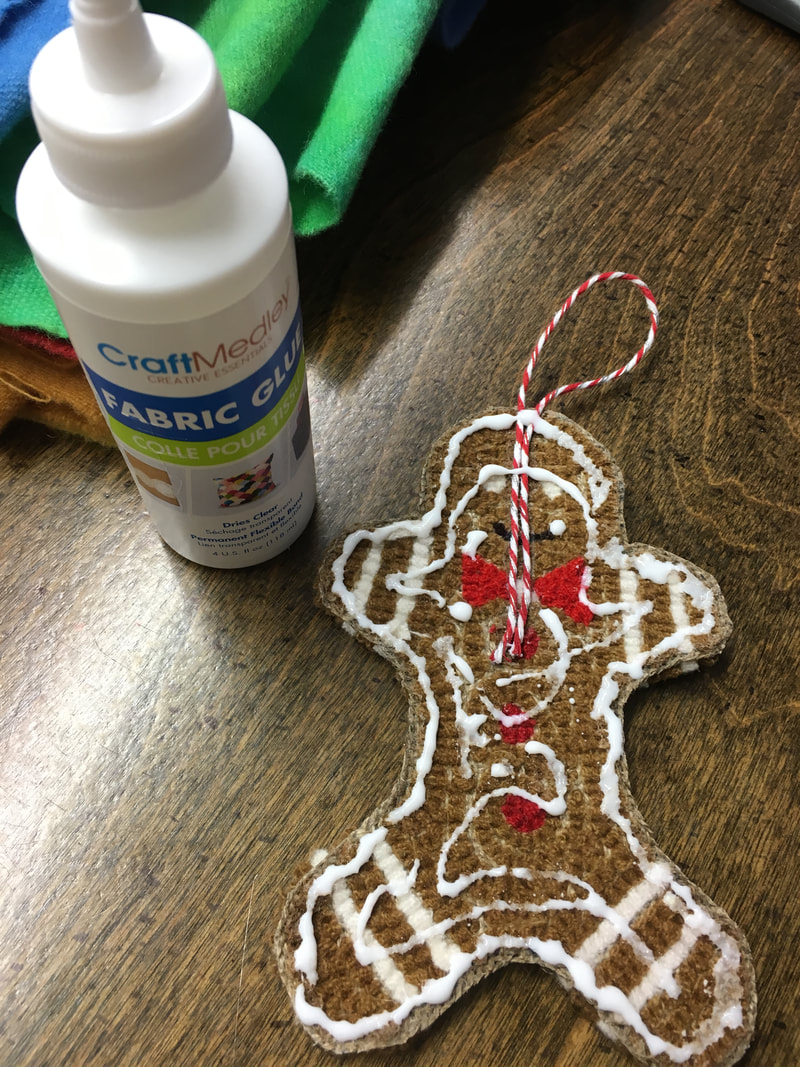 |
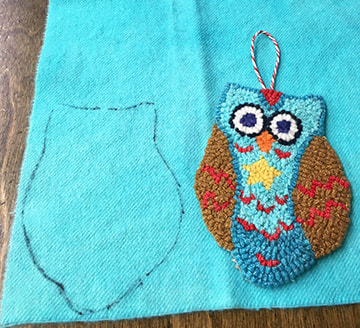 I put the ornament on the backing right side up to trace around it with a fine marker. when I cut it out I remove the marker line with the scissors. This ensures that it is the perfect size. Right - Finished ornament. I trimmed the wool's pointy ears into a soft curve so it wouldn't fray. | 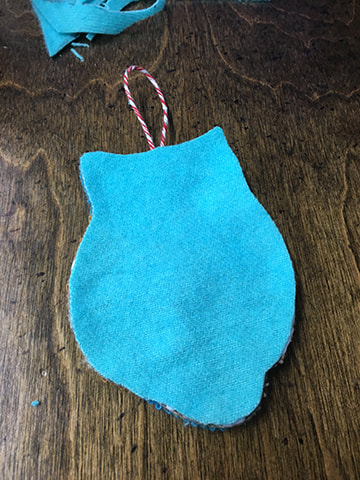 |
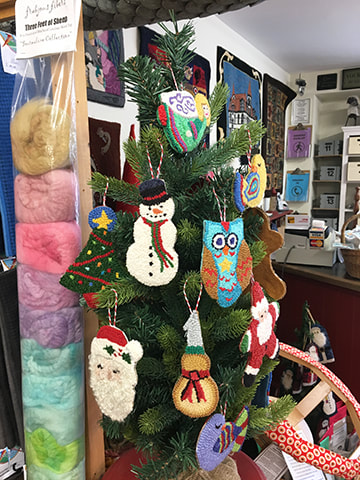 | 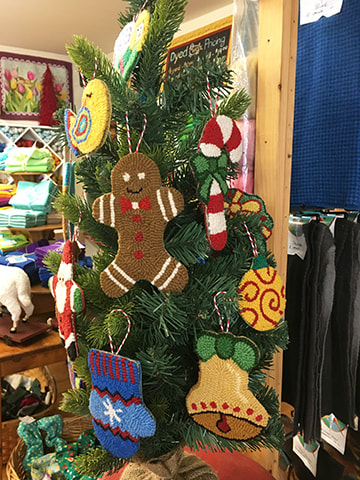 |
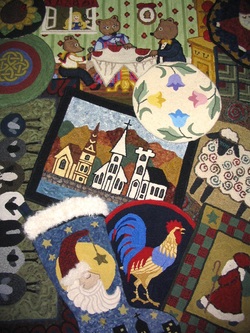
The shops Christmas Tree is now adorned with lovely little seasonal ornaments.


 RSS Feed