Encompassing Designs
  • Home
  • Shop
    • Kits
    • Patterns >
      • Christine Little >
        • Signature Designs
        • New Designs
        • Seasonal Designs
      • Deborah Sweet
      • Susan Leslie
      • Patricia Perry
      • William Morris
    • Supplies >
      • Backings
      • Frames
      • Hooks
      • Books
      • Extra
    • Wool >
      • Abrashed
      • Custom Dyeing
      • Dyed Bundles
      • Dyed Curly Mohair
      • Dyed Spots
      • Dyed Values
      • Dyed Yarn
      • Jacquard Dice Dyes
      • Natural & Colours
      • Plaids & Textures
      • Dye Books & Swatches
  • Ordering
  • Blog
  • Workshops
  • Our Story
  • Contact Us

Cutting Burlap

10/31/2012

0 Comments

 
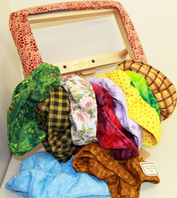
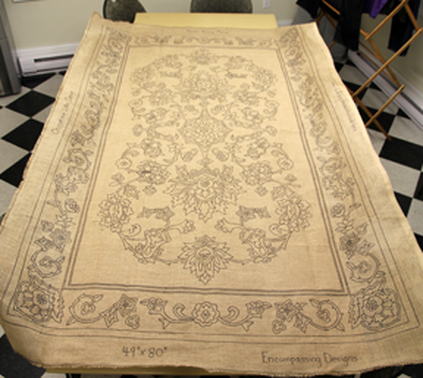
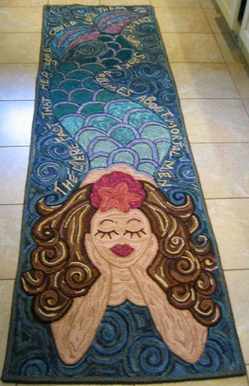
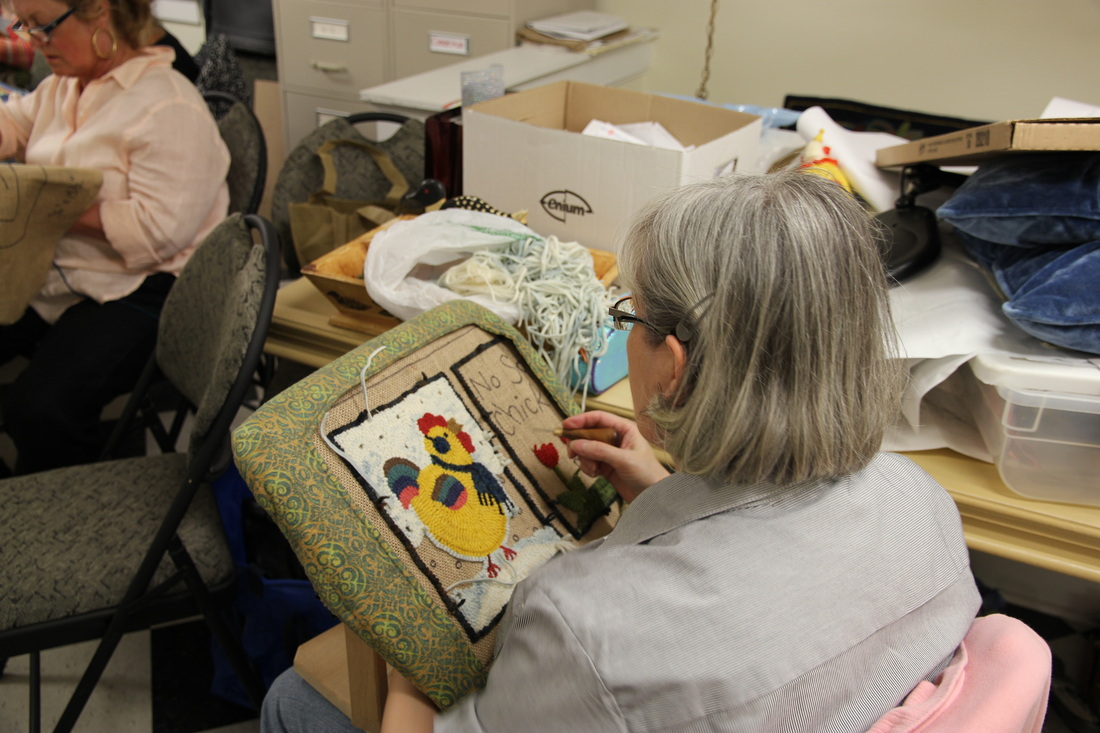
You always want to be careful cutting the burlap to minimize fraying.  Any cuts made crooked across the gain will fray like mad and you could loose a great deal of the outside border needed for binding the edge.  

Cutting will be done with scissors by carefully following the grain, or an easier way, is to put a
small snip where you want to make the cut and then pick up one of the burlap fibers and pull it
through all the way from the other side.  The burlap will gather up but that is okay, just keep pulling until you reach other side.  This will leave a gap between the weave that you can follow with your scissors without having to scrutinize so closely.    

Once your piece is cut out always zig zag the outside edges to prevent fraying….some people even use masking tape.  

That's all for today folks.  Been watching too much TV and staying up too late to be clever.  Crawled out of bed at 10:00 this morning and feel like I've been hit by a truck.  I won't make it to work until noon.  Someone said the other day....you aren't really late until to get there.   Boy, the thunder is really loud.  Must be directly overhead as I felt that one in my bones!

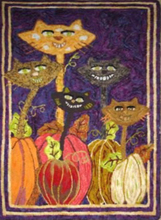
Happy Halloween everyone!   
0 Comments

Sometimes My Cup Just Runneth Over!

10/30/2012

1 Comment

 
Well, I managed to survive another hectic week.  If stress was fuel I could have powered myself across the ocean to sip a decent bordeaux and dine on authentic French cuisine.      

Stress is like cholesterol, there’s good and there’s bad, and the kind that rides me bumper to bumper is usually the 80% normal, day to day grind, but the other 20% is “What the hell am I doing in front of another oncoming bus?”  I seem to thrive on stress or maybe it thrives on me, a symbiotic relationship that should get divorced.  The one benefit, there seems to be no shortage of stories to tell from Murphy’s Law always on my tail.  If  anything can be done the hard way, that's the way I roll.  

Some tell me I must like stress considering I always seem to be in its clutches but that’s just crazy.   I stress because I have stress….if I was enjoying it I'd just go with the flow.   Sometimes my life is a crap sandwich and I would give my neighbour’s right arm to abolish stress from my kingdom, but on the flip side, once the angst is over I usually come out smelling like a rose and packing a funny story to tell.  So why my life straddles a teeter totter I’ll never know.     

I’ve been stalked by stress as far back as grade school when I left assignments go until the night before the deadline.  I’d frantically do the work last minute, pass it in and get a rave review, therefore supporting little motivation to change.  If only one of those teachers would have marked me low, ripped a strip off my hide or stood me in the corner with a big ole dunce hat, there might have been incentive to change. But instead, I got a slap on the back, a smile and a mark I could live with.  So, you see, it isn’t really my fault, I’m a product of a bad education. 

So last week my dance card was full, and this week isn’t much better but a few of the major stressors are gone to lighten the load.  Last week I had a 12 student beginner class to prepare for with kits to make, some were custom and all needed dyed wool and cutting; I had to shift piles of stuff to clean the classroom (don’t look in my office);  had to make decisions for the new garage, meetings with electricians, plumbers, wrought iron guy and Selkirk man for the wood stove;  have our chimney swept; stacked firewood; did housework; started winterizing my gardens; worked the shop; managed the new website; tended to four babies (I mean dogs); grocery shopped and cooked meals; worked on and edited the new dye book; wrote blogs and hung around Facebook trying to figure out how it all works.   Now maybe that doesn’t seem like anything to whine about and probably Martha wouldn’t bat an eye, but I was pretty much rattled, worked until 2:00 am or later every night, and banked a hefty deposit of sleep deprivation.   I was wound tighter than a virgin in an all boy’s school.     

The stress bubbled beneath the skin for days and finally broke like a festering boil Saturday when I got off work, arrived home and was hanging around the yard with the dogs.   Not totally with it, I wasn’t paying the usual strict attention and the new guy, Jake, my little black boy, saw the neighbour come out of his garage, barked and ran across our property and into the man’s yard before I knew what was happening. 

Well, I lost it.  I love my dogs more than life and most think I spoil them rotten but I’m a strong pack leader and my dogs mind, they have to listen, their little lives depend on it and running into the next yard is not a far cry from running into the street to chase someone on a bike.  Jake was
too far into excitement mode to pay attention to my blood curdling “COME!!”  I literally peed my pants screaming and jumping up and down to get his attention. He didn’t respond so I launched into a hissy fit right there in front of the neighbour…I’m not concerned about any sort of embarrassment on my part, the neighbours know I’m weird but my hubby was mortified.  Besides, I was angry because although the neighbour could clearly see that I was trying to get Jake to return to our yard as soon as yesterday, be bent down in play mode, encouraging him to come over to say hi.  Before I continue, I must say that I have never and would never lay a hand on any of my dogs, or my husband for that matter, so there is no cause to phone the SPCA or the AHA (Abused Husband Association).

So after hubby told me it was time to quiet down I proceeded to loose what was left of my sanity and my bladder, went around the corner of the house and screamed as if the grim reaper was closing in. Funny, after that I mellowed out, the hard edge of the week sloughed off like a snake
shedding its skin, no personal resemblance intended.  That was all I needed to reset the calm button and I felt like my old self again. Hubby wasn’t that pleased with my shenanigans but he got over it.  He’s so laid back and calm there’s barely a pulse.  I don’t know what he sees in me really but I guess we’re the poster couple for opposites attracting. 

Anyway, now that the tight lump in my throat had dissolved, the headache had vanished and the stress of the week had melted away I was able to laugh despite the wet drawers and the shock on the neighbour’s face burned on my retina.   Although a bit tired, the beginner class on Sunday went smoothly and I met a lot of wonderful new people in the process. When I got home I sat on the sofa, slapped my aching feet up on the coffee table and snuggled with my four beautiful babies.  I awoke four hours later in the darkness, still wearing shoes, jacket and glasses, surrounded by the warmth and love of my little furry family, feeling lucky to be me, totally refreshed and wondering what the new week will hold in store.     

Picture
Beginning class of 12 students busy on their projects.

1 Comment

How To Use Red Dot

10/29/2012

1 Comment

 
How to Use Red Dot

 1.     First draw your idea on paper.  This allows you to easily make changes until you perfect your design.  If you work directly on the burlap with a marker mistakes are permanent and make for a messy pattern.   

 2.     Place the red dot medium over the drawing and secure with stick pins or tape so it doesn't shift while you work.    

3.    You will be able to see your drawing through the red dot very clearly. Trace over all the lines of your pattern with either a pen or ultra-fine tipped marker.  Now your design will be on the red dot medium.

4.    Position the red dot over your burlap and secure it with stick pins. 

5.    Trace over the lines with a Sharpie marker or any marker with a point. The ink from the marker will bleed through the red dot and absorb into the backing.  After you have traced over all the lines remove the red dot and you should see a perfect replica of your pattern.  Now go over the lines on the backing with the marker to darken them.   Don’t press too hard with the marker when working directly on the burlap as it is a rough surface and will wear off the tip fairly quickly.  The tip is what gives you a fine line on your design, keeping it neat and detailed.  Once the marker gets too dull it will make thick lines.   

 6.     Except for objects with straight lines or borders all of the lines of a pattern can be transferred using the red dot medium.  When transferring pattern that has straight edge you have to establish that first on the backing before you position your red dot to do the inside design.  The straight line  will need to be drawn by hand with a pencil.  For instance:  If you have a design that is 15 x 15 you would leave a distance of at least 3” along the outside edge so that the pattern will fit in your frame.  This would mean that you are working with a piece of burlap that is 21” x 21”.  (If you want a wider edge you can make it larger)   Take a ruler and measure  3” in on one side, find the closest channel in the grain, take a pencil and drag it along that channel until it reaches 15” in length.  Then on the end of that first line make  90* turn and  drag the pencil in the nearest channel until you reach 15” in length.  Do the third side of the border and then close off with the fourth side.  You will be using your ruler to measure each line so it is a perfect 15" x 15" square.   This will give you a nice straight outer edge for your pattern and make hooking so much easier on as all the holes will line up.  if there is a border on the pattern you would have had to consider that in your measurements.  If the pattern is 15" x 15" with an inch border around the outside you would have started with a piece of backing this is approximately 23" x 23" so you would have the excess 3"  all around and a design that measures 17" x 17" in total.  

     All geometric patterns like inch mats and anything with squares or straight lines are drawn by hand by dragging a pencil along the grain.  Make sure the pencil is somewhat sharp as when it gets too dull it won’t lay in the channel of the grain.  After you have your lines drawn you can then drag your marker along those pencil lines to darken them.    

Any time you have a design with a house surrounded by trees and shrubs you would transfer everything with the red dot accept the house.   You use the drawing on the red dot to see where the lines should be below it,  find the closest channel (straight row) in the backing grain,  rub the pencil along the grain through the red dot, then lift the red dot on one corner and you will see where your pencil had made a faint line, go over it with the pencil again to widen the channel and then use the marker to darken it.  Follow this process for all the lines on the house, including the door, windows and roof.    A bit of preparation and taking the time to do it right means hooking in straight lines....so much easier than trying to hook a line that goes on and off
the grain, correcting it to the left and then to the right; your line ends up looking like a drunk staggering his way home.   

Not all pattern manufactures produce their designs by hand.  Most companies have them stamped which means lines that are not on the grain.  Enquire before you buy, especially if there are a lot of straight lines in the design and especially if it is an oriental pattern as that means hooking in all horizontal lines....you will be cursing!!!  Before you fork over your hard earned money ask, "Is this pattern straight on the grain?"  When I first started my business I was a bit green and bought designs from pattern houses.  Most were stamped and so crooked my customers wouldn't buy them so they hung on the racks until I recycled them, using the back of the pattern to draw on and hook projects for the shop.  A costly mistake for me, so I decided that I would only sell my own designs, all hand drawn, perfectly straight on the grain and even though it's labour intensive, with some patterns taking over two days to produce, the product speaks for itself.  
1 Comment

Two Friends Hooking

10/27/2012

0 Comments

 
Picture
Isn't this oil painting fabulous!  I believe it is a painting called Two Friends by Edwin Headly Holgate.   It was in a fire and the signature was ruined but the auction house said they believe it is one of his.  Edwin was unofficially a member of the Group of 7.  Anyway, I bid on it but after it crept up to over $15,000 I was out...(well I was out at $2000.00) but I hung on the phone to hear the bids until they hung up on me before it was sold....I was clearly not a serious contender.

Anyway, I think I would like to try to paint a similar picture of my own with two of my friends.   A nice winter project.

0 Comments

Dye Book Coming!

10/27/2012

0 Comments

 
We are almost finished editing the new dye book "Dye Me To The Moon" and will be taking it to the printers next week.  Shane is busy cutting swatches to be attached to the labels as soon as everything is printed.  We're all pretty excited!  If not for Shane this book would not be possible, he not only did all the work but he also created most of the formulas.  Momma is very proud!

I have a beginning class of 12 students on Sunday so I'm busy making kits.  The shop is full of wool dust from all the cutting.  Hooking isn't the tidiest hobby in the world.   Like eating crackers in bed you have to keep the vacuum handy.  I'm by far the messiest rug hooker, according to hubby that is, who wonders why I don't work with a garbage can close by. I say it slows me down!  Hook with a frenzy, hand sweep the ends to the floor and then clean it up later.  I beat to a strange drum.  Some people use a plastic container with a slot in the top to collect the ends but I like to pretend I'm allergic to plastic so I can't have it around.  Truthfull, in a house filled with traditional furnishings, a white plastic container stands out like a sore thumb.  Guess I'm anal.   Most who know me will vouch for it but I just take that as a fabulous compliment!  

Speaking of plastic, I'm still trying to figure out a way to hide the kitchen fridge, the massive white elephant that's always in your face.   I think about hooking my Country Sampler pattern and attach it with magnets just to hide the gleaming whiteness of it all.  Tried to conceal it with small magnets holding biz cards, notes and reminders but that just meant aa different kind of ugly.  Someone once said, I should get a sickness so I'd have something real to complain about.  Maybe that's why I got diabetes?  Ah well, that's life.
 
0 Comments

Hooking with gripper frames!

10/26/2012

6 Comments

 
Picture
Picture
Picture

To be fair one has to cover both sides of the coin so I'll spotlight the gripper frame inext.   She is a very lovely girl and in a perfect world we would all love to have one but there are pros and cons to this as well, although nothing to shed any tears over, unless of course you're bleeding! 

Don't we love our gripper frames!  So easy, so slick to move your backing around.   Not all gripper frames are created equal but today's designs usually tilt and turn 360* which is what you want to look for.  The older style stationery frames were high in the back and slanted lower in the front with open areas on the sides and front to get at our work.  But if you wanted to hook in a circle you have to keep adjusting the backing or learn to manipulate your wrists.  Frames that turn 360* allow access to every part of your work with a quick spin. 

There are lap frames, sit on frames and floor frames.  You can decide what suits your hooking lifestyle and some of us have more than one frame to cover all our needs.  A smaller, sit on or lap frame for scooting about to hook with groups or at a friend's house and the floor frame at home for comfort in front of the TV. 

Poor granny had to strap down her pattern to a room sized dinosaur that didn't allow any moving of the backing without a great deal of time and effort.  The stationery frame did not allow movement so she ended up hooking in straight lines back and forth.  She would have loved the flexibility of a moving frame, would have thought thought she died and went to heaven!  Today we like portability, visiting friends with hooking in tow and we also like hooking in wavy lines, circles and diagonal lines.  Thanks goodness for evolution of the rug hooking species!

Cons
1. Deadly spikes that scratch our skin and tear our shirts.  Who hasn't bled on their project please stand!  No one? Didn't think so.  Putting the backing on and taking it off is where you are likely to be scratched but leaving it sit around with out a flannel cover, you can accidently brush up against it for a little abrasive contact. 
2. More cost although that isn't a deal buster if you want one. 
3. Gee, can't think of another negative thing to say!

Pros
1. You can leave your work in a gripper frame for as long as you like.  Seeing your project out and ready you are likely too hook more often. 
2. Easy to move your pattern around to get to all areas.
3. You can make or purchase a gripper frame cover to protect you while you work to stop or minimize injury.   
4. Solid hardwood framing means long life.
5. Grippers never wear out.
6. A lot of the gripper designs have a hand rest bar that stretches across beneath the backing.
7. Usually all gripper frames come apart for travel, will fit in a bag or a suitcase.
  
8. Patterns with very little edging can still be put on a gripper frame and pulled tight to work. 
 

Picture
Picture
Picture
6 Comments

My Furry Family

10/25/2012

0 Comments

 
Picture


Jake - Black toy 1 yr old
Honey - Apricot toy - 9 yrs old
Henri - Cream Miniature - 2 yrs old
Fiz - Red toy - 2 1/2 yrs old


Well, I didn’t crawl into bed until 2.00 am this morning and here I sit practically brain dead.
The house reeks of tripe, for those of you who don’t know what tripe is I’ll try to explain.  Imagine the smell of cow manure mixed with sheep manure and then throw some horse poop on the pile and you pretty much get the drift… I buy tripe in frozen patties and the dogs love it like cats love catnip.  The smell drives them crazy and they become little ravenous pigs gobbling it up. Tripe is the contents of the cow’s stomach at slaughter and that might be disgusting for humans but it's the first thing a wild predator eats after the kill. Yum! 

I feed my dogs homemade diet.  Usually raw or semi cooked and bone.  The optimum diet for a dog is 30% organ meat, 60% muscle meat and 10% bone.  Dogs are carnivores and wheat is not conducive to their diets although the pet food manufactures seem to feel otherwise.  Wheat and byproducts are fillers that don’t serve your dog in any way, shape or form.  If you look inside a canine’s mouth you will see sharp teeth for tearing, ripping and crushing, taking down prey and stripping meat from bones.  I try to feed my dogs a diet that closely relates what they would eat in the wild.  Dogs are scavengers and will eat anything, including another animal’s dung, so although we think our dogs are above this sort of behavior, they’re really just an animal sharing our home. Of course I like to pretend my dogs are the exception to the rule, with above average intelligence and a semblance of culture; after all they dine off of Blue Willow China so elegantly.  But then horror of horrors, they go outside, roll in deer poop just to burst my bubble.   

We have four babies….I mean dogs.  All poodles; three toys and one miniature.  Honey, Fiz, Henri and Jake.  The oldest is nine and the youngest just turned one.  The nine year old doesn’t have one bit of plaque on her teeth, not a hint of discolouration whatsoever and she has never been to the vet for a cleaning.  The secret?  Bones. Real bones, at least twice a week.  We are told not to feed our dogs bones but why?  Vets will say that your dog could choke or get a bone shard in their colon.  That would be sad but I am willing to take the chance to provide my dogs with an optimum diet.  Bone dissolves in the animals gut, like chocolate melts in our hands.  In goes bone and out comes a dry, powdery tube with very little smell.   One person said it best.  No coyote
ever died from eating a chicken, bones and all.  You see it is the cooked bones to avoid, they become brittle and are more apt to splinter but a raw bone is a tough customer.   My dogs will take a marrow bone and scrape the insides until the outside wall is wafer thin.  Bones rub against
their teeth and gums and remove tarter buildup while supplying the necessary nutrients to their diets.  My dogs are pros, can strip a bone of meat and sinew in minutes.   I like to think if they ever found themselves in the wild, you know, if I had a massive heart attack outdoors in the middle of the night during their before bed pee and they wonder off into the woods, they would be able to hunt and know what to do with their kill.  Morbid thoughts I know but it is something I think about being the daughter of a doomsayer, a worry wart who drummed in a potential death scenario for every moment of our childhood.  He could have been famous if Hallmark had a need for an "all the bad things that kill you"  section in their greeting card line.   So, at times when it’s cold and dark out there I worry about my guys and how they would survive.   Hopefully they would hang around and cuddle with me for warmth but maybe I’d be missing a nose when they find me.........

0 Comments

Blog #18 - October 25th, 2012

10/25/2012

0 Comments

 
I am compiling thoughts as they come to me or as things pop up in the shop but if there is any topic anyone would like me to discuss please click on the comment box and send your request. 

What a crisp morning and I just noticed that today is exactly two months from Christmas!  Winter's on its way!
Picture


"...on a winter's night with ewe."
 

0 Comments

Blog #17 - Pattern of the Week

10/25/2012

0 Comments

 
Picture


Ruth Anne "49" x 80"

Picture

Designed for Ruth Anne Nicholson, thence the name, is as traditional as it gets.   Old world charm at its best.  Boosting Crewel/Jacobean style this looker will ad to any existing room or just go ahead and build a room around it! 
0 Comments

Blog #16 - The Technique of Rug Hooking

10/24/2012

2 Comments

 
At Encompassing Designs we believe in supporting rug hooking autonomy.  If you are the type of personality that soars with eagles, we want to cultivate that confidence and allow you to fly, but if you are the type that feels more comfortable with a bit of guidance our door is always open.

Deep down we all basically know what we want, because we definitely know what we don’t like, and by the process of elimination we usually get to the place we want to be.   I try to dispel any notions that rug hooking is difficult, breaking down the different aspects so that it is less intimidating. The last thing anyone needs is a dependency on other people, preventing them from blazing ahead with their creative mind and materials. Beginning classes that take six months to a year, where you are not allowed to progress past the last lesson until the next appointment seems to be an elementary approach, stunting the student's productivity and the creative drive that attracted them to this art form in the first place. Grandma didn’t take classes, she probably mimicked her mother’s movements and then jumped in with both feet, designed her own patterns and dyed her wool without a full-time mentor, proof positive that it can be done.  Actually some of the most talented rug hookers I know have never taken a lesson beyond being shown how to pull up a loop.  There are those who discourage new rug hookers from pursuing instruction because of the influence it would have on the raw, natural talent they may have.  As humans we tend to conform easily, adapting to external forces and in the process we  can loose a part of ourselves in the process.   Teaching is a tricky deal, you don’t want to influence a student into being a carbon copy of you, a little mini me, pardon the pun.  Your only directive should be to nurture their talent, and promote autonomy so they can confidently make their own  choices. 

I see it all the time. Beginners in the middle of these lengthy courses come into the shop to buy patterns and wool to hook behind their teachers back because they love hooking and want to indulge their own creative ideas immediately. I guess I’ll be in trouble for saying this although I am not casting dispersions on anyone’s teaching style; I'm just passing along the observations and experiences that I have witnessed from twelve years in the business.  I've taken all the requests, complaints and questions of past customers and compiled it into a teaching outline so my
students benefit from the foibles and follies of all those who came before them.

A comment has reached me via the hooking grapevine that I am wrong, that it is impossible to teach rug hooking in a three hour course and of course I agree. What I am teaching is not the A-Z of this craft, no mentor or book can give you that.   Rug hooking, as in all things, is an ongoing education.  What I am promoting is how to properly use a hooking tool to achieve the optimum degree of skill when executing a loop. Just the way you hold your hook can greatly change the way your loops turn out. These details do not get enough attention. My classes are all about how to pull proper loops and minimize wrist strain.  It doesn’t matter what first project you are working on, what matters is that you learn the skill to hook in straight lines, wavy lines, circles and know how to give the proper definition to objects in the design. My goal is to show you the basics so when you attempt something a little more involved, say flower shading, you can concentrate on the position of the wool values to achieve realism, not have to worry about the quality of your loops.    

So many people come into the shop with problems. Although they have taken classes they tell me their technique was not addressed so they fall short on neatness and proper loop formation. Without the right foundation, rug hooking can be frustrating and you might not be able to achieve the quality you wished to accomplish. Over the years I’ve heard many tales of woe and I’ve dispensed tips and helpful advice to literally thousands of customers who complain they could be much happier with their work. Luckily most of the concerns are just an easy fix and they look at me as if I’ve invented the wheel.  I'm no hero, I just like to do things properly and pass it on.  
 
Rug hooking, as in any craft, is meant to be fun so there should never be frustration, pain or blood.  Yes, I meant blood!  A woman took a class, loved it but had to give it up because she bled too much. I asked her to demonstrate how she hooked and discovered she was stabbing the hook tip into the end of a finger below every time it dipped down into the backing hole so the hand could position the wool. It wasn’t long before a bloody sore put an end to her hooking ambitions. A quick correction of her technique put her back in the game and I got a nice big hug!  Another common complaint is that the previous loop falls back down through the hole when the next loop is being pulled up, another simple fix. There should never be any struggle, discomfort or pain associated with rug hooking!  

Here's another common problem I would like to share.  A few years ago a client called and ordered enough hand-dyed yarn to hook a large floral design.  She was an experienced hooker with several decades under her belt. A Snowbird, she was heading to Florida and this was going to be her winter project. I don’t hook with yarn but I do know that one 4 oz skein of 2 ply wool will cover an area approximately one foot square in size. So I hit the dye pots and cooked up a beautiful palette. I was a bit concerned about the quantity of each colour, especially if she ran out and would want me to colour match a year down the road so I made certain she had more than enough to complete the project.

You can understand my surprise when six months later, the woman was back in Nova Scotia and I get a panicked call that she'd run out of the background colour. Oooppps!  She said she only had enough wool to cover half of the background. Double oooppps!  After the initial shock wore off disbelief kicked in.  Impossible!  How could she be out???  I questioned whether she was a high hooker or if she hooked every hole? No was the reply to both. That was all I had and because assessments are impossible over the phone I asked her to come in with the rug so I could figure out what happened.

The rug was fantastic.   The colours were so rich I swooned.  Her hooking was superb; her loops were perfectly uniform almost of machine quality. Everything looked in order... that is until I turned the rug over to view the back. Oh my! The mystery was solved. There was more wool below than was covering the top. When she pulled up each loop through the backing hole she didn’t pull it tight to the back of the rug just pulled enough to achieve the height needed on top. It was amazing she was able to hook with all those floppy, inch long loops hanging below.   Her rug would have been reversible if not for the fact that the hanging loops were way to long and shaggy in their appearance.    

I explained what was happening and showed her how to pull the yarn so it snugged up against the back of the rug.  She was a bit angry.   In all the classes she had attended, no one ever told her she was doing anything wrong.  She was annoyed about all the wool that was wasted over the years and the money that purchased it. She thanked me over and over, and went home to tear it all out and start over.

This was just one of many valuable lessons I've learned from my customers. Noting their struggles has taught me to spend extra care with my students so they fully understand the technique of rug hooking.  Often I have seasoned rug hookers join my class to fix problems that have frustrated them for years. No one leaves my class without the basics under their belt and I tell them, if you feel the need fto build a bit more confidence come back and sit in on a second class for free.  No one has ever taken me up on the offer.  I view that as a good sign.  Despite the objections of others, I feel my beginning class is the best three hour investment any rug hooker can make, and yes, I always check the underside of their projects before they leave.


2 Comments

Blog #15 - Opinions

10/22/2012

0 Comments

 
I would like to chat about opinions.  Yes we all have them, it’s part of who we are.  The trick
is knowing when to share them and when to keep the trap shut.  The one ugly aspect of being creative is that people offer their unsolicited opinions about your work.  If the comment is positive, supportive and complimentary no problem, but when it’s negative it can suck the joy out of the moment quicker than a sock going up the vacuum hose.    As a shop owner, I’m a bit of a
bartender in that people feel free to confide in me, exposing the aftermath of thoughtless comments, the collateral damage of opinion bombs.   “Why did you use that colour?”  “I would
never have done it that way!”  “What were you thinking?”  All of a sudden the project you felt so proud of is tainted and worse, your confidence has taken a hit.  

If you ask someone for their opinion you open yourself up to their thoughts and have to accept what comes down the chute.  You don’t have to heed their advice or take it to heart but it was solicited and good or bad you deal with it.  Wanting approval for your work is normal, we all want to fit in and feel accepted but do we really need someone else to tell us what we’ve created is good?  When it boils right down, the only opinion that matters is your own.   A wise art teacher once said something that has stuck in my crop for thirty years and I use this philosophy in my business and in my life. "Never, under any circumstance cast your work in a negative light.  Don’t ever bring attention to what you perceive is a flaw.   Most won’t even notice but as soon as you point out a part that you might not be happy with, others will view the work as flawed.  Accept that you have created something special and others will see and believe in the value in your work."  Wise words!

 One wonderful rug hooker I’ve known since I first opened my door lacks self-confidence about her work.  Why?  Because people in her group have told her repeatedly that she’s not a very good hooker.  Why anyone would say this is lost on me, especially when it couldn’t be further from
the truth.   Obviously there is more going on than meets the eye.  This woman is a beautiful rug hooker and sweeter than brown sugar.  

A frustrated woman came into the shop to sign up for a beginning class.  She’s been hooking for
years so I was surprised at the request.  Apparently, her friends told her she wasn’t a very good hooker so she wanted to learn to hook like me.  I was flattered but then I had to laugh.  I’d always thought her work looked identical to mine and I consider myself a pretty good hooker, so that meant my work was less than pleasing as well. The whole thing was utterly ridiculous and I pressed that fact, hoping to rebuild the confidence that had been torn down.  Seeing she needed more convincing I took it a step further.  I told her because there was nothing wrong with her rug hooking, the problem might lie somewhere else in her life.   Maybe these people are envious that her house is bigger, or maybe they are widowed and she still has her husband.  Maybe her car is newer and her clothing is perceived to be nicer, maybe they think she has more money.  Who knows why envy rears its ugly head but I was positive it was the main ingredient behind the
unkind remarks.    

She said to me.  “You know, my best friend and I were out shopping the other day and I had
to pump gas and when I went in to pay and then returned to the car my friend said, “You know, you don’t look that fat from behind.” BINGO!  I said.  See there is nothing wrong with your hooking, there’s a little green monster messing with your head.  She left with a smile and a renewed faith in her rug hooking and maybe in herself.  

I don’t want to sound like I’m preaching, far from it, just be kind to your fellow rug hooker.  Words can hurt.  My mother always said; “If you can’t say anything nice about someone don’t say
anything.“   If there’s an element of a friend’s rug that you don’t agree with  then find the things you like and play them up. This is a craft, not world domination; we don’t have to score points off one another to gain ground.  
0 Comments

Blog #15 - Pumpkin Grinners

10/21/2012

0 Comments

 
Halloween is rapidly approaching.  Carved pumpkins with toothless smiles will invite children to knock on doors for candy treats.   In my time it was common for people to hand out homemade snacks like caramel popcorn, peanut  brittle and the most delicious candy apples with a hard red coating you could lick or bite to gain access  to the juicy apple underneath.  Dressed as creatures
of the night, ghostly figures made from old bed sheets or fairy princesses we were  rewarded with
brown sugar, chocolate or peanut butter fudge, maybe a rice crispy square, handfuls of candy kisses or an apple.  Those were definitely the good old days; a simpler era when mother’s had the time to prepare homemade goodies.   Of course no one will let their kiddies eat homemade Halloween snacks anymore, unless your phone number and name are written on the bag and then only after it's examined with a CSI scrutiny.  Apples are just chucked in the garbage to avoid a potential catastrophe, worried that pins and needles or a razor blade might be buried deep inside its flesh.  Sadly, we live in a different world now. To protect children, some areas have canceled Trick or Treating altogether.  How sad that future generations won’t get to experience All Hollows Eve’s Trick or Treat fun.   

One tradition hasn’t changed though; the desire to decorate our homes with fall colours and seasonal frills.  Throughout the year we sell a lot of autumn geared designs, with pumpkins
and harvest scenes, witches, skulls and haunted houses.  The most popular pattern is called Pumpkin Grinners, weird shaped cat heads sporting Cheshire smiles that crown long necks growing out of pumpkins.   I put the design on the rack with trepidation. Bordering on ugly, it seemed too far out there to sell as a pattern.  Well, I know nothing!  It has become, by
far, the most sought after Halloween design that we sell.  People adore the cats with their overzealous grins.   The finished rug, sold to the shop by rug hooker, Ann Durkee, remained on display for several years until a few weeks ago when someone saw it in our window display, fell in love and bought it on the spot.  Beauty is definitely in the eye of the beholder.   Now
I miss the darn thing. Those happy faces, curly eyelashes and colourful pumpkins with a rich mottled purple background grew on me and was a great source of fun comments and conversation for the shop.  
     
Picture
Pumpkin Grinners hooked by Ann Durkee. 

0 Comments

Blog #14 - Sailor's Lure

10/20/2012

0 Comments

 
Picture
This picture was emailed to the shop today.  Sailor's Lure, one of our many whimsical mermaid designs.  Janet purchase the pattern after seeing another version of it hooked in our "Art Under Foot" gallery show in the spring.  Janet always delights me with her talent. 

Hooked by Janet Delo.  It's the Wow Factor! 

Picture


The poster for the gallery show "Art Under Foot"  Design by Shane McWhirter

Picture
The flyer sent out for the show. 
Design by Shane McWhirter

0 Comments

Blog #13 - Saturday

10/20/2012

0 Comments

 
Saturday is my favorite day in the shop. I 'm there alone and the place feels all mine.  I have a place to work and I get to connect with the customers.  That may sound strange but when Bonnie
and Shane are there it feels less intimate for me as I have no space to work so I’m forced to be upstairs out of sight. Now don't get me wrong, I'm glad for the help...if I had to do the patterns and dye all that wool I'd have burned out long ago. But, on Saturday, there is nothing to separate me from the people coming through the door and the moments we'll share.

I find through the week I'm held prisoner by all the work that goes on behind the scenes. The paperwork, web maintenance, emails and all the boring necessities that hijack a huge chunk of your day leaving little time to hang around downstairs to chat. I miss that!   Of course I am always available for colour planning or advice but the daily grind has a way of abducting the day, leaving little time for the fun.  On Saturday it’s all about the fun.  I'm downstairs, front and center, and I love it!

The solution? I’m having a work station built in the downstairs area.  A place where I can design, work on custom orders that normally have to be done after hours because Bonnie needs the only workspace for pattern production.  This wonderful new desk/counter is coming at the end of the month…let’s call it “my precious”.  In the front will be a nook and stools for customers to sit and chat while I whip up a new design or cut a custom kit.   So the upside, you’ll be seeing a lot more of my mug downstairs in the shop.  Please drop in for a cup of java and a bit of social repartee anytime!  


0 Comments

Blog #12 - Something new to view!

10/19/2012

0 Comments

 
Picture
Canvases are 6" square.  Scraps of Heart Red and Antique Gold for the pear and apple and Green Envy Herringbone for the leaves.

So, I’ve completed two of these little canvases, using the coloured burlap I’ll be selling.  
Coloured linen is also on its way.  Something new to play with and I'm sure both have bright  futures.  

There is something so delicious about not having to hook backgrounds.  I started with fruit designs, although I was asked at my hook-in, “What does fruit have to do with rug hooking?”  But
it’s the fact that the fruit are hooked that makes them relevant.  Anyway they were simple to draw and test the theory to see if the idea would fly, call them prototypes. I think they turned out rather cute, hooked up in less than an hour but I will admit I was less enamored with stretching the burlap around the frame and stapling it tight.  Finicky to make the edge folds look flat and neat.   A few little bulges here and there but impossible to eliminate entirely. I need to glue some craft paper on the backs and attach a hanging device to call them finished.  
 
Next I plan to do some black and white sheep on a red burlap background with all kinds of mystery fibers and whatever comes to mind. I think it would be better to use than Verel for projects where you don't want to hook a background.  I find Verel, or divider cloth, too small holed and polyester turns me off.   I also find it tough to touch as it reacts like pantyhose with rough hands and besides I personally like all things natural .  You can sew up pillows just as nicely with burlap or linen for a unique designer look.  I’ll publish the coloured backings on my site as soon as they arrive with some more creative ideas!


0 Comments

Blog #11 - Featured pattern of the week!

10/18/2012

0 Comments

 
Picture
A new design from the collection of Sue Cunningham's "Women of Abundance"  This little jewel is appropriately named Clammin'

Be the first to hook this darling piece.  The pattern can be viewed, along with others in this series,under Sue Cunningham designs. 


Size: 33 1/2" x 21 1/2"

0 Comments

Blog #9 - Wednesday evening Hook-ins

10/18/2012

0 Comments

 
Picture


Linda Ruth and Laura Smith...yes the one and only fabulous Canadian singer. 

Picture


Bonnie hooking "No Spring Chicken"

Picture


Anne, Pam, Lorraine and Deanna

Picture


Sue, Deb and Mary

It's Thursday morning, the day after the Wednesday evening hook-in at my studio. We
meet at 7:00 pm and break up anywhere after nine.  Last evening we were pleased to have two visitors join the group.  Most rug hookers travel with their hooking paraphernalia…like American Express, we don’t leave home without it.  This time it was a daughter and her 80 year old mother.  The daughter was from Truro, NS and her mother was visiting from Ottawa and the nonhooker of the two.  She bought a kit though, a Celtic Knot from the Book of Kells.  She said she actually saw the Book of Kells on a visit to Dublin and told us how they turn one page a day.  She said the designs were breathtaking and she wanted a memory of her trip, saw the kit and was inspired.  

We have a great bunch of women who gather at the studio on the 1st and 3rd Wednesday of the
month.  We are the only hooking group that meets in the evenings as you can hook any day of the week and twice on Sunday in this area. Because we are evening oriented we attract women who work and they are happy to have a place to socialize and share their passion.  We range in age from 40ish to the oldest at 80.  If traveling to beautiful Mahone Bay please come and join us!

 Our group consists of about 25 women in total but we don’t all show up on the same evening as life gets in the way.  We once had a man join us, a navy retiree who we felt should have seen it all so we wouldn’t have to worry about embarrassing him, but when talk got around to the under-wire in a bra, he turned fifty shades of red and never returned.  Our county yields a  
lot of male rug hookers but most are closet crafters, not leaving the comfort of their home.  I don’t know if they’re afraid it will dissolve their manliness or if a group of women are intimidating.  Too bad men can’t be wooed to join us as they would bring a different perspective on the evening’s conversations.  I personally would enjoy a bit of co-ed rug hooking. 

I explain to people coming into the shop, who marvel that today’s men do this craft, that grandpa was hooking, knitting, tatting and indulging in all manner of crafts right alongside grandma.   The nights were long and dark, nothing much else to do than wile away the hours with satisfying handiwork.  It seems that tidbit gets overlooked when we’re in a rush to praise our fore-mothers with creative genius and resourcefulness.  Good old grandpa’s weather worn, callused, hard working hands were just as talented.  There was nothing else to do after the sun went down and the oil lamps came out.  My goodness, I could never have survived without my Ott-Lite!

0 Comments

Blog #8 - Creativity and sleep don't mix!

10/17/2012

0 Comments

 
Do you ever have a light bulb moment when you come up with a clever idea, get excited like a teenage girl over David Cassidy (showing my age), go to bed and find that sleep is nowhere to be
found?  Your brain is traveling at light speed and the heart is racing from an endorphin high, every fiber of your being is jazzed. That happened to me again last night.  Sleepless nights are no stranger to me; I do most of my creative stuff after midnight, usually in bed.  Hey, no naughty thoughts!  And I don’t need to be inspired to miss sleep, I don’t know if it’s my age, but sometimes sleep is a skittish stranger, the more I chase it the faster it runs from me.  

So last night was no different.  I kept thinking about all the ways this new idea could work, my mind firing like a pistol.  There was no one to throw the idea up against except my four poodles
(Hubby is away working) and it was too late to phone a friend.  As the hours ticked by and the frustration began to click in, I finally gave up, turned on the light and read for a bit. Nothing like a juicy slasher novel to relax my blazing mind.  Finally at 4:00 am my eyelids began to droop so I turned off the light.  I guess there will be plenty of time to rest when I’m dead; in the
meantime I have another fabulous idea.  I’ll make it up and share the finished product in the next few days. Have to make a run to Michael’s for a canvas form, some spray paint and a staple gun at Home Depot.


0 Comments

Blog #7 - How much wool to cut?

10/16/2012

0 Comments

 
After completing my first few rugs I quickly realized that cutting all the wool for the project created bags of ends, all shedding lint and mixed together in a matted mess. Leftover strips are not much use when colour planning the next rug unless you’re patient enough to piece them all together to see what kind of yardage you're dealing with. For those who don't know the rule...if you have one square inch of area to hook you need  approximately 4 square inches of wool to do the job. Trying to measure with cut strips is a task.

So I made a rule that works for me.  I don't have all those ends that need storing and I no longer seize up in my chair from long periods of sitting. I only cut as much wool as I can use in a 1/2 hour period. That gets me up and out of my seat to move around, shake out the stiffness and drink some water to stave off the dehydration I’ll get from the red wine I was drinking.  Back in the old days I would sit for 5 - 10 hours
straight, breaking only for a begrudged jaunt to the bathroom. On my very first project I saw the sun come up three mornings in a row, pulling all nighters from the shear excitement of watching my mat evolve. Talk about being hooked! I fell hard and quick and the payback for my joy? I couldn't straighten the old bones after that marathon of loops. Not that it mattered; the satisfaction far outweighed any physical discomfort. I was 13 years younger then and hooking that way today is out of the question. I have to work smarter now and treat my body kindly.


0 Comments

Blog #6 - Not a Morning Person!

10/15/2012

0 Comments

 
Some days I feel more energetic than others.  Today is one of those days that I would die to be able to put my feet up and cop naps between hours of mindless TV.  After last week’s frantic push to get the new website up and running I spread myself a little thin and could use a
staycation.  Bonnie was out on holiday all last week and I had to be front and center to open the studio which meant having to work on the website until the wee hours of the morning.  I apologize to the people who showed up at opening time to find the shop in darkness.  I was late every single day!  I move like a turtle in the morning and then once the first cup of coffee infiltrates the bloodstream I gear up to a sloth.   It doesn't get much better than that.  I’m not a morning person, possibly due to the fact that the cat in me stays up far too late in the evenings.  I’m too old to change now and probably wouldn’t if I could.  I have become accustomed to my luxuriously lazy schedule.    

I crawl out of bed sometime after eight.  I have four dogs to feed and stand around waiting as they all find their spot in the yard bank to make their daily deposit.   I feed them a homemade diet so there is breakfast prep, time to sit with my coffee, a quick grooming, time to sit with
my coffee, same coffee, just cold now, my breakfast, more coffee and the shower. That’s about three to five hours’ worth of effort and then sometimes a wee nap to regenerate.  I’d have to get up at 5:00 – 6:00 am to make it to work by 10:00 am.  How did I ever manage a nine to five job?  Who was that person and where did she go?    Truthfully, there were countless times I napped in the employee washroom, head on the toilet tank because I didn't get my eight hours of sleep.   

So what's the greatest perk of owning my own business you ask?  Second to the fun it's the flexibilty of it all. Taking time to smell the roses.  But...if you want high octane performance, check with me around midnight when my jets are fueled and I’m rearing to go, the creative juices are flowing and I’m superwoman once again.  


0 Comments

Blog #5 - Wool for "Likes" on Facebook!

10/15/2012

0 Comments

 
A big thank-you to all of those who have already posted "Likes" on my Facebook.  To show my appreciation, for every "like" we receive, I will enter your name in a draw for
$200.00 worth of hand-dyed wool.  You can even choose which wool you would like by either coming into the shop or making your selections on the website and we will pop it in the mail!   Good luck!
0 Comments

Blog #4 - Funny story

10/13/2012

0 Comments

 
I have a funny story associated with the “Queen of The Sea” pattern.

Anyway, I’m in my studio and I’ve just finished the design when a middle aged man comes in to browse the shop.   He saunters over to my workspace and looks down at the drawing.  I kid you not…his forehead broke out in tiny dots of perspiration.    He kept staring at the mermaid’s over-endowed chest for an uncomfortable amount of time, mouth agape.  The appeal was lost on me, first of all it was a drawing of black lines on white paper and the breasts were very discreetly covered with starfish.   

So I did the only thing I could do and asked him “Do you think they’re big enough?” 

I tell no lie…he replied with labored breath, “Ohhhhh yes”.  It came out soft and slow, almost a whisper. 

And then I just couldn’t resist and asked, “What do you think of the octopus?”   Referring to the big, two foot long octopus directly below the mermaid.  His reply?  “What octopus?”


0 Comments

Blog #3 - Blogging & Facebook

10/12/2012

0 Comments

 
I'm not that computer savy, spend little time searching the web, have a website and email (a business  necessity), so I'm not so computer literate that I am comfortable with all the new techy stuff.  But after only two days of going live with my new website and Facebook, I've already met several very interesting people and have already found two of my designs hooked on people's walls that I would never have seen otherwise.  As a designer, the most exciting part of the process is seeing the finished piece, how the patterns are interpreted by each artist.  My designs are like my children...how I love to see them grow up and become beautiful adults! 

This rug, Queen of the Sea was the second mermaid piece I had ever designed.   How wonderful it was to see it hooked on Debbie Kelley's Facebook page.  I heard myself saying WOW before I realized I said the word.    The rug was plied with ribbons, how great is that?  I don't know who's more proud, Debbie or me?  
 
In Debbie Kelley's words. 
I won a blue ribbon and purple 'best hooked rug' at the Deerfield Fair which is a
large agricultural family fair held here in my town, Deerfield, NH. This is only
my second rug and she took me forever to hook ( I am the slowest hooker in the
world) so I was mighty excited, extremely proud and wicked happy ! Yes, of course, you can
post the rug on your site. I tagged you in a couple of my photos so they should
already be showing up on your page. Thanks for making my day ! :) 
Picture
0 Comments

Blog #2 - What's the hoopla over hoops?

10/12/2012

0 Comments

 
Picture
Hoops have been around (pardon the pun) a long time and are usually used at some point in our rug hooking lifetime.  If you know anything about structure, the sphere is one of the strongest shapes so if it is well made with hardwood and secured with screws and glue, and if your pet elephant doesn't sit on it, you'll have it for life.   

Most beginner rug hookers like to keep the start-up costs down until they figure out if they're going to love the craft. There is nothing wrong with a hoop, they're just a bit more fussy to use as the backing can loosen while you work so you have to tighten it all down periodically.   

In a world where we like instant gratification and less inconvenience, a hoop might seem like too much work. I will list the pros and cons of the hoop and you can decide for yourself what avenue to pursue.  My advice would be to purchase a hoop that is 14" or 15" in diameter.  Smaller hoops like the 10" are really too small and awkward to hold and maneuver.  The work space is too small so you find yourself moving the backing around continuously to get to new areas to hook.  Also, the closer you get to hooking near the hoop the more difficult it is to work the hand underneath.  Your fingers won't have the freedom of space and will get cramped. 

Hoops not specifically made for rug hooking are not really appropriate for this craft.  They're lightweight and designed to clamp down on cottons or Aida cloth. There is a great deal of pressure needed to clamp down on hooked parts of your rug and your hoop has to be of strong construction to do this.  If the design is smaller than the hoop diameter than you might get away with it but once you have to clamp down on hooked areas you have to exert a lot of pressure to tighten it down enough to hold the looser, unhooked backing in place.  But, don't worry about clamping down on hooked areas as wool has a memory and will spring back as soon as the hoop is removed.  Also, other craft hoops have short bolts so that when you clamp down over thick parts of the rug the top part of the hoop can be opened to the point where there is not enough bolt to tighten. 

Tip: When starting a new project the hoops and backing are very light so when you pull up the loops the entire hoop will lift up off the table.  This problem can be rectified by placing a heavy book over the top part of the hoop to hold it down.  Once a bit of the pattern is hooked there will be enough weight  from the wool to hold it down. 


Pros
1. Turns easily to allow accessibly to every side of your design when hooking.  
2. Portable, lightweight to carry to a friends house or pack in a suitcase for those trips to the     cottage or abroad.
3. Inexpensive to purchase.
4. If using a hoop made specifically for rug hooking and is constructed of hardwood, it should last.

5. Hoops can have base installed to allow hooking in your favorite chair or the car.

Cons
1. Wing nuts are difficult to tighten with arthritic fingers.
2. Forces you to sit at a table instead of the favorite chair in front of TV
3. Too much fuss with all the continual wing nut tightening.
4. Backing continually loosens as you hook.
5. You have to allow enough salvage on your design to fit the hoop to be able to work in the corners of the rug. (Some commercial designs do not allow enough outer border, it should be a minimum of 3")
6.  Putting your pattern in the hoop takes some time to get it even.  Tugging can distort the image if not pulled only top to bottom and side to side.  Tugging on the diagonal will shift your image and when you are done hooking that is what you will get.
7. You shouldn't leave your work in a hoop for extended periods of time or you might damage the backing.  It is best to remove the project after every session. 

Here is the information needed to make an informed decision, To be hooped...or not to be hooped....that is the question?   Next blog I will discuss the pros and cons of grippers frames. 
0 Comments

Blog #1 - Loosing My Blog Virginity!

10/10/2012

1 Comment

 
Welcome all to my blog!  This is a new concept for me but it's proof positive you can teach old dogs new tricks!   Those of you who know me already, know I love to talk and I think I have a lot to say after twelve years in business, thirteen years a hooker. I can't wait to share tips and funny antidotes that have happened along this magical journey since opening my shop door. Call it a passion or an obsession, we all know what I mean.  

So many things have happened, so many changes and all for the good.  We have a lovely new studio as of 2007 when my husband and I renovated the building we are in now.  The first floor, retail area, is 1000 sq. ft. crammed full of hooking treasures, stocked with top quality rug hooking merchandise from floor to ceiling.  Upstairs I teach and host workshops and our group, The Main Street Hookers, meet for fellowship and inspiration every 1st and 3rd Wednesday of the month.  

So lets get started on the blogging.......  I would like to share a story prompted by a recent email from a customer who sent us a picture of a hooked stool top.  Lunenburg Tea Cosy is one of our designs which a customer adapted into a stool cover by squaring off the top of the pattern.  Instead of the traditional red buildings of Lunenburg she vamped the design by selecting various colours, bringing a whole new feel to the pattern.  Suddenly it represented any fishing village along the eastern seaboard, a quaint harbour in Newfoundland, a small inlet of Nova Scotia, a coastal scene from Maine.   

Hooking is like baking, give the same recipe to 10 people and every dish will have a different flavour. Thank goodness as this makes us all unique! The same is true with rug hooking.  The same pattern given to 10 hookers will tell a different story.  Over the years, I have noticed that some people find it difficult to recognize an unhooked pattern on the rack from the finished rug on the wall.  Colour is a huge influence, pulling from our memory banks past experiences.  We react  the same way to visual stimuli as we would respond to a pleasant scent through smell.  Red may represent the dress that a favorite aunt used to wear, yellow can be the blond girl that stared back at you in the mirror.  Rose, the dominant colour of the floral wallpaper at grandma's house.  Green, a blanket you suckled as a small child.  Memory and past experiences influence all aspects of our lives. 

Colour is so personal.  We wear it ever day.  We choose our clothes, gravitating toward  certain colours time and time again.  Through experience, I believe that people buy rugs because of the colour first and the composition second.  Probably the same is true for paintings.  I ask rug purchasers what attracted them to the piece and "the colours" is the usual answer.  We anal types like our art to fit our homes, not clash and stand like a sore thumb.  We paint our walls and decorate our interiors first and then everything else skips down the same path.  

An interesting observation I'd like to share. When customers come in the shop for colour planning a new project, they may not be sure where to begin, so we work together until we whittle it down to what pleases their eye.  Time and time again I have to laugh, and let them know that they have chosen the same colours that  they are wearing that day.  They look down at their clothing and smile as the realization hits them. I boost customer confidence by telling them they colour plan every day.  They dress themselves in coordinating outfits.  Look at your rug as if you are dressing your body, it may help remove the apprehension out of the task.  

I am told by a lot of rug hookers that colour planning is daunting.  But remember, your aren't out on a limb....believe it or not your palette is partially chosen for you.  Most of the rugs we hook are for our homes so if this next project is slated for the living room, draw on the colours in the curtains, the sofa, the throw cushions and carpet.  There is no need to stress, your colour palette is being handed to you on a silver platter, reach out and grab it! Look at your surroundings and invite those colours in.  Your home, the proverbial nest, is a representation of your favorite colours so run with it.  

Tip: If you need help to dye the wool, gather paint chips and samples of your upholstery to take to your closest rug studio and use them as a guideline to plan your next heirloom, or dive into the dye pot and create those colours yourself.   Don't try to be too matchy matchy, colours blend beautifully if tonally close. 

There, I've lost my blog virginity, and I would like to say that it was very pleasurable! 
  Hopefully you haven't fallen asleep, I'll try to keep the words to a minimum in future...this being my first time I got carried away!
Picture


Lunenburg Cosy squared off and hooked with lively colours. 
Great job Dody Conner!


Picture


The pattern Dody modified.  Lunenburg Cosy hooked with colours that represent its harbourfront. 

1 Comment
    Picture
    Picture
    Picture
    Christine Little has been ranked #5​ out of the 60 top rug hooking bloggers by Rug Hooking Magazine!

    Picture
    Picture
    Max Anderson, Australia, recipient of my Nova Scotia Treasures rug.  An award of excellence for promoting Canada through his writing.  
    Picture
    Picture

    RSS Feed

    Archives

    March 2023
    February 2023
    January 2023
    July 2022
    March 2022
    February 2022
    January 2022
    November 2021
    October 2021
    July 2021
    March 2021
    February 2021
    January 2021
    December 2020
    November 2020
    September 2020
    August 2020
    June 2020
    May 2020
    April 2020
    March 2020
    February 2020
    December 2019
    November 2019
    October 2019
    September 2019
    August 2019
    July 2019
    May 2019
    April 2019
    March 2019
    February 2019
    January 2019
    December 2018
    November 2018
    October 2018
    September 2018
    August 2018
    July 2018
    June 2018
    May 2018
    April 2018
    March 2018
    February 2018
    January 2018
    December 2017
    November 2017
    October 2017
    August 2017
    July 2017
    June 2017
    May 2017
    April 2017
    March 2017
    February 2017
    January 2017
    December 2016
    November 2016
    October 2016
    September 2016
    August 2016
    July 2016
    June 2016
    May 2016
    April 2016
    March 2016
    February 2016
    January 2016
    December 2015
    November 2015
    October 2015
    September 2015
    August 2015
    July 2015
    June 2015
    May 2015
    April 2015
    March 2015
    February 2015
    January 2015
    December 2014
    November 2014
    October 2014
    September 2014
    August 2014
    July 2014
    June 2014
    May 2014
    April 2014
    March 2014
    February 2014
    January 2014
    December 2013
    November 2013
    October 2013
    September 2013
    August 2013
    July 2013
    June 2013
    May 2013
    April 2013
    March 2013
    February 2013
    January 2013
    December 2012
    November 2012
    October 2012

    Picture
    Picture
    Gift Certificates are available for that special rug hooker in your life!  Any denomination, no expiry date! 

    Picture

    Categories
    (Click on the categories for past blogs)

    All
    Announcements
    Beginner Class
    Christmas
    Colour Planning
    Contests
    Copyright
    Coupon
    Customer Rugs
    Cutter Servicing
    Dyeing
    Equipment
    Featured Hooker
    Giveaway Draw
    Guest Blogger
    Guest Blogger
    Health & Fitness
    Home & Heart
    Hooked Rugs
    Hooking Groups
    Hook In Talk
    Initially Yours
    Jibber Jabber
    Just A Bit Of Fun!
    Life's Experiences
    Life's Experiences
    New Design
    New Ideas
    Pattern Of The Week
    Patterns Hooked
    Pets
    Rants
    Recipes
    Rememberingfbe7326ff7
    Rug Schools
    Show & Tell
    Show-tell
    The Rant
    Tips Technique
    Tips Techniquef0cd117ab4
    Visitors
    Workshops

    Picture
    Picture
    Picture


    Picture
    We have a pot to "Fiz" in!

Shop Hours:
Monday - Friday 10:00 AM - 5:00 PM 
Saturdays 12:00 PM - 4:00 PM
We are closed during ice and snow storms
​so please call ahead.  If school is cancelled we probably are as well.  

Toll Free: 1-855-624-0370
Local: 1-902-624-0370​
encompassingdesigns@gmail.com

498 Main Street
P.O. Box 437
Mahone Bay, N.S.
Canada B0J 2E0

​Follow us and keep up to date
on our specials, new products
​and events!
Picture
Picture
Picture


Home
Shop
Ordering
Blog
Our Story
Workshops

Contact Us


​​​© Copyright 2023 Encompassing Designs. Website by SKYSAIL