Encompassing Designs
  • Home
  • Shop
    • Kits
    • Patterns >
      • Christine Little >
        • Signature Designs
        • New Designs
        • Seasonal Designs
      • Deborah Sweet
      • Susan Leslie
      • Patricia Perry
      • William Morris
    • Supplies >
      • Backings
      • Frames
      • Hooks
      • Books
      • Extra
    • Wool >
      • Abrashed
      • Antique JQ Colors
      • Custom Dyeing
      • Dyed Bundles
      • Dyed Curly Mohair
      • Dyed Spots
      • Dyed Values
      • Dyed Yarn
      • Natural & Colours
      • Plaids & Textures
      • Dye Books & Swatches
  • Ordering
  • Blog
  • Workshops
  • Our Story
  • Contact Us

The Story of Louis

1/31/2013

4 Comments

 
Picture
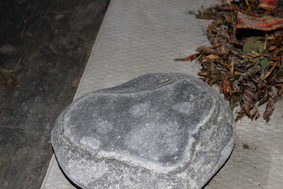
Am I crazy or does this look like a paw print???
Picture
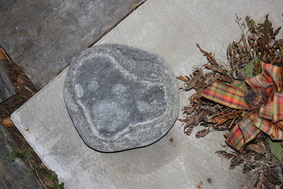
This picture was taken at midnight. The paw print is made up of the large pad and three toes. The one of the far left is a light part of the stone.
Louis was special right from the start.  He was the runt, prone to health problems and had a screwy eye.  I bought him from a breeder in PEI, and the woman deceived me.  I drove all the way to the tip of the island to pick up a puppy that wasn't the one in the pictures she sent.  I knew the minute I saw him I’d been duped.   This little guy had one small eye and one normal eye, whereas the pup in  the pictures was darn near perfect.  Maybe someone without an eye phobia wouldn’t have noticed but I did, I zoomed in on it immediately.  The breeder admitted she lied but assured me it would open wider as time went on, that sometimes this happens.  I wanted to believe her so much I took the puppy home, even though eye thingys made me squeamish.  I tell everyone, if you're bleeding to death I can help you, but if you have a hair in your eye, forget it!  I’ve always had this problem, don’t know why but I get weak in the knees at the mention of anything to do with the eyes.  

I tried to see beyond the deformity but being artistic I see every detail so it as always there staring at me in the face. Miracles do happen though.  That little guy tugged on my heart strings, breaking through the eye phobia until it didn’t matter anymore and maybe I loved him more because of it.  He was special.  He was the most lovable, cuddly, momma’s boy I’d ever had and that was what I needed so we bonded like steel.  Maybe I was more protective of him because he had a few problems.  I hate to admit it but I had been a bit shallow and Louis taught me to love unconditionally, just as he loved me…goodness knows I’m a fright in the mornings and he never cared.   

I can’t explain the connection we shared.  There aren’t any words that could relay how I felt. How I know he felt.  I was his whole world, literally.  He never took his eyes off me.  If I tried to leave the house he’d wrap his front paws around my leg, holding me tightly, being dragged toward the door.  He would never put himself in a position where he couldn’t see me.  If I was making dinner he was in the dining room watching me.  When he played with his siblings he’d still watch me and run to me every now and then just to kiss me and then go back to play.  If I was upstairs he was there, if I was watching TV he was sitting beside me.  I swear Louis watched entire movies, following the program and barking if ominous music indicated trouble brewing. Every night in bed he would lay in my arms with his head on my shoulder until I drifted off to sleep and then he would move to a spot he found more comfortable. My love for him was beyond any kind of explanation, like a mother’s bond for a child.  I think maybe he kindled the same feelings I had for Shane when he was a baby.  

Louis was two, Honey was seven and we just got Fiz, short for Fiona, who was around four months.  It was a Sunday morning and I was lying on the sofa with all three tucked close in my right arm.  My dogs all love one another, can cuddle very close  without problems.  I looked down and smelled their little heads.  They were all sleeping so peacefully.  I felt completely happy.  I remember thinking that I was the luckiest person in the world.  

Less than four hours later, my world came to a crashing halt.  My son Shane and I were outside piling firewood and the dogs were hanging around sniffing and checking out the yard.  I took off
my jacket and laid it on the tarp that the firewood was dumped on and they all laid down and watched us work.  For some reason, Louis got up and walked over to the pile and Fiz followed her big brother per the usual.  They both went directly to a piece of wood, Louis must have seen something move.  He sniffed the piece of wood, and then so did Fiz.  

Instantly they both ran about ten feet away and started vomiting and squirting out projectile diarrhea simultaneously.  Louis was a two year old and Fiz was only four months.  It was apparent
they had been bitten by something because their two different sizes would have metabolized an ingested toxin at different rates.  Thank goodness my son was there to drive us to the vet clinic. I thought they would both die on the way there.  I was in the backseat trying warm them with blankets and keep them breathing.  Louis was the worst; he clearly got most of the venom.  

That drive was horrible.   I felt so helpless.  We made it to the vets, not our normal one, as my vet's answering machine didn’t get turned on for the weekend and I didn’t know their emergency number so I called the closest alternative vet and she agreed to take us.  
 
Louis managed to hold on to the next morning and died shortly after I arrived.  I won’t go into  details but it was a horrible death and I am haunted by his suffering.  Fiz almost died as well, we were told her heart rate went to 12 beats a minute during the night.  Somehow the little mite survived.   
 
Shane and I buried Louis in the backyard.   I wrapped him in a piece of linen from the shop and laid him gently in a hole in the garden.  The Vet suggested sending his body for an autopsy but I just couldn’t do it.  I called the vet college and they said whatever killed him may no longer be detectible and when I asked if I could have his body back they said no.  That was the deciding factor. He would be classed a biohazard and would need to be disposed of.  That meant throwing his poor little body on the pile with the other dead animals  and all of a sudden, the person who had always wanted to be a pathologist, someone who believes that once your spirit is gone the shell is no longer relevant,  couldn’t part with his little body.  I needed it close.   Even through my grief I knew I was being uncharacteristically foolish but I just didn’t care.  I needed him with me. 

We figured they were bitten by a Black Widow spider. They live throughout North America in woodpiles and yes, this far north.   They bite people every year and a healthy adult will survive with minimal effects, but a small child or an older person could succumb.  Small dogs don’t have a chance.  
 
My husband was away at the time so I was alone.  It was by far the worst time of my life. The pain was so real it crushed me from the shear weight of it.  I could barely breath the pain was so
intense. I just wanted to curl up into a ball and die too.  I had two other dogs to take care of and somehow managed, but I wasn’t exactly present.  Friends came by and brought me food and sat with me but I was inconsolable.   I cried more tears than all my years on this earth combined and as each day passed I seemed to get worst instead of better.

In the meantime my sister had been away on vacation and returned with a rock that she had found on a beach and heard that Louis had died.   The  rock was shaped like a heart and she asked if I would like to have it for a headstone.  It was perfect and I fully intended to have it engraved at some point.  I laid it on the grave with a floral arrangement.   
 
Each night I took the arrangement inside to protect it from the deer and the frost.  To retain the flowers freshness, I set it on a cookie sheet with water to rehydrate the oasis overnight. On day two of his passing, I took the dogs outside for their morning routine and carried the cookie sheet and flowers out to the grave.  As I approached, the plot I stared in disbelief.  The frost had settled on the rock and left a perfect paw print that had now thawed in the morning sun and left a water mark.  I was standing over it and leaned a bit forward and the water dripped out of the cookie sheet and splashed on the rock wiping out the paw print.  I started to bawl like a baby.  Mourning the loss of Louis and now loosing this mystical print, this potential sign, a message from beyond?  I rushed inside and phoned my husband and told him what had happened.  He’s a geologist and I looked for him for an explanation.  He had none.  
 
The paw prints came and went over the next few weeks and when hubby returned home he examined the rock thoroughly and could find no hollows or raised parts…the rock was smooth along the top.  There was no physical explanation.  Then one evening around midnight, I was taking the dogs out for their bedtime pee and shone the flashlight on the rock and found the frost painted print once again. I ran screaming into the house for hubby to see and he took the pictures above.  Once again he could offer no explanation.  
 
I suppose the print should have comforted me but the hole left by Louis's absence was too deep and raw.   Even with a husband and two other dogs in the house I continued to feel lonely and cried for months.   Inconsolable tears.  I was a mess.  That’s when I found myself looking for breeders on the internet.  I knew what I was doing, looking for Louis’s face in another puppy or  adult dog. I knew it wouldn’t be the same but I hurt so badly I didn’t know what else to do.  I never considered what kind of pressure I’d be putting on a new little guy for filling Louis’s paws would be a tall order.  I'm not proud admitting I wasn't in a very good place or thinking rationally. 

I found a little cream boy in Ontario that reminded me of Louis when he was a puppy.  Hubby said maybe it would help.  Poor guy, he didn’t know what to do for me and of course he was grieving too.  We bought the new puppy and waited for him to arrive.

Henri was wonderful and we clicked pretty quickly. He had a huge personality.  Being a puppy he kept me pretty busy with potty training and  being cute and playful.  And then, horror or horrors, more tragedy struck.  He was with us for only a few weeks when he got Parvo, a deadly killer of puppies.  After losing Louis I didn’t think I could bear to lose another one of my precious babies so I parked my grief and concentrated all my energy on Henri.   The Vet geared us up with an IV drip to keep Henri hydrated and I took care of him at home as my vet didn’t have a night facility to monitor sick animals.  I wanted him home to inspire healing.  I fully believe familiar surroundings work better than locking them in a cage in a sterile environment with only strangers to take care of them.    

Parvo is painful as it destroys the puppy’s bowels. Constant bloody diarrhea dehydrates them quickly and is usually the main reason for death.  Henri would curl up into a ball and whimper from the pain and it was heartbreaking to watch.  His heart raced and his breathing would become labored and hard.  Feeling helpless I decided I had to do something so I researched animal acupressure and dog massage on the internet and I practised it several times a day.  I laid my hands on him and gently massaged his poor little body and applied acupressure to heal his stomach and bowel area.  I seemed to connect with his body instantly, feeling his pulse on my fingertips.  
  
I talked to him softly and told him all the things we would do when he got better.  I played nature sounds and opened the windows to let out the negative energy of his sickness.  I even smudged the room several times a day to expel any negative energy that might have been taking up residence in the house.  I only allowed myself to think he would be healed, and said that over and over, fighting all the terrible thoughts that tried to creep in. I’d read about Parvo on the internet and the chances of him surviving were slim so it took everything I had to remain positive.  

When Henri was suffering his little body would curl into a tight ball and when I applied the acupressure, his body would open up like a flower until he was stretched out on his back.  His breathing would calm and his heart rate would return to normal. He would then sleep peacefully for a while, allowing his body to heal.  This continued for two days.  Massaging him hourly, applying acupressure and running the IV.  On the third day Henri awoke around ten in the evening, jumped down from the sofa and came to me.  He was a bit wobbly but it was apparent he was going to be okay.  He licked my hand as if to say thank-you.  Relief flooded my  heart.  
 
The next day I took him to the doctor to be checked out. He was very surprised and confessed that he believed Henri would die, that there was nothing else we could have done.  He told me that I healed him, that he believed the human touch and positive energy ruled over his sickness.  Needless to say, Henri and I bonded over the experience and we became inseparable.  
 
I still cried for my Louis, but it was getting a little easier to get through the day.   As long as I was crying that paw print kept showing up.  Whether it was frost or morning dew, it was there.  I don’t believe in ghosts but I clung to the idea that it was Louis trying to comfort me.   Telling me it was okay to let him go and not be sad.  I decided that explanations weren’t needed.  Science didn’t need to tell me why the rock was weeping paw prints, I accepted them as the gift they were.    Slowly over time my tears subsided and life started to return to normal.  And amazingly, once my tears stopped so did the paw prints on the rock.  Hubby and I still can’t explain why…it just did.     

The rock is still there but is just a normal piece of slate that happens to be shaped like a heart;  a headstone for the most wonderful poodle.  Life goes on and you have to love the ones that are here and let the angels fade into memories.  Henri is pretty darn special and we call him Dr. H because he helped to heal my heart.  Now we have Jake, number four, and he is very much like Louis was, a cuddly momma’s boy.  Henri never seemed to want to cuddle, he was always bothered by overheating with his thick coat of hair.   Each of my hairy kids are special in their own way.  They all bring something unique to the table and I love them all.  I know we live
longer than they do. It isn’t a perfect fit so there will be more tears.  They say the price of love is grief and life certainly doesn't come with guarantees.  We can be lying on the sofa on top of the world and then, in a nanosecond everything can change.

Picture
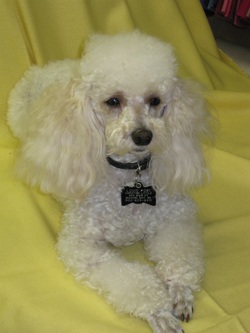
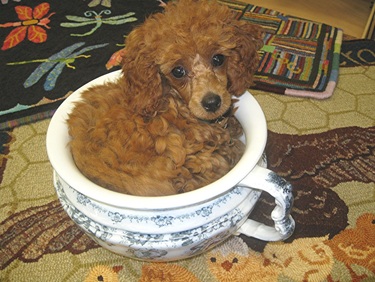
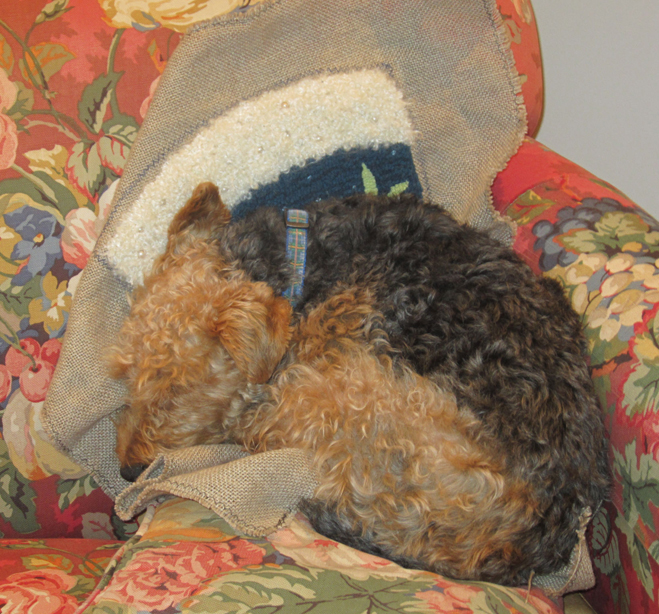
My favourite picture of Louis, posing on a piece of wool in the shop. He was a miniature but smallish and very fine featured. He had a French whisker..very dapper. You can't make out his smaller eye in this piece..it is the one on the right. The dark hairs around his eye helped to make the actual eye area appear larger.
Picture
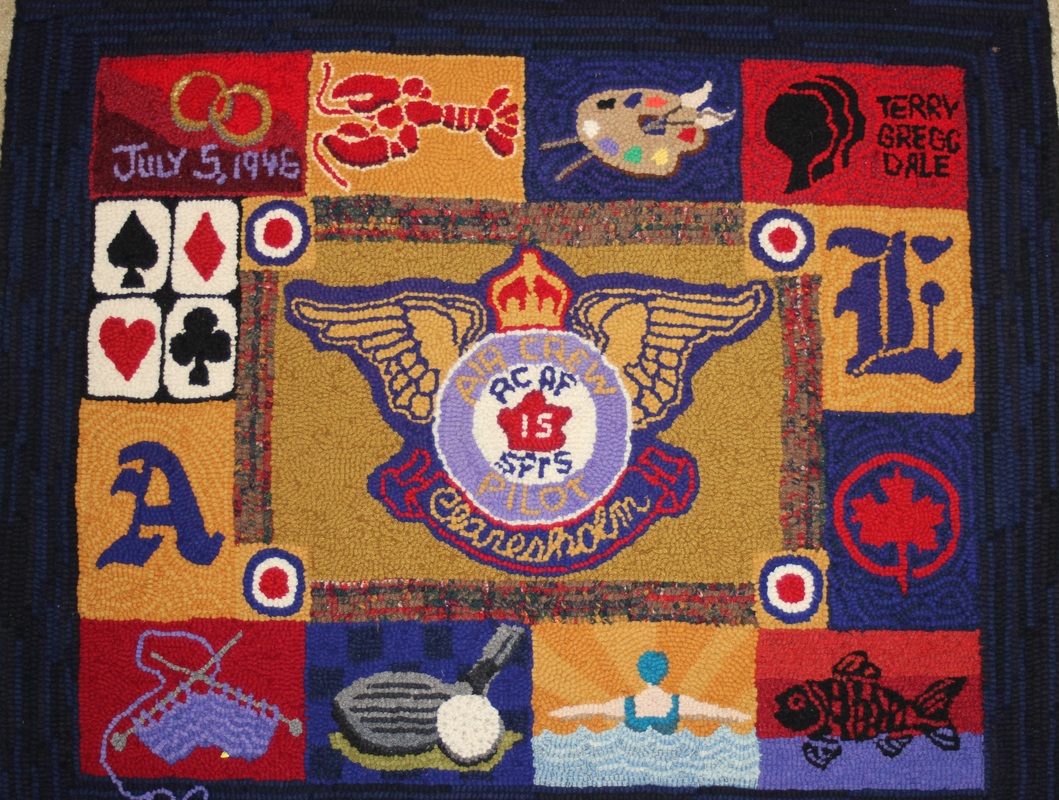
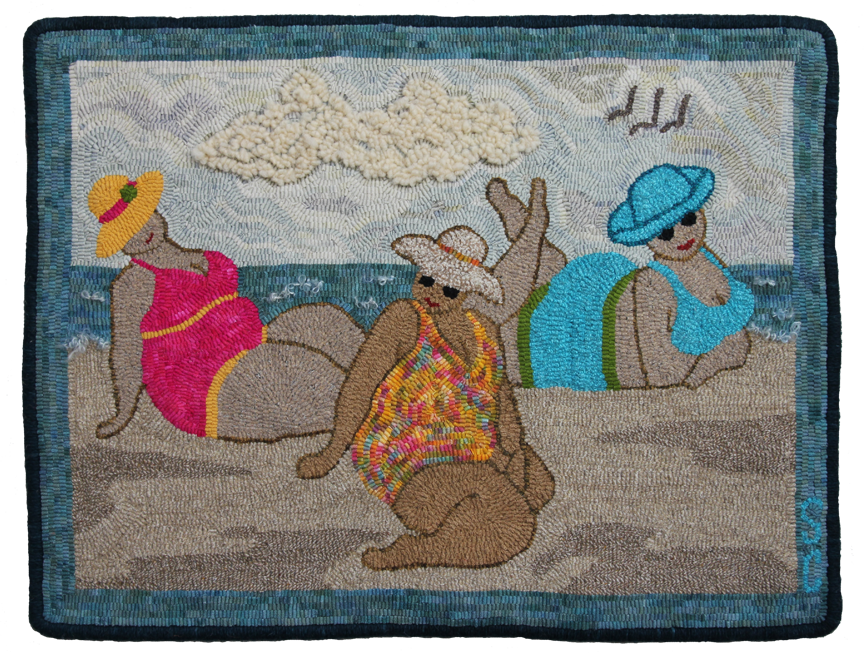
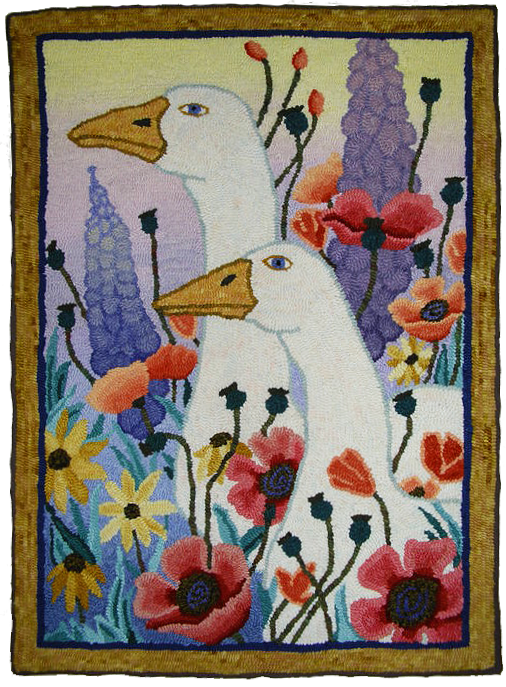
My favourite picture of Louis as a puppy. In a patch of flowers he appears angelic and gentle, just like he was.
Picture
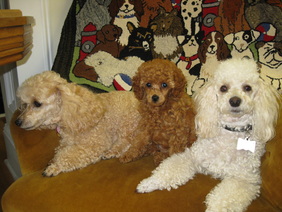
My awesome threesome just before the tragedy. The hooked rug behind them is art imitating life!
4 Comments

"If At First....." 

1/30/2013

2 Comments


The Story of a Jacobean Crewel Mat by Heather Gordon

Picture
If at first you don’t succeed, it is worth trying again.  The project I just finished (January, 2013), was begun in September, 2009.  This is my third attempt.  I love it and enjoyed every hooking minute but it wasn’t always this way.  For a couple of years it sat in a corner in a Rubbermaid container, where it was dropped when I got home from rug school.  I was frustrated and disappointed and never wanted to see it again. 

I had completed two previous Crewel projects – a bell pull and a lovely mat that Christine designed for me and named “Heather”.  The mat is quite striking with beautiful floral colours on a black background.  This time, my friend, Lesley Marshall, encouraged me to join her at another course and asked Christine to design a mat for her which was named “Lesley”.   Lesley finished hers right away, and you can see a photo on the Encompassing Designs web site and attached to the pattern.  Mine sat in a box.

Why did I abandon this lovely design?  Well, it had nothing to do with the design, which I loved – especially the centre medallion.  I think we have all had the experience of a project that just doesn’t come together.  I started with a vision.  This was going to be a traditional Crewel.  I could see it in my mind with the colours of those gorgeous embroidered panels in the Victoria and Albert Museum.  It would have an off-white or parchment background with gold, rust, olive, bronze, brown and teal motifs.  Instead of red, I would use variations of dusty rose or raspberry shades since strong reds don’t work in my house.   It just did not turn out that way.

My second attempt was a slight improvement on the areas that I had hooked.  I changed the colours in the central medallion and adjusted one of the floral motifs.  So much for that.  Back it went into the box.

I knew that I had some of the colours right.  Along the line, I had picked up some of Christine’s 3-value swatches.  Anjou Pear, Cranberry and Ganache worked well together but I still did not have the right teal and my rusts and browns were too strong.  I started to think about some of the colours that I had seen in the shop and for my gift to myself at Christmas 2011, I bought more 3-value swatches, adding Teal, Coppertone and the new Magic Mix that Shane had just invented.  Then I got out a variety of swatch remnants (some Jacobean blues, dusty rose, golds, plum colours and more greens) and got inspired.

Each year, I go on a 4 day retreat to White Point, a traditional lodge/resort on the South Shore of Nova Scotia.  There are 12-15 of us and we tend to either take a special new project or a project that challenges us.  I spent most of the time (aside from the eating and drinking part) colour planning and experimenting with crewel colour combinations.  It was great.  Colour planning is my favourite part.  By the time I left, the project was well on its way.

This was my main project last spring.  It was set aside in June so that I could design and hook 3 pieces for summer shows.  I did some hooking on it in the fall, alternating with more interesting pieces because by then, I was just working on background and borders.   Then, in January, I felt the need to finish it and here it is.


Picture
Picture
Colour Palette for Lesley, hooked by Heather Gordon

Main Swatches:  Anjou Pear, Cranberry, Teal, Coppertone and Max Brown

Additional Colours: Leftovers from previous projects including bronze, Jacobean dusty rose, some bluish teals, transitional gold/tans and a variety of greens and purples for the grapes. 

Background:  The first off-white I tried was too bright.  The second was too yellow.  The third was too drab and the fourth was JUST RIGHT.  It is a light solution of Max Brown, abrashed with a slightly stronger solution of the same colour.

Outer Border:  I used the same mid-value teal formula from Christine’s Sky Blue Pink dye book that I also used in the main field.  The next gold band is a mid-value of Max Brown, from the same book and this was also used in some of the motifs.  The outer band is a stronger value of the Teal.

Finishing:  Whipped with cording and natural Briggs & Little yarn dyed in the same dye bath as the outer border Teal.

Cuts:  Design motifs were hooked in #4 cut with #3 for the finer details. Most of the leftover swatches that I used are #3 because they came from my early hooking days when that was the standard for shaded pieces.  The background is hooked in #4.  I tried #5, but it looked too heavy for the design.  I did go to #5 for the first two sections of the outer border and I used #6 for the darker outer teal because it grounded the mat well.
Picture
Colours vary slightly from the above pictures from being taken with a different camera. The colours above are a truer depiction of the actual rug.
Picture
Another hooked version by Lesley Marshall, thehooker the rug was designed for.
Story by Guest Blogger Heather Gordon
2 Comments

A Pot to Fiz in

1/30/2013

1 Comment

 
Picture
You've heard of not having a pot to pee in....well this is "we have a pot to Fiz in" 
This is our little red girl Fiona, "Fiz" for short.  She's a lot bigger now but still cute
as a button!  She came from a breeder in the valley. 
 
1 Comment

A Rug, A Gift, A Memory

1/29/2013

2 Comments

 
Picture
Today was crazy busy and the hours melted away faster than ice-cream in summer. Geared with good intentions, I planned to write a blog about Linda Ruth and her monster Oriental but when I looked on the computer for the digital picture I’d taken of four women standing on chairs, holding up the beast, with only their eye’s peeking over the edge of this gigantic, room sized rug, I came up empty handed.How disappointing to have lost that picture, probably in one of my computer crashes without a backup!   I have others in the various stages of development, but this was the Pièce de résistance, the one showing the rug’s massive size, using our bodies as a frame of reference left nothing to the imagination.   Two hours wasted tearing the shop apart looking for a printed copy I know I have but that eluded me as well.  It was a lose, lose situation and more than a bit on the frustrating side.  
 
After work I came home and searched our personal computer database on the chance it might have been downloaded there along with the hundreds of photos we take of the hairy kids.  All hope of finding the picture was gone and I sat stewing when a photo flashed across on the screen.  It was a picture of the second rug I had hooked fourteen years ago.  There is was, boasting all those brilliant colours just as I remembered.   So I’m veering off course to feature a story from my meagre beginnings as a rug hooker. Maybe this was one of those ah-hah moments, that were supposed to happen.  If I hadn’t been looking for something else, I wouldn’t have come across this picture.  Maybe tomorrow I’ll go into the shop and lay my hand on that lost photo instantly…funny how things happen sometimes….as if they were meant to be.  In the meantime my memories of this rug have been pulled out of the archives.

After finishing my first rug, I was itchy to get started on the next, and it was an easy decision.   I wanted to hook something for my in-laws who were very dear to me, showing my appreciation for all they had done for us.  I wanted something personal, to highlight their lives, not your customary floral or geometric.  Jim, my father-in-law, hung his hat at Air Canada for his entire working career as a pilot and before that, served in the Airforce.  Considering his flying career afforded my hubby’s parents the lifestyle they enjoyed, I felt it was important to make that the focal point of the rug and put all else around it.  Jim took his training at the RCAF in Claresholm and I found this beautiful crest on the internet.   Done predominantly in primary colours the rug is bold and eye catching.  
 
Starting at top left to right. 
- Wynn’s & Jim’s wedding day July 5, 1946
- Wynn loves lobster
- Wynn took art lessons in her sixties and painted several watercolours and oils.  She said the teacher told her that she had promise   
- The three black silhouettes are their sons, oldest to youngest: Terry, Gregg and Dale
- Jim and Wynn both played Bridge with friends, until one by one all the men were gone and now the women carry on
- The big L - Jim’s last name is Little, born in Vancouver
- The big A - Wynn’s maiden name was Acurch, of New Brunswick
- Jim worked for Air Canada 32 years flying the big boys, the 747 planes
- Wynn is an avid knitter, keeping us well stocked with afghans and slippers
- Jim, always athletic, loved his golf
- Wynn went to the pool three times a week and still does at 94
- Jim was an avid sport fisherman  

The roundels in the four corners of the crest border are from the Liberator airplane he flew during wartime.

Fourteen years ago I hadn’t even begun to comprehend dyeing so all of the wool for the rug was recycled and used as is. In only a couple of months of pulling my first loop, I had accumulated a rather impressive stash to draw from.  No grass grew under my feet as I stalked the bins at Frenchy’s grabbing all that wool with my hot little fingers.  I went several times a week, getting to
know when they put out the new stuff and was prepared to bump little old ladies with my purse to score a precious plaid or coveted white wool before they did.  The piles grew to the point I had to hire someone to build custom shelving for my upstairs hobby room and in no time they were bursting with every colour of the rainbow and all those in-between.  
 
I’m not sure what was more thrilling, hooking or hunting for wool.  Seeing it stacked on those shelves, the beautiful kaleidoscopic of colour waiting for a rug to call it home.   At  night, I would go in there and turn on the light just to look at it.  I hauled many a garbage bag out of Frenchy’s, packed with fabric gold.   I stayed up until the wee hours of the morning washing, drying and tearing up those wool garments, sometime wrestling with pesky interfacings, hems and seams.

It seems like forever ago, when Frenchys’ would snip a wool garment for craft use.  If you brought a perfectly wearable item to the counter and said you planned on using it for rug hooking, they cut or tore it and charged you half price.   Later when they realized how many hookers were out there and the money they were losing, they stopped it.   Now for a $1.00 you can pick from a few crumbs of wool they discard but the wonderful days of excess are over.   We are now forced to pay full price for a garment and they rub their hands together like scrooge counting coins.  But, I got in there at the beginning and harvested enough bounty to hook for years!   Ah-h-h, stash….moderation my eye, one can never have enough of a good thing! 

The rug hooked up in about two weeks, and my in-laws were tickled pink to receive it.  They wouldn’t  put it on the floor and it’s proudly displayed on the back of a sofa.  Hooking this rug was a feel good experience and today, I was happy to be reminded of making it.   Sadly, Jim is no longer with us but he will never be forgotten.
   

My signature CL is cut off the bottom of the picture above so you can't see that I used the yarn in the knitting needles to create my initials.  I thought I was being clever there!  I really liked hooking the lobster and managed to squeeze in some shading.  Actually it was my first attempt at shading.  This rug was a lot of fun to hook!  I also tried to hook each background in a different pattern for added interest.

Picture
I remember the letters being real finicky to work on but I managed to squeeze in enough detail to make it readable. I worked in mostly #4 and some #5.
2 Comments

The Cremation of Sam McGee

1/27/2013

5 Comments

 
Picture
It’s Sunday, my day off and I usually don’t blog but it’s too cold to go outside and writing keeps me out of the refrigerator. 

First I would just like to say, "Enough already with the cold!"  This morning was slightly better, a balmy -10 and I should be grateful it's warming up but come on!  And, what's up, or should I say, down with -17 wind-chill? 

Wind-chill is like Canadian tax and airline tickets.  You get teased with a base price and then they pile the taxes on.  Please...just show the total 'everything' instead of sugar coating it with the lower figure. The weather channel shows you a temperature of -10 and when you go outside you're hit square in the face with -17.  The hairs in your nose freeze and break off!  We haven't had this kind of consistent cold for years.  Where in heck is global warming?  I see next week brings some reprieve but man, like Sam McGee, I'm chilled to the bone! 

When I was in grade four we were asked to memorize a poem and one by one we got up and recited our choice to the class.  Most got up and did a four to eight line stanza so when I stood to narrate “The Cremation of Sam McGee” it was met with a gasp from the teacher.  I didn’t do it to show off, have the longest piece or for any other reason other than pure love for the poem.  I stumbled over a few lines but all in all, got it out fairly effectively.   Some kids were grossed out by the cremation part but that was the appeal for me.  I was a morbid little kid, obsessed with death and dead bodies, wanting to grow up to be a mortician or a pathologist (a story for another time) as early as grade two.  Anyway,  I heard the poem the year before and it resonated with me, sticking in my crop half memorized until the need for the assignment made me take it all the way. Pretty industrious for a wee mite of a girl but for some reason, the words stuck in my head and to this day I can relay the entire poem...sometimes I quietly recite it in lue of counting sheep on those nights when sleep eludes me.  

Robert W. Service wrote a lot of poems about the Gold Rush that happened in Alaska and northwestern Canada at the turn of the 19th century. "The Cremation of Sam McGee," however, is probably the most famous of all. It was published in 1907 and was based on the places he saw, the people he met, and the stories he heard while he lived there. Since its publication, the poem has been popular with generations of readers, who love its combination of black humor, adventure, and captivating descriptions of the lives of Yukon prospectors.  For those of you who have never read his wonderful poem google and enjoy it!   Johnny Cash does a great job reciting it on YouTube.  

Back to my hooking and the warmth of the woodstove, my own little crematorium of sorts, that has an insatiable appetite for hardwood which I've been feeding like a bulimic at an all you can eat buffet. It warms my entire house, upstairs and down and is my savior on these bitter days and nights.  Now, if only I didn’t need to go out for provisions, doggy business and work,  I’d hold up here till spring!


5 Comments

Art for a beholder's eye!

1/26/2013

6 Comments

 
Picture
Picture
A clever mind and able fingers made this fun "Family Portrait" of sheep.  Actually, Sue said she nearly burned them off hot gluing the backing on the frame but I think it’s worth losing a bit of skin over.  Everything Sue does is immaculate.  This piece of art is ready to  be taken home and hung, all you need is a picture hook. 

A while back, we received a shipment of coloured burlap and linen.  Sue had been in the States and saw that folks were appliqueing designs on coloured burlap and then sewing it into pillows so we thought, "Why not hook something?  Same deal, no background!" 


Some of the colours really spoke to me, begging to be used and I'm losing sleep coming up with different ideas to utilize them.  If only I could hook as fast as I think, or at least have the time to do it all!  Now I’m imagining hooked salt boxes of various colours on the different coloured backings; whimsical, eye catching gifts for the coming tourist season.  

Sue Cunningham bought a piece of the seafoamy  coloured burlap and whipped up this fetching piece called “Family Portrait” .  The sheep are all wearing coats of Curly Locks (Mohair Boucle).  Some are done in the natural while others are hand-dyed charcoal and what I call Sooty Santa, to separate the various bodies and of course black for the little bad boys!  She hooked the faces and legs in black wool fabric. 


6 Comments

Celtic Knots made simple!

1/25/2013

4 Comments

 
Picture
The finished Knot. Hooking time: 1 1/2 hours. The knot was hooked in #4 and the background plaid was in #5. Finished piece 6" diameter. Hooked on fine weave Scottish burlap.
Picture
I've been trying to stay away from blues, reds and golds, my favourite colours and expand my horizen. So I thought orange would make a nice change. I have nothing against orange, other than it reminds me of the 70's and my entire house decor, that and harvest gold and green!!! Way too much...needed to move on and the primary colours fit like a glove...my new house decor. Maybe in another decade I'll hang my hat on purple and pink.
The only difficult part about hooking a Celtic Knot is drawing the design.  They aren’t much fun to draw, even with a pattern, oh so many lines! But once that job is out of the way, the hooking can be as difficult as  you want it to be or so darn simple you wonder why you hadn’t done it
before!

The little Celtic piece I hooked for this demo came from the Book of Kells, a simple Knot yet full of interwoven charm.  This is a simple piece to colour plan, using two colours for the knot and one for the background. 
 
In any rug hooking pattern, each part of every object is broken down and dealt with as an individual unit.  The entire pattern is a sum of many  parts.  For instance, in a pattern of a sunflower, every petal is dealt with as a separate object, hooked one at a time until they all become joined and create a flower.  Each petal is outlined and then filled in and then you move to the next and so on.  A Celtic knot is also like that.  Every link of the knot is to be viewed as a separate object and hooked accordingly.  Every time there is a cross over or under, this divides each link from the next and each segment will be viewed as a separate link.  
   
Before you begin you have to determine the cut to be used to fit the design.  You can either measure the distance across with a ruler and then figure out what cut will fill the space using four strips or you can work with a visual reference, cut four pieces of various cuts and lay them across the width of the segment to see if they will work.  For the demo piece I used a #4 cut and as I went along I made a few corrections to the lines, making them wider if needed by hooking directly on the line etc. (Usually the rule is to stay inside the lines of any object so that it retains the size intended by the designer.) Celtic Knot patterns are usually never perfectly even.  Most are hand done so there are variances in the widths so you might need to do a bit of correcting as you go. 

For a simplified knot all you need are two contrasting colours or two tones of a single colour, a medium and a dark and a background colour. I used rusty orange wool I had left over from a recent kit and in the photo I showed a couple of other choices.  I had so much fun hooking this little piece I thought I might do several more in an array of colours for the shop.  
 
I’ve hooked a few Celtic pieces before and I’ve used a herringbone and a solid for the knots. The Herringbone was darker and did the outlining and the solid filled in  the centers.  The herringbone also  provided a bit of textural interest.   I’m a lefty so I’ll talk in lefty terms.  I chose my darkest value of rusty orange and hooked along the outside line of one of the segments.   I started where one segment crossed over  another and left my tail about ½ inch high. Then I chose the lighter value and hooked it up against the first strip, starting at the dissecting line.   Do not skip rows here or your knot segment will be wider than planned.  Then hook the second lighter strip and follow with the last dark strip.  Hooking in this order will allow each segment to be the same size.   If you hook the two darker, outer strips first and the drawing isn’t totally even, each link of the knot may not be the same width so you run the risk of either having too little space to put in the two center strips or there could be a gap so they don’t come together properly.   This way ensures every part of the knot will be exactly the same width.  
 
Do not cut the beginning tails or ending tails until the  surrounding segments are hooked.  The extra height allows easy hooking around the finished segments.   The ends will stand up straight and be easy to hook around and later when you snip them they will be perfectly embedded
and be a crisp end to that row.  

Don't hook the background behind the knot until you finish the segments as they may not be the same size due to corrections to the width as mentioned above.  I left them all until the end and did them all at once. 
 
Note:  Another tip, if you are a left handed rug hooker it would be best to start from the right side of the segment and work to the left and vice versa for right handed.  It is always easier to hook without having your tool over an existing row.
 

Note: Mix it up a bit.  Use the lighter shade on the outside of the Knot for a different look.  
Picture
Start with drawing the Knot or purchasing a pattern. Shown are several colour choices, some with herringbones for the darker shade and solid for the lighter. I chose the rusty orange for the demo.
Picture
Beginnings...I've hooked a straight segment to start and am now hooking the adjoining link. Note the tail is butted up against the completed segmented and left high.
Picture
Note I am a lefty working from right to left on the segments. My tails are left high at the start and at the end. Left high they are easier to hook around when doing the next segment and makes for a clean cut.
Picture
Without thinking about the Knot as a whole, hooking each segment hooks quickly and voila you have a finished Knot before you know it.
Picture
Celtic Snowflake, done with two different colours for a more dramatic look. The background of the Knot was done in a spot of pale blue and grey and the rest is an over-dyed plaid using County Blue to coordinate.
Picture
Done as a commission design, this lovely Celtic Boat is framed with an intricate Knot. It took a long time to draw out and match the size the client wanted. I have a lot of respect for the artists who do these designs...patience makes perfect!
Picture
Another simple example. Three colours make up this pillow top. A herringbone for the outline and a solid for the center of the knot. The background was lovely burgundy plaid with a gold fleck through it.
4 Comments

Heart of the Mat-ter

1/24/2013

2 Comments

 
Picture
Valentine's Day is fast approaching and I dug out my old faithful “Heart of the Mat-ter” to adorn the shop window once again.  This rug is custom designed for romance.  With all of its  delicate hearts, this monochromatic jewel couldn’t be a better fit for the day.  Although the hearts are indisputably the focal point of the rug, I believe the border sets it off.  This simple lace design, with just a few dots of border peeking through gives you the feel of cotton eyelet.   The lace was created with a very light application of Red Violet dye, about 1/128 over one yard of Natural, tinting it to a pale pink to blend with the interior of the rug.  The border was the only wool I didn’t over-dye.  A deep burgundy plaid, Pendleton housecoat was already a perfect match for the dyed wools and provided a frame to pop the rug's interior.    

I had a lot of fun dyeing, colour planning and hooking this piece.  I over-dyed about 12 different Pendleton shirts and skirts with Majic Carpet’s, Red Violet.  Some of the plaids were darker so the result was a deliciously intense, deep pinkish purples and reds.   Some were softer so they took on varying hues of dainty pinks and mauves.  Depending on the base colour of the wool, each piece came out with its own personality, providing a large selection of light to dark stash to give the rug the contrast it would need to pull off monochromatic hooking.    

I basically threw each piece of wool into a pot and added dye with abandon.  I didn’t keep records or think much about the outcome, just measured out different amounts of dye and dumped it in the dye bath.  For one application, a lighter wool got ¼ tsp and then maybe 1/64 for another.  Sometimes I dumped in almost a full tsp for a deep colour on top of a darker based wool.  Every pot and wool got a different shot of dye and each rewarded me with a perfect colour. Some of the wools were predicable while some were wildly exciting.   Pink was never a big favorite, but after this experiment I held it in higher regard.   After the wool was spun and dried, I threw all the colours on the floor, sat in the middle and paired up the ones that most complimented each other but had enough contrast to stand out, separated them into piles and grabbed my cutter.   

The trick with a monochromatic colour plan is to make sure that when two or more colours touch, they need to stand out from one another but still blend.   If they are too close in tone they become muddied into a blob.  I think I effectively achieved the goal and found the exercise a great learning experience. This rug held my enthusiasm from start to finish, maybe the little girl in me remembered a secret crush on a cute boy and the wish to be his Valentine.  I used to love cutting out paper Valentines back in the days of elementary school and I remember decorating my brown paper bag that we all lined up along the wall and waited to see how many I would receive. 

The cuts were all #5 for the lace and hearts, except for the background and border in #6.  The housecoat I used for the border was a bit on the thin side, so I cut it in wider strips to fill in better.  Borders being what they are, straight lines of one colour , I say "go wider or go home".   Why  put a lot of work into a dark border? You hardly see the cut width with darker colours anyway so pick it up a notch, finish it quickly and get on to the next project that’s probably already  percolating in your mind.  
 
The background is Dorr Oatmeal with a very light dusting of Red Violet.  The oatmeal wool is light  beige in colour so it came out a bit warmer than some of the cooler pinks but  it worked.  The oatmeal had a light texture that doesn’t show so much in the pictures but is very effective in
the actual rug.  The only non pink is the few hits of two tone Shamrock Green for the leaves. 

The dyed wools showing in the picture below are not the same pieces used for the rug.  Today Shane over-dyed yardage for me to add to the rug display in the window.  I selected various new plaids, a herringbone and solids to duplicate what I initially dyed for the rug.   The colours are yummy!  Maybe these colours don’t fit in with the red, blues and yellows of my home, but I have a new appreciation for them.  
   
Customers are always asking what plaids look like when hooked and this rug is definitely a great teaching tool.  Considering the shop sells wool, we need to strut a bit of our stuff in the window so I’ll figure out a way to drape the various pinks around the rug for a dramatic sea of colour.  Until February 14th comes and goes, we will remind people how these beautiful colours are synonymous with romance and love!   

Picture
Picture
Picture
Picture
Picture
These are the wools we over-dyed with Red Violet.  The back row is the wool before the dye bath and the bottom row is the result.  The natural was over-dyed twice with different amounts of dye for a light and medium solid.

Picture
I always knew this rug would be lovely hooked in a blend of colours and Pat Pringle proved me right. Great job!
Picture
Believe it or not, this is the original pink version changed into a yellow palette by using the computer. A hue and saturation function that will change the colours with a click of a button. You would never guess that it wasn't colour planned and hooked this way.
Picture


When my friend Susan Leslie passed away I was frantic with grief.  I needed to do something for her and for lack of a better idea I became obsessed with hooking this small token to have at her memorial service.  I don't know what possessed me, I just knew I had to do it.  I used leftovers from the Heart of the Mat-ter piece above.  After the service, Susan's mother asked if she could have it and I was so happy to say "yes".  Thinking back it now seems kind of weird that I worked so feverishly over  this tiny piece  but somehow it made me feel better, held me together, kept  me focused so I wouldn't run into the street screaming.

2 Comments

Rose Of Thorns Compass Rose

1/23/2013

3 Comments

 
Someone asked on Facebook to see a finished version of 'Rose Of Thorns'  featured in yesterday's   posting.  The work in progress green version is the one I am working on since 2001.  I had intentions of sending it to Martha Stewart so I dyed colours she gravitates towards and hoped it might spark an article in her magazine about the compass rose patterns and rugs t I design.  Lofty ideas when you are new in business, trying to make a name for yourself.  Being mentioned by Martha, Oprah or land a spot on CBC TV or radio ensures a bit of traffic to your website.   I don't know why I lost steam.  Maybe it was because I'm not a big fan of green or maybe the shop responsibilities got in the way.  Who knows but it's been stored in a safe place for over a decade.  Shame on me.  Maybe seeing it again will be the incentive to finish it. 

The second version of this beautiful pattern was hooked by Vera Sollows.  Earthy colours seem to suit this designs and she did a very nice job in her selections.  I saw the rug in the flesh and it was spectacular.  Unfortunately, back then, my camera skills weren't to be desired so it's cropped badly and too small to blow up for any detail so it appears blurry.  Maybe there's a bit of camera shake in there as well.  Vera used our spot dyes for the Celtic design.  All in all it was fabulous.  I liked it more than the version I was working on.  The chocolate background makes the Celtic Knot pop whereas in my version there is less contrast.   I really love the delicate Fleur-de-lis.


I took the rounded Celtic Knot's on the outer edge and used them in the border to tie the design together.  It looks like Egg & Dart moldings. 
Picture
Picture
3 Comments

Transferring a pattern with red dot.

1/22/2013

5 Comments

 
Buyer beware, patterns are not all created equal.  Stamped patterns have no regard for matching the lines of the grain on the warp and weft.  Anyone who has hooked a pattern off grain will tell you it's work.  Some people try to straighten them which can be frustrating.  All the correcting lines muddy the pattern so it is a mess to decipher and hook.  Patterns that are stamped tend to be the same price as hand drawn so don't throw good money after bad.  Of course if you truly love the design you are stuck with what you get but the experience will be less than charming.  Sometimes stamped patterns are faded so that you can barely make out the lines so before you begin to hook it, you have to get out the marker and darken it yourself.  You should not have to do this after paying good money for the pattern.

Today I am going to explain step by step how to draw a design on a backing so that you can have the optimal rug hooking experience. 


How to Transfer a Design From Red Dot to a Backing


First you will need to cut  your piece of backing.  If you pattern measures 22” x 30” the backing size should be 30” x 38”.   This will allow for an excess of 4” per side to fit in a hoop or on a gripper frame and later for trimming and finishing.    If you should purchase a pattern with very little excess edge, or if you are working with a smaller scrap, you can sew a piece of material to the edge so the pattern fits on the frame. 

You always want to be careful cutting the backing  to minimize fraying.  Any cuts made crooked across the gain will fray like mad and you could lose a great deal of the border needed for binding the edge.  Always zig zag the outside edges of the cut burlap to prevent fraying.  (Some people  use masking tape to protect the edge or duct tape).  

Measure where you want to make the cut and use a pair of scissors to snip about an inch.  Then pick up one of the backing fibers to the left or right of the cut and pull it through like a draw string all the way to the other side.  Once this one strand is removed it will be very clear where to cut with your scissors.   This is far easier and faster than trying to follow the straight of the grain with your scissors and your eye. 

 
Below is the anal person’s guide to pattern transfer.  If you are artistic and not uptight about marker mess, you can draw directly on the backing, although if you want to draw straight lines within the pattern or put on a border the same rules will apply.

1.   First draw your design on paper.  This allows you to make all changes that are easily corrected.  Working directly on the backing with a marker will make mistakes permanent. 

2.    Secure the drawing to the table with tape to prevent slipping.  Now place the red dot medium over your drawing and secure with stick pins or tape to the paper drawing.  This prevents any slipping between the two layers as it can get annoying always trying to match up the lines once the red dot shifts.

3.    You will be able to see your drawing through the red dot very clearly. Trace over all the lines of your pattern with either a pencil, pen or ultra-fine tipped marker.  (An ultra-fine tipped marker works best because it flows over the red dot without having to apply pressure.  Now your design will be on the red dot medium. 

4.    The Red dot medium has red dots that can be used to line up straight lines for borders etc.   I don’t usually bother with this as most of my designs lines are not the exact place where the dots lay.  

5.   Markers do not have a long shelf life.  Especially if you are tracing over burlap’s rougher surface.  A heavy hand and too much pressure will wear the tip down faster.   Linen patterns maximize the use of the marker as the surface is softer.  Be prepared to go through one marker for a large pattern, maybe even crack open a second.  Once the tip is worn off you can still use the marker for darkening lines until it dries out.   

6.    Position the red dot over your backing and secure it with stick pins. 

7.  Trace over the lines with a Sharpie marker or any marker with a point. The dye from the marker will bleed through the red dot to the backing.  (We use Sharpie markers as they have a finer point and less odor.  Anyone with allergies or sensitivities to strong smells will prefer them.  If bothered by the marker wear a carbon filter mask, purchased at any hardware store.) 

8.     After you have traced over all the lines remove the red dot and you should see a perfect replica of your pattern.  Now go over the lines on the backing to darken them.   Don’t press too hard with the marker when working directly on the burlap as it is a rough surface and will wear off the tip fairly quickly.  The tip is what gives you a fine line on your design, keeping it neat and detailed.  Once the marker gets too dull it will make wider lines and if you are drawing smaller objects they will appear less defined and muddy.  Note:  Except for straight lines or borders all of the lines of a pattern can be transferred in this way. 

9.    When you have a straight line border or straight lines inside the pattern design, those lines will need to be drawn by hand with a pencil so they are straight on the grain.  For single borderlines.   If you have a design with a border that is 15” x 15” you would leave at least 3-4  inches along the outside edge so that the pattern will fit in your frame.  This would mean that you are working with a piece of backing that is 19” x 19”.  Take a ruler and measure in 4”.  Find the closest hole/channel, take a pencil and drag it along the backing in that channel until it reaches 15” in length.  Pay close attention as any distraction can make the pencil jump the channel into another line.  Go over that channel the second time with the pencil to make the valley even more defined so later when you drag your marker through it will stay on the line.  Then make the second side of your border until you reach 15”.  Do the third side of the border and then close off with the fourth side.  This will give you a nice straight edge of your pattern and make hooking so much easier.   
 
10.  All internal lines of the design have to be drawn by pencil as well.  You can do this by dragging your pencil down the line on the red dot.  The pencil will find the nearest channel and as you drag it down the line it will leave a dull pencil mark right on the backing.   When you lift up the red dot you will see where to go over the area one more time with the pencil or use a marker to darken the line.

11.  All geometric patterns like inch mats and anything with squares or straight lines are drawn by hand by dragging a pencil along the grain.  Make sure the pencil is not too sharp or it won’t make the channel wide enough.  After you have your lines drawn you can then drag your marker along those pencil lines to darken them.    Hooking straight lines is so much easier than trying to hook a line that goes to the left and then the right of the grain.   

There you go...101 of pattern transferring
Picture
Measuring out and drawing in the border lines. This pattern has several borders and each have to be measured out and then drawn with a pencil first and then filled in with marker.
Picture
More darkening of lines.
Picture
Working with the red dot medium to make sure all the lines are in the right place. You overlay the red dot periodically to check the lines before darkening with a marker. Pencil lines can be erased if necessary but marker lines can't.
Picture
The lines are all down and now I am in the process of darkening in the center rose, Fleur-de-lis and border.
Picture
Rose Of Thorns, one of the first compass rose patterns I designed back when my business had training wheels. A bit on the Celtic side this piece is stunning with its Egg & Dart border to match. I started hooking this piece in 2000 and it is 3/4 down. Drawing out this pattern for an order inspired me to dig out the rug and entertain thoughts of finishing it. The finished rug is 36" x 36".
Of course if you have a pattern with multiple borders such as the one in the photos above, it is always best to work from the inside to the outside.  Cut out your backing, find the middle and lay your red dop on top and position so that it's centered.  You can check by measuring each edge of the pattern to the edge of the backing to make sure it is equal on all sides...at least 4" away from the last line of the border.  Then where the first inside line begins make a mark in one corner by dragging the pencil over the  red dot to make a small mark that will show through on the backing.  Then lift the red dot and draw the entire line by dragging it to the next corner area, checking where the line will end my putting the red dot back down. Repreat to do all sides.  Measure with a ruler to check before you darken these lines to make sure they haven't gone wonky somewhere.  Always double check all your lines to make sure they are where they are supposed to be. 

Another tip...when dragging the marker along the channel hold it straight up, so that the tip fits nicely in the groove.  If you drag it on the diagonal it is more likely to jump the line.

The red dot can make about 15-20 patterns before it gets too ratty to use. 
5 Comments

Sunday Beginner Class

1/21/2013

3 Comments

 
Picture
I taught a fun beginning class on Sunday.  There were supposed to be five students but two were no shows due to illness so it was down to three and good things come in small packages.  Two of the women were friends of one of our Main Street Hooker group, Glenna. She is a recent hooking convert that inspired a couple of her friends to take a class so she came along for the ride and hooked for the afternoon.    Barbara lives down the road from our Ginny so there might be an opportunity for a little car pooling there because I am sure she will join our evening hooking group.

I have a well honed gut instinct; I can meet someone and like them instantly or experience a feeling of caution.  It’s served me well and truthfully, so far I’m been on the money. Today, green lights were flashing.  I clicked with these women, they were filled with such a fun spirit, people I would like to know better; the genuine article.  I expect all three will join our Wednesday evening hook-in and fit in nicely with the crowd and I look forward to seeing their progress and getting to know them better.  

The weather was incredible today.  At one point it was +10 and the snow is almost a faded memory in my backyard.  Mud in January doesn’t seem right but I’ll take it!  This is the kind of winter I look forward too and would like to see more of. But of course it won’t last and I’ll be grumbling again as the world turns white yet again and the temperatures dip.  I know I’m a broken record but like any typical Nova Scotian, we all complain about the weather, but wait 10 minutes and it will change. 

Then the day was crowned by an invite to Mary’s for dinner.  Mary is a great cook, the kind I would like to be, taking time to put on a spread each night instead of Save Easy chicken and grab items to fit my hectic lifestyle.  She made a pot roast to die for, meat so tender it melted in my mouth.  Roasted Vegetables from the Lunenburg market, cooked beets and a yum, yum Hot Slaw. (I need the recipe Mary!)    Then for desert an Upside-down Pineapple Cake, something I haven’t had since childhood.  A nice bit of pampering after a day of teaching.  Life doesn't get much better than that!


Picture
Left, Joan hooking a Celtic Knot, right front is Lana hooking Geo Tulip and Barbara right back hooking Highland Thistle.
Picture
Glenna working on her latest piece. A delightful sheep wearing rubber boots plashing in a puddle called Dances With Wool.
3 Comments

Hook-in on Saturday?

1/19/2013

2 Comments

 
Picture
Ah Saturday, the start of the weekend, a time for relaxing and catching up on chores and doing a bit of provision shopping.  That's the lucky life of the nine to fiver because when you own your own business not so much. I’ve been pulling a six day week and on Sunday I happen to be teaching a beginner class so if I do the math, that would be seven days straight.  Then add all next week, another 6 days and I’ll be chomping at the bit for a day off.   

That’s always been a dilemma for me.  Which day to take off?  Historically, Sunday was always the worst day for sales, mostly tire kickers and flea market folks wandering the streets.  People tell me to take off Monday but they’ve always been good days for the shop.   Take off Tuesday they say, cause the other rug hooking shop is closed that day, then there’s Wednesday, hump day, I don't want to be off all day and then open up for Hook-ins that evening, then Thursday is getting close to the weekend and Friday is even better for shoppers.   I just know from past experience that all the days of the week pan out equally,  as far as sales go, so it was always difficult to decide which one to count out.  So, what do you do when you can't decide?  You keep them all.  I worry about disappointing someone, driving to my shop from goodness knows where to find a note on the door. I suppose I could say, phone me at home, after all I’m only a few minutes away and more than willing to drive in. 

Today being Saturday, I'm going to sit on my derriere and hook to my heart’s content.  You can come and hook with me if you like but I’m not going to do a thing as far as work goes, just sit and enjoy myself.  Come and have a cup of something hot; coffee, tea or chocolate and stay for a chat.   Maybe Saturday could become a hook-in day for those who wish to pop in toting their wares.   My friends usually drop by on Saturday so I don't get much done anyway so why not make it all about socializing and fun and not worry about orders or any of that stuff.  I’ve always wanted to establish a day hook-in for some time, I just couldn’t decide on the day of the week to hold it on.  Around these parts you can hook pretty much every day of the week and twice on Sunday, but I don’t think much happens on Saturday.   So lets give it a whirl, it is now official, Saturday is hook-in time at Encompassing Designs.  Say 12-3 to start and see what feedback has to say.  I know it's late notice and the weather outside is frightful so I don't expect to see anyone today but hopefully next week a few will mosey on by and

And then Sunday I'm teaching a beginning class.  I do look forward to teaching.  It has always been one of the aspects of the business that I fully enjoy.   Glenna, one of our hook-in regulars is coming to sit in while a couple of friends from her neck of the woods take the class so it ought to be a fun filled day.  


2 Comments

Put on those big girl panties!

1/18/2013

3 Comments

 
Picture
Yesterday was a weird day.   Somehow I got trapped on an emotional roller coaster and couldn’t get off. We all have days like this and thankfully they are few and far between.  Not to get too philosophical but sometimes I wonder what life is all about.  Why we go through the motions when we all know how it will end.   I look around and I have plenty to be thankful for but I get overwhelmed and down in the dumps and of course, not
sleeping adds to the boulders on my shoulders. 
 

If only I could be normal.  Think normal thoughts, do normal things, coast along happily through life, living, loving and learning, focusing on the day I will retire.   Why do I have to be so full of fancy.  Always wanting to touch the stars can be tiring, hard to fit it all in around
everyday life of dishes, laundry, running a business, dogs and now, shoveling snow.   All the mundane stuff is gravity, pulling you down when you want to fly.   I want to do so much, that I end up becoming emotionally paralyzed and then do nothing.  That’s when the poor me’s move in and it takes a smack down brawl to throw them out. 

Yesterday was such a day.  Everything seemed bigger, tougher, more draining.  Small things became large and large things became elephants in the room. I kept shrinking more and more as each hour passed and I got so far behind in my goals for the day I started to fidget. I became irritated until I couldn’t stand the heat of the shop, even my jeans seemed too tight and confining; when I went outside my gloves annoyed me, my fingers fumbled and I dropped my keys in the snowbank, even the weight of my purse on my shoulder got under my skin.   Everything seemed exaggerated and I left work feeling sucker punched by the day. 

And then over dinner it peaked and I teared into a glass of club soda, (it would have been wine but I had to drive home and besides, crying in a restaurant might put people off their food).  The festering boil popped and drained, leaving nothing but a sense of renewed hope, of being alive, thankful for my blessings and a renewed spirit to continue  the journey.  Mom would have said it was a 'kick in the arse day', one of those moments to bend over and get a well placed reality check.  Nothing like a boot in the butt to put things in perspective so you stop sweating the small stuff.  My friend said "Get out the big girl panties and put them on!"  Buck up soldier!  Shit or get off the pot!

Today I woke up, hauled my weary body out of bed, put one foot in front of the other, took the pups outside and inhaled the crisp freshness of a new morn.  My negative alter ego had vanished and although I know there will be more of these moments, that's okay.  I am only human. I know I won't be shocking anyone with the revelation that I have bad days, we all have them, no one sails through life on a happy boat every second of every day.   I know the grass is not greener on the other side, unless of course you have astro turf,  a fake reality that will bite you at some point so don't look down your nose at me!  
 
Today I have a million things to do.  Get orders out, get a kit ready for pick-up tomorrow, then go home sometime in the evening to dishes piled along the counter, laundry spilling out of the hall door, (I no longer have a matching set of socks), bring in more firewood and try to get to bed before midnight.  I could let it drag me down again but I'm going to say "to heck with it", take time just for me, write on my book or maybe sit for a bit and stare at the wall, have a nice soak in the claw foot tub and read, or get out my hooking, finish the poor Christmas stocking that keeps goading me into a big guilt.   I've been working pretty hard lately and I need a bit of fun. Something just for me so I won’t get tied up in a ball with the complaints of the day.  All work and no play is making me a dull dilly.  

I've been told I'm a perfectionist and the reason behind the stress.  Too bad I couldn't have it surgically removed or zip it off like a skin tag.  I have high standards and that's what makes my shop so unique, but maybe I could lighten up a bit, not put so much pressure on myself.   Maybe I'll live a little longer. 


"Don't let the Perfect be the enemy of the Good" - Voltaire


3 Comments

Crazy about Christmas...or just crazy?

1/16/2013

4 Comments

 
Well, call me foolish but I can’t let go of Christmas.  It’s too soon and I’m not ready yet!  I only just took down my tree Sunday evening and all along I was telling people I was too busy to do it  because I secretly wanted to keep it.  There was remorse abandoning it to the outdoors, cold and forgotten like yesterday’s news.  Usually it’s dumped New Year’s Day, a good hangover kind of mindless job, cussing the needles all over the carpet like it’s done purposely to annoy me. My beautiful little tree gave its life for me and this is how I treat it?  Dress it all up with glitz and bling and then heartlessly strip it down and throw it out like trash.  I’m seriously thinking artificial next year....

So, what has happened to the Grinch we all know and sometimes love?  Where is the real Christine?  Have I been abducted by Christmas loving aliens and replaced with one of them? Or does it have something to do with menopause?  Is that what's making me all sentimental and sappy, just like the tree I threw out? After years of being indifferent to Christmas, sometimes not even bothering with a tree, this 180 switch will take a little getting used too.  
 
So still in the festive mood, I’m designing new Christmas stockings for next year.  Christmas stockings are lovely, full of colour and offer the promise of good things to come.   Stockings are small projects that are quickly hooked so you don’t mind the limited time they are displayed.  Adorned with whimsical themes you can add buttons and bows, sparkly things and fuzzy wools to tickle the fancy of children of all ages.  Maybe even hook and hang one for Rover, so Santa can stuff it with treats and squeaky toys.  

I’m going to design another dozen or so stockings for 2013 to add to the collection.  If anyone has any suggestions send me your input and I’ll pump them out and get them on the rack.  Someone already asked for a King Henri VIII, a male historical figure to offset Mary’s Mona Lisa pattern...a his and her sort of thing.  And one person would like a few red cardinals.   This doesn’t mean you have to order the patterns just put forth a few ideas to help me along. 

2013 is going to be the year of design.  I want more, bigger and better.  My goal is to catch up to
Pearl McGown and then wiz by her…which isn’t too lofty an idea considering I’m alive and kicking and have several decades  ahead of me…cross fingers, knock on wood!  Big shoes to fill but I’m going to give it a whirl and over the next couple of years I should be able to put a dent in my target of 3000 patterns.   You have to have something to get up in the morning for, besides the need for food and take the dogs out to pee!  So there it is, out in black and white, I can’t retract it…it’s carved in stone; I’m going to design my arse off!  


P. S. I’m starting to think I shouldn’t eat chocolate before I write.  I’m feeling a little jazzed and overly enthusiastic!   I found my husband’s stash of dark chocolate Toblerone and had a little nibble waiting for dinner.  

               Here are three newbies, hot off the press!
Picture
'No Crib For A Bed' a manger filled with animals gathering around the baby Jesus, who has a pretty groovy curl on the top of his head.
Picture
'Dash Away', Santa heading out for the night shift...up, up and away!
Picture
'O'Christmas Tree' how lovely are your branches!
4 Comments

Say Cheese (ies)

1/15/2013

1 Comment

 
Picture
Here's another completed addition to the series of Women of Abundance collection of Sue Cunningham.  Three bathing beauties basking away a sunny day, while we look outside to the ice and snow of reality!    

Sue certainly has the proper perspective on the body shapes of these delightful rotund gals.  Toulouse Lautrec would have painted

these models in his studio, real women with a bit of padding on their bones. 

Sue has been changing things up a bit.  Before she used lighter flesh tones but has now decided to add more of a tanned looked.  She was happy with the faces in this piece, one line smiles and dark glasses capture a simple beauty because we all know that working in such a small space and adding too much detail, one misplaced loop can make a sourpuss out of a face.   

The bathing suits are once again done in bright colours. The gal on the left is adorned in our spot formula "Carnation"; the gal in the middle is wearing "Razzle Dazzle" another one of our formulas and lastly,  turquoise over herringbone, not only gives the swimsuit a great colour but texture as well. 

The ocean is done in Cerulean Sea, one of our spot dyed formulas and Sue has lightly dyed a soft blue curly mohair for the wave action.


The sand is all herringbone, with two tones to add shadows here and there.  Both Sue and I love the effect of herringbone, always adding just the right amount of texture. 

The sky is done in what she calls "Mahone Fog"
which she is sharing the formula for. 

I try to avoid the classic 'blue' sky whenever possible. It's just a bias of mine as I prefer a more sultry look. Mahone Fog is one of my favourite 'go-to' formulas. Because I use it so frequently, I tend to dye up a couple of yards at a time so it's always at the ready. And if, as often happens there are variations dye lot to dye lot, I just cut it into strips and mix it all up together. I've never been disappointed with this one.

I use ProChem dyes for this formula over 1 yard of Dorr natural wool.

Step 1: Prepare 1/16 tsp #121 (Maple Sugar) in 1 cbw. Dye full yard of Dorr natural.

Step 2: Place dyed wool in large flat pan to prepare for spotting.

Step 3: Prepare 1/32 #441 (Slate Blue) in 1 cbw. Using a tablespoon, spot this formula randomly over the peaks of your prepared wool.

Step 4: Prepare 1/16 #120 (Golden Pear) in 2 cbw. Using a tablespoon, spot half (1 cup) of this formula randomly over the peaks of your prepared wool.

Step 5: Transfer the remaining cup of this mixture into a spray bottle. Spray this formula over the spotted wool, paying particular attention to areas mainly comprising the Slate Blue dye. Overspraying the blue with this remaining mixture will dull it down and create the 'foggy', somewhat antiqued effect I want to achieve.

Step 6: Cover pan with foil punctured with small holes to allow air to escape. Bake in 250 degree oven for around 30 minutes.


Picture
The Mahone Fog is used in the Nantucket Whaling scene below. Sue adapted this Lib Callaway pattern by adding the compass in the upper right hand corner and the rope border.
1 Comment

Linda Ruth's 'Beck'

1/12/2013

2 Comments

 
Picture
Stay tuned for upcoming stories about Linda Ruth Beck, of Chester, NS.  Linda owns and operates 'Come By Chance', the best antique venue on the south shore.  She's one of our Main Street Hooker regulars and is continually wowing us with her clever, one of kind designs and approach to rug hooking.  

Linda rarely works from a pattern.  She starts with a large backing, finds the middle, throws down a bit of colour and creates a design as she goes.  For us anal, in the box types, we can hardly 
 grasp the concept, so we bow and hold her in the highest regard.   In the upcoming months I'll feature some of the jaw dropping rugs she's created, so you to can marvel at her keen eye for design and colour execution.  Oh, and I should mention she's fast.  Dedicated to the craft, she hooks a few hours each day and knocks off her pieces in record breaking time.  She says she loves hooking from side to side in straight rows as our ancestors did, so she usually gravitates toward geometric style designs. 

In the meantime 'Beck' is her current project, which I believe has sold before it's even off her frame.   There will be another border, emulating barn boards with a rope motif that meets in a knot at the bottom and loops at the corners.    I'll post a picture of the completed rug.

Generally, Linda Ruth creates as she goes, where she stops no one knows!   Her secret?  Start with a big piece of backing so you don't limit yourself and when I say big, I mean room size big.   We love to joke about her Christmas Coaster rug from a few years back.  She planned to make a few coasters as gifts, you know, little mats to put your drinks on.  Well, she hooked a few and then decided to connect them and the next thing, she's at the hook-in doing a show and tell of a big ole hall runner!  She's definitely full of surprises, leaving us wondering what she'll do next!

'Beck' seems a perfect name for this maritime seagull.  He came to life through various recycled plaids, textures and light wools.  Linda Ruth is an avid dyer and works in a cosy, well appointed studio in her century old home.  She uses pretty much all recycled wool and her stash seems unlimited, preparing her for any  undertaking. 

Linda Ruth's home is filled with all her incredible rugs so she is now exploring commissions and setting up a section of her spacious antique shop to display and sell her handwork. She has been selling antique rugs for decades and now her incredible pieces will join their distant cousins, catching the eye of that lucky buyer that will appreciate her interpretation of this traditional artform.  
 

Picture
With permission from the artist, Dolly Handcock of Chester, this card was the inspiration for Linda Ruth's rug.
Picture
Linda Ruth with 'Beck'
Picture
2 Comments

Finishing Mary's Seashell Stocking

1/11/2013

1 Comment

 
By Guest Blogger Mary Doig

How to Make a Christmas Stocking
 
Of note:

If your stocking pattern is not already on red dot transfer material, see instruction number 5 below and make a template of it before you start hooking.

A warning – I am NOT a seamstress, so there may be easier or better ways to assemble a stocking. However, this system works for me, and I hope it works for you!

1.  Pattern and swatches are ready to go.  Linen is zigzagged twice approx 0.5” from the pattern lines.  To prevent raveling of the pattern, raw edges are zigzagged once.  Swatches are labeled with the dye formula, which makes it easier to dye more if the material runs out. 

2.  Hooking is in progress.  I am generally happy with how the colours are working out, although I think the strong purple line in the center of the starfish is too much.  Eventually it is changed to a beaded line of medium and light purple.

3.  Hooking is finished and has been pressed.

4.  Beading is finished.  New glass beads and pearls from a broken strand add some bling.

5.  Make a template for the stocking backing, by copying from the red dot pattern to newspaper, tracing around the stocking outline with sharpie marker to transfer the outline.  If you have not made your own pattern, I would advise copying its outline to red dot before you start hooking, using a china marker so as not to mar the pattern, and then use the red dot to complete this step.

6.  Cut out the newspaper template, adding ½” for seam allowance.

7.  Place the template on the material you are using for your stocking backing.  I use a piece of wool that has been dyed the main colour of my stocking.  Pin it in place and cut around the template.

8.  The stocking backing is ready for assembly.

9.  Cut the lining from a piece of cotton, doubled over.  Place template on cotton and pin in place.  Cut around template.

10.  Two pieces of stocking lining are ready for assembly.

11.  Tear one 10” x 2.5”  piece of material for tab.  I tear the material because it automatically finds the straight of grain.   I use the cotton lining fabric for the tab.  You may prefer to use wool.

12.  Cut excess linen away from the stocking front.  I cut about ¼” beyond the zigzagging around the stocking.  Make nicks through the zigzagging at the curviest parts, which will help in the next step when you press the linen to the wrong side.

13.  Press excess linen to the wrong side of stocking front.

14.  Stitch excess linen using a running stitch, to hold it in place.  Use a neutral colour thread and don’t poke the needle all the way through the hooking.  Stitching should not be visible on the right side of the stocking front.  On the way around the stocking, while stitching, reinforce the places that you have nicked through the zigzagging, to ensure that they won’t fray.

15.  Press ½” to the wrong side of stocking backing.

16.  Pin the stocking front and backing together, with wrong sides together.

17.  By hand, slip stitch the front to the back, stitching as close to the hooking as possible.

18.  Lining and tab:  Press ½” to the wrong side at the top of each lining piece.  With right sides together, stitch ½” seam allowance on sewing machine,  from the right hand top around to the left hand top of the lining, leaving the top open.  For tab, fold right sides together and stitch ½” across top and down the side, leaving bottom open.  Turn right side out (a chopstick is helpful for this) and press.

19.  Insert lining into the stocking, with wrong sides together.  Double the tab over to form a loop and slip it in between lining and backing.  Slipstitch together by hand, around the top of the stocking and through the tab, so the tab is secure.

20.   Tack at the heel, instep and toe by stitching a couple of stitches through the backing, lining and front.  This should be invisible.  It helps to hold the lining down inside the stocking.

21.  Stocking is finished!

Picture
1. Pattern and swatches are ready to go. Linen is zigzagged twice approx 0.5” from the pattern lines. To prevent raveling of the pattern, raw edges are zigzagged once. Swatches are labeled with the dye formula, which makes it easier to dye more if the material runs out.
Picture
2. Hooking is in progress. I am generally happy with how the colours are working out, although I think the strong purple line in the center of the starfish is too much. Eventually it is changed to a beaded line of medium and light purple.
Picture
3. Hooking is finished and has been pressed.
Picture
4. Beading is finished. New glass beads and pearls from a broken strand add some bling.
Picture
5. Make a template for the stocking backing, by copying from the red dot pattern to newspaper, tracing around the stocking outline with sharpie marker to transfer the outline. If you have not made your own pattern, I would advise copying its outline to red dot before you start hooking, using a china marker so as not to mar the pattern, and then use the red dot to complete this step.
Picture
6. Cut out the newspaper template, adding ½” for seam allowance.
Picture
7. Place the template on the material you are using for your stocking backing. I use a piece of wool that has been dyed the main colour of my stocking. Pin it in place and cut around the template.
Picture
8. The stocking backing is ready for assembly.
Picture
9. Cut the lining from a piece of cotton, doubled over. Place template on cotton and pin in place. Cut around template.
Picture
10. Two pieces of stocking lining are ready for assembly.
Picture
11. Tear one 10” x 2.5” piece of material for tab. I tear the material because it automatically finds the straight of grain. I use the cotton lining fabric for the tab. You may prefer to use wool.
Picture
12. Cut excess linen away from the stocking front. I cut about ¼” beyond the zigzagging around the stocking. Make nicks through the zigzagging at the curviest parts, which will help in the next step when you press the linen to the wrong side.
Picture
13. Press excess linen to the wrong side of stocking front.
Picture
14. Stitch excess linen using a running stitch, to hold it in place. Use a neutral colour thread and don’t poke the needle all the way through the hooking. Stitching should not be visible on the right side of the stocking front. On the way around the stocking, while stitching, reinforce the places that you have nicked through the zigzagging, to ensure that they won’t fray.
Picture
15. Press ½” to the wrong side of stocking backing.
Picture
16. Pin the stocking front and backing together, with wrong sides together.
Picture
17. By hand, slip stitch the front to the back, stitching as close to the hooking as possible.
Picture
18. Lining and tab: Press ½” to the wrong side at the top of each lining piece. With right sides together, stitch ½” seam allowance on sewing machine, from the right hand top around to the left hand top of the lining, leaving the top open. For tab, fold right sides together and stitch ½” across top and down the side, leaving bottom open. Turn right side out (a chopstick is helpful for this) and press.
Picture
19. Insert lining into the stocking, with wrong sides together. Double the tab over to form a loop and slip it in between lining and backing. Slip stitch together by hand, around the top of the stocking and through the tab, so the tab is secure.
Picture
20. Tack at the heel, instep and toe by stitching a couple of stitches through the backing, lining and front. This should be invisible. It helps to hold the lining down inside the stocking.
Picture
21. Stocking is finished!
1 Comment

Seashell Christmas Stocking

1/11/2013

3 Comments

 
by Guest Blogger Mary Doig
Picture
This design was inspired by Dr. Krista Ritchie, the wonderful bonus daughter that fate brought to me (the term stepdaughter always sounded too wicked stepmother-ish).
 
I am working on a multi-year plan to make each member of my family their own Christmas stocking, of their own design/vision. Krista wanted a seabed still life – including a skinny starfish, sea grass, sand dollars and urchins.  She envisioned a dark blue background with little dots of plankton that would also resemble stars.  And although she was very clear with her directions and even provided me with sketched templates, I struggled with the actual design. Christine came to my rescue – it was like magic seeing her draw exactly what I (and hopefully Krista!) wanted.
 
Colour planning was fun.  The starfish was red, for a Christmas feel.  Other than 3 value swatches in red and blue for the starfish and background respectively, 6 value swatches were used.   Blue green to yellow transitional for the sea grass, purple to orange transitional for the  scallop shell, light brown for the sand dollar, blue to orange reverse transitional for the mussel shells, although colours from the other swatches were used in the mussels to mimic iridescence.  To add another bit of red, because the red was all alone in the starfish, the spines of the urchin were made red, and some of the orange to purple transitional was used for the urchin shell.   Originally I thought I’d use recycled greys and browns from my stash for the rocks, but since there were so many unused swatches with the dyeing I had done, it seemed a good opportunity to have neutral colours that matched the rest of the colours by using the mid values of these swatches.
 
I bought some dark blue yarn with a silver sparkle to make the stars/plankton with, but wasn’t happy.  It was too fat.  When I told Christine of my plan to add hooked beading to the central lines in the starfish, she thought ****sparkle**** (you know she’s a huge fan of sparkly things)…and had the idea of real beading for accents.  Not only is Christine a hooker, she is an accomplished jewelry maker, so she had a huge selection of beads to choose from.
 
Then that gave me the idea to place a pearl in the scallop shell, using a loose pearl from a broken string of my mother’s. My mom loved Krista very much and was also a big fan of sparkle, so I thought it would be extra special to add this as a little gift from her that Krista would have every
Christmas.   Christine suggested 4 mm Aurora Borealis Swarovski Crystals for the plankton.  All the beading embellishments were added after the hooking was completed and pressed.
 
Hooking was done in a three cut.  Fine shading in a three isn’t my first love, but I thought that it would help show off the shells better than a primitive cut would.  I followed a lesson learned from Jane Halliwell Green via her pictorial class (and books) – anchor objects by starting dark at the bottom and moving to light at the top.  This technique also helps to define objects against one another as your eye moves up the piece.
 
The top of the stocking was hooked with natural soft curly mohair, doubled up, from the Fleece Artist.   Years ago I purchased a skein from Christine, and it has lasted forever!
 
Finishing:  Stay tuned for tomorrow's blog by Mary Doig

Picture
The design!
Picture
Transferring the design to red dot at the hook-in.
Picture
Colour planning with swatches.
Picture
Beginnings!
Picture
Ruby says,"I think I would like this stocking for me so Santa can bring some treats. I've been an awfully good girl this year!"
This pattern is available on Mary Doig's page of this website. 

Picture
A picture after the bling was sewn on. Crystals for the plankton, a pearl for the shell, and red/orange crystals down the center ridge of each the starfish leg.
3 Comments

'Stocking The Chimney' by Della

1/10/2013

7 Comments

 
Picture
I loved hooking this Christmas Stocking called "Stocking The Chimney".  Your website is wonderful, lots of pictures and you've been posting pictures on Facebook and I saw the partially hooked Stocking The Chimney you were working on and knew right away I NEEDED to do that rug.  lol

I love geometric designs and when I saw your brick work I thought oh my, that is beautiful, I'm  going to pay close attention to try to figure out what Christine did so I can do  the same! I was very pleased with my resulting brick work.  I had some overdyed  burgundy that I thought would look  great as the bricks, it was an old skirt from  Frenchys' and the grey was also recyled wool from Frenchys' probably a skirt as  well.

You've commented about Santa's jacket on Facebook, I struggled getting the  'right' shade of red for his jacket.  I've recently been learning to dye wool  using the Wooly Mason Jar method but knew the shades for that weren't going to  be a deep enough red.  I tried some Pro Chem and Majic Carpet two different  shades of red and didn't find it was going to be 'right'.  So back to my stash I  went and found
what I thought would work best for the jacket, it was something I  purchased at some point, looks to be spot dyed.

I've been hooking since  2007 and I don't think I've ever done a human face so I did what I thought  looked right but the nose bothered me.  I tried bright red, then pinkish then a  light brown.  I
haven't sent you a pic of the nose changed back to the original  red I had started out with.

I've decided that I will probably try to do  one Christmas sock each year for my family members but this one will be for  me!  Thanks for the pattern and it helps seeing the patterns hooked, it  inspires one to do it! Keep up the good work.     Della

By Guest Blogger Della Ackles

Picture
A closeup of the items in Santa's goodie bag.
Picture
Ribbon I used for the Christmas present in Santa's sack.
7 Comments

A trip down a wintery, memory lane...

1/9/2013

1 Comment

 
Bear with me, I'm  feeling a bit nostalgic. 

Driving home from work last evening I noticed the Mahone Bay harbour was covered by a thin blanket of ice. Torn between the beauty of our planet and the realization that winter was really here to stay, my ahhh quickly turned to a moan.  The harbour freezing over is always indicative of how cold the nights have become and at -14, the night before last, was a prime example of why I should be a snowbird in Florida. But thankfully that kind of cold won’t last. It never does anymore. A quick freeze is followed by an even quicker thaw and with rain coming this evening that should take it right back to waves lapping the shoreline. We just don’t dip and stay below zero anymore. And that’s a good thing, at least for me. Global warming has its perks I guess, I could do with a little less of a frigid winter. Maybe have the entire season concentrated into one week where we are pummeled with unending snow, cold temperatures and Jack Frost on a rampage. People could haul out their snowmobiles and all the winter toys, do whatever turns them on and experience a Currier & Ives winter painting outside their windows.  A week would be just enough to get a bit of wear out of the coat and boots, give us something to talk about, because we Nova Scotians love to talk about the weather, and then roll ahead into a long, glorious spring. 
  
There have been many changes over the years. Cold is no longer the cold of my youth. We seldom get the temperatures of yesteryear, when the harbour froze solid to Strum’s Island and stayed that way until spring. Snow is no longer the threat it used to be either. Years ago snow
came in nothing short of a blizzard, pretty much causing the daily grind to come to a halt. It took days and a heart attack to dig the car out and a path to the street. When the plough made a run by your driveway it built a wall of snow so high you got a nose bleed standing on it. I remember the snow stacked against telephone poles, reaching close to the wires.  The stuff lasted the winter without warming temperatures to melt it away.   Winter meant snow and ice, a winter wonderland for as far as the eye could see.   Today’s winter can mean anything from a bit of snow to mud, sometimes both at once.  
 
I know I was smaller back then, but I remember walking to school in the white powder up to my waist, sometime higher…climbing into the footsteps of the bigger, older kids blazing a trail ahead of us. A slip and a fall and you could have been lost until spring. That really happened to a woman back in the 80’. She was a bit on the tipsy side, fell down on her way home and the plough swept her into a bank of snow and she lay there until the spring thaw. That would never happen today, you might be a human popsicle but they’d find you in the morning.    

And school was never cancelled, as long as you could run, walk or crawl you had to be there. But back then, it was fun, and healthy to be out in the fresh air, walking to school, what an unfamiliar concept today, with mom’s taxi service running all day long.  Everyday we’d play on the way to and from school, making snow angels and snowmen, and forts with multiple rooms. Snow caked mittens, glowing red cheeks and running noses; that was winter.  We’d arrive cold and wet to school and put our mittens on the old, hissing radiators; the smell of damp wool wafting through the air.  By recess they would be dry and we’d run screaming to the outdoors for another 15 minutes of glorious winter fun; more snow angels, snowmen, digging  tunnels and building forts, more wet mittens and boots. I’m not so sure many kids
today get the full experience winter. I find that sad.  

I remember flying down Oxner’s hill on a real wooden toboggan or a piece of cardboard.  The hill was so peppered with kids you barely made it down the hill without a crash.   Ahhh…..and skating figure eights on the pond behind our house while avoiding pucks as the boys played hockey.  Maybe George, the lad you had a secret crush on helped you up when you fell, held your hand for a heart stopping second. That pond hardly freezes solid anymore and now skating is done in an indoor arena, not under a wintery sky. 

We skated on the harbour as far as our legs could carry us, the ice groaning and making cracking sounds under our weight, but we had no fear, it was a thick as a concrete slab.   We’d stand on the sidelines while cars raced the icy track out to the islands and back. Bonfires on the ice to warm your hands and marshmallow melts, all parts of winter to look forward too, gone and almost forgotten. In later years Ice boats tacked back and forth the shores, but even that no longer exists. Hubby liked extending the sailing season but the iceboat hasn’t been out of the basement for years now.  The harbour is no longer the icy playground it used to be.

The late eighties saw the last of the smelt houses. That was always a given, smoke stacks puffing greasy, grey clouds from small wood stoves while fishermen sat around a hole in the ice telling fish tales and sipping from a flask of coffee, tea or maybe something stronger. The last time smelt shacks were on the harbour a quick thaw sent them to the bottom in less than a day. As I watched them sink from my apartment window, one by one, into the sea, I didn’t realize I was watching the end of an era.

One thing for sure. Change is inevitable. Nothing stays the same. Eventually time carries everything away. As we age we think more of the past and the changes we've gone through. And someday it will be our turn to tell the youngins' the way it was, way back then.  We’ll all become that old fogie you listened too as a child.... telling you fanciful stories, putting an extra foot on the fish story. "Yep sonny…I had to walk 10 miles to get to school in snow up to my chest. I didn't have winter boots or a jacket and carried my little brother and book bag on my shoulders…..yep, them was the days all right!" 
Picture
Packed like sardines on a four seater toboggan we hung on for dear life as we picked up speed to the bottom. Usually the person on the back flew off from the bumps of the uneven, snowpacked hill. What fun!
Picture
Yes, I know these pictures are before my time...1910 to be exact. But they represent my memories of the 60's. The crowded Oxner's Hill after school or on the weekend. I can almost hear the laughter and smell the steamy, warm breaths and fresh outdoor smell of kids at play.
1 Comment

A Passion for Paisley

1/8/2013

10 Comments

 
An Adventure in colour planning, colour matching and dyeing with swatches.
By Guest Blogger Mary Doig
Picture
Isn't this rug spectacular?! Stay tuned for more pictures as Charlene heads for the finish line!
A few weeks back, my friend Charlene asked me to help her with some dyeing for a new project. 
She had designed a lovely paisley rug, and was looking for some input on colour.
 
Charlene had some initial ideas for a colour plan – she wanted to try something different from the usual clear, bright colours that she works in, and use more muted yellows and orange/reds and green. She also wanted a bit of “poison”, as had been discussed in her rug school class on
paisleys.  As part of her rug class experience in paisley design, she had coloured in a copy of her original pattern sketch.
 
Here’s what we did:
 
We met the night before our dye session to make the action plan.   I brought swatches; since I started dyeing years ago, I have been saving approx 2”x 5” samples of every dye formula.  The name and formula is attached to each swatch with a safety pin, so it’s quick and easy to refer to
when dyeing.  
  
We put all the swatches out on the table, and Charlene picked the colours she had thought about for the rug.  We stowed away the rest so we wouldn’t get confused.   Of the colours on the table, she then discarded the colours that weren’t pleasing to her eye.  What she was left with was colours that she liked, and interestingly, they all coordinated well.  Then we determined the values she wanted of each colour – light, medium or dark.  
  
Charlene intended to use primarily recycled wool, so from her stash, we picked what would be best to overdye for each colour. We used recycled white for the lightest value, which was to be a soft mottled gold for background.  Because she wanted darker versions of the gold for borders and outlines, we chose a soft yellow to overdye for medium gold and a darker tan for the darkest gold, which would be the outline value.  Recycled light orange was chosen for an orange abrash, and recycled lime green for a mossy green abrash, spotted with hints of rust.   We used the same recycled orange to overdye two values of red abrash.  Some new cream and white textures were used for a sunny yellow and for a rich eggplant.  The eggplant was to be the poison.   At the same time we were choosing the wools to overdye, we were also measuring (by covering the hooking area four times over with wool, because she hooks her loops quite low) to ensure she won’t run out.  After that, along with two glasses of a delightful Pinot Grigio, we were
done for the night.
 
Charlene was super organized – she soaked her wools overnight in water and dish soap, in separate bowls, and beside each she laid the swatch for the colour that the wool was to be dyed.  The next morning we used the open pan method to dye each one in sequence.  We kept notes, because occasionally we had to amend a formula slightly, to account for the colour we were
overdyeing.   Overall, it went like clockwork – as one dye lot was setting, we were preparing the next one.  Charlene has served in the military, and the phrase for that type of action is “working concurrently.”  We were lean, mean, dyeing machines (well, Charlene is lean, me not so much, but I make up for it in mean).  It was a beautiful fall day here in Nova Scotia, perfect for outdoor drying, so Charlene was hanging our handiwork up on the clothesline as I worked concurrently in the dyepot.
 
We needed two further dyeing sessions after the initial one….the lightest gold value, to be used for the background, turned out to be too bright.  As the late Dorothy Haight, oriental rug hooking guru, would say – it “jumped,” meaning that it didn’t blend well with the other colours.   So we took it back to the dyepot and overdyed it with a dilute brown/black combo – what I call my “toning down wash.”  I always have a jar on hand, for just this kind of occasion.
 
And then Charlene decided since she liked the eggplant so much, she wanted to use more.   She had a couple of different recycled purples (one was more blue than the other) that she wanted to overdye.  Since the colour we were trying to match was already very dark, we knew there was room to darken the recycled purple more while we tried to get it to the right eggplant colour.   We threw the recycled purple wool into the dye pot, and by eye, added red brown.  It was still too purple-y, so we had a look at the colour wheel, and decided to add yellow as the complement to “brown it down” and that worked well.   When all her eggplant is line-dried, she’ll mix it together and it will be spectacular! 

Here’s a picture of Charlene’s colours, her pattern with a bit of the hooking done, as well as her initial sketch and colour plan of her pattern.  The eggplant looks black in the picture, but it is really a delicious dark red/brown/purple shade.
Picture
Looking forward to seeing the finished rug!    by Guest Blogger Mary Doig

A Passion For Paisley - Designed and hooking by Charlene Scott
Pattern is available

10 Comments

A Frenchys' Find

1/6/2013

3 Comments

 
Picture
Picture
You never know what you'll discover at Guys Frenchys.  Over the years, I’ve heard tales of exquisite finds; of a diamond tennis bracelet, a ruby pendant and diamond rings found in the pockets of jackets or linings of purses.  Sterling pill boxes and real ivory pieces, thrown in with plastic household items and discarded apparel, waiting for someone to discover them and
breathe life back into their existence.  For those of you unfamiliar with Frenchys, it’s a chain of second hand clothing outlets where you can buy, new to you, brand name clothing for mere pocket change and more importantly, a place for Nova Scotian rug hookers to buy recycled wool garments. 

I can’t recall a name, but a rug hooker discovered this unfinished mat in a bin and brought it to a NS Rug School to put in the silent auction; an annual fundraiser put on by the guild to raise money for charity. I was drawn to it immediately and muscled in to take the prize at any cost. I might add, there was some pretty serious competitive bidding as we all saw the beauty and merit in this piece. I don’t know what the others intended to do with it, but I was entertaining serious thoughts of finishing it. 
 
The two things that appealed to me were the Emperor’s incredible right hand and his pantaloons. 
Eerily clawish, the hand models realistic fingers and long nails that drip down into dagger like points and the pants, of numerous colours, were done in values, at least six for each colour used needing a huge stash of dyed wool to draw from.  When looking at the finite details of this piece you get the feeling you are witnessing true hooking mastery.  
 
The person who designed and hooked this rug was an artist in every sense of the word.  Not only were the subjects stunning but the pattern was drawn directly on the backing, a feat few would attempt unless you held the confidence of a steady hand and the ability to transfer an idea of the mind to paper with minimal effort.  There were very few corrected lines which impacted on me greatly because I know how difficult interpreting a thought to paper can be without wearing down an eraser!
 
The Emperor’s face is amazing.  Hooked with high contrasting detail it appears hard, old, weather beaten and a little bit scary, exactly as a fearless, brutal, warrior's face would.  Unfortunately the Geisha’s face was never done but you can imagine the pale white skin, a mask like backdrop to
bright, red ruby lips.  

The shading of their costumes was also well done, not using as many values, but enough to make the folds of cloth appear draped and flowing.  This artist/rug hooker knew how to manipulate colour to maximize a realistic approach.  

There are unhooked Chinese stylistic bats around the Emperor’s head (one has a completed face) and swirls of smoke indicative of Chinese dragon designs.  The lotus flowers and butterflies are cleverly shaded, sometimes very simply but done in such a manner that creates maximum effect.  This person knew what they were doing when applying colour to captivate interest from an audience.  
 
There are so many details, I wish you could see them all but the pictures are blurry when enlarged and the drawn lines are faded.  These pictures were taken when I first bought the rug, before I packed it away for a later time.  But if anyone is interested I could take it out for measurements and close-ups.  I often pondered why it ended up in a bin and sold for a pittance when it was destined to become a showpiece.   The obvious conclusion, someone must have died and their family didn’t realize the treasure they uncovered.
 
Unfortunately, the rug reeked of moth balls, indicating it was probably stored in a trunk for some time.  You can imagine it rolled up, waiting patiently to be taken out, unfurled and finished; but alas, life’s circumstance intervened, cheating it from being fulfilled as the great piece of hooked art it was meant to be and then discarded like yesterday's trash.  I aired it out in the back storage room for weeks until I could tolerate it in the shop and then packed it away for another time.  Back in the day I was young and foolish and filled with romantic notions of finishing it, but now with so many relevant pieces to hook I don’t have the time or inclination to do anything with it.  Besides, the burlap had sprouted a few holes along the way and looked sun baked and brittle, not a project to waste time on unless you want your heart broken.  I once pondered separating it into into sections, (the designer actually sewed the panels together as if adding each of the two figures was an afterthought) finish the Geisha’s face and then frame the two figures but I hated to destroy the creator’s vision, ruin the story they were trying to tell.  If anyone has an idea or suggestion of what I might do, let me know!   If anyone would like to hook this design I could even make it into a pattern.
  
Or even better, maybe someone out there knows the history of this piece. To land in a Frenchys' bin it had to arrive from the United States as the clothing bales come from south of the border, but initially, it could have originated from further afield.  The mystery is very intriguing and it’s fun to surmise the journey that transported this spectacular rug to little ole Mahone Bay.  
  
Picture
Picture
3 Comments

Wool Widget 

1/6/2013

6 Comments

 
This is a dip dyeing tool hubby made for me a few years back.   Holding the wool with just my fingers meant scalded digits and I didn't like using tongs as they were too awkward to handle and  kept slipping so the wool would fall into the dyebath, plus you need two hands and two pairs of tongs to hold the wool open and vertical, so he came to my rescue yet again. 

Tah dah!  This little Wool Widget works well.  There is a knob handle for safe holding, the wood floats if you want to lay it in the water and you don't care if it gets wet.  The brass hooks hold the wool nicely along the salvage edge and you can wrap it around once or twice, depending on the size of wool needed.  

Simple to make and easy to control when dipping the wool up and down in the water.  
 Maybe I should have these made for the shop?   
Picture
Picture
6 Comments

Geese In The Garden by Barbara Taylor

1/5/2013

1 Comment

 
Picture
I've always liked this design.  Inspired by an antique postcard given to me by my mother-in-law, this is one of the very first patterns I've made. 

It's been hooked with several very different colour palettes and each one is truly lovely,  but this happy, springlike version is a total delight.  One of my favourite aspects is the unexpected, transitional sky of soft pastel tones, an out-of-the-box choice, that strays from the traditional blues and suits this particular rug like custom tailoring...hey Tayloring!  Barbara credits the dip dyed wool to Shona Patterson, that goes from yellow through mauve to blue purple at the bottom. 

I also love how the white geese, virtually nondescript except for a light outline and facial features are pushed to the forefront by all the surrounding colour, forcing them into the role of focal point just as they should be.  Great job!  

And of course, last but not least are the beautifully shaded poppies, perfect against a backdrop of mauves and blue tones.  How positively lovely and I'm not surprised. Every rug hooking project Barbara takes on is nothing short of a masterpiece. 

1 Comment

Thanks Pam!

1/5/2013

1 Comment

 
Picture
Today has been cold.  The temperature is actually better than yesterday but I feel chilled to the bone and ungrateful for the minor degree reprieve.  Even my faux fur can’t keep the cold out.  I’m a wimp in winter and I feel ashamed moaning about -1 when others would take my place in a heartbeat, but I just wasn’t built for the cold.  

Maybe it’s because I don’t look good in a hat.  The back of my skull is as flat as a pancake so hats don't sit well up there. I envy people with those nicely rounded heads that can carry a hat.   Without a proper fit, the hat drops down in the back so it catches on the collar of my coat and then gets pushed  forward up and over over my forehead.   It's a constant adjustment.  If I could wear a hat maybe I’d feel toastier considering that most of the body’s heat loss is through the top of your head.
  
My flat head is the top reason I don't wear them, but then hat hair is another issue.  Between looking like a big headed dork and then having my thin mane statically stuck to my cranium...well...I’d rather freeze.   So the few times I’m forced to don a hat in -10 temperatures, once the chapeau goes on it can’t come off until I'm back home where the dogs don't care how I look.  In the meantime, I have to wear it indoors for the rest of the day, cursing under my breath from the heat and lack of comfort.   Someday, I’ll find the perfect hat, one that fits a cube shaped head, but until then, my vanity will send me out into the cold, bare headed and whining. You're probably thinking I should get some real problems, but right now this is all I’ve got.  
 
My neck and throat are happy campers though.  Especially since I've been given a gorgeous ruffly, spiral scarf from Pam Haughn, one of our Main Street hookers.  She’s a crafty one….dabbling in many fiber mediums and proficient in all.  She sews and actually makes the gripper covers for the frames I sell in the shop.  She knits of course and has been hooking pretty much since I started the Wednesday evening hook-ins.  Everything she puts her hand to is smartly executed.  She explained how the scarf was made but she lost me on the details.  According to her it was simple, but I have to argue that point due to my ineptitude in the knitting department.  But that makes me even more impressed so thanks Pam!

Pam loves to hook rugs for her family and her Sibling Retreat commemoration is pretty amazing. 
She adapted a photograph of all her siblings, butt side showing, lined up on the beach, into the most incredible rug.  She said she didn’t want to hook the faces and it was a good decision because it gave the rug even more personality.  The body shapes and stances are bang on.  She used the rug picture to make last year’s Christmas card which I’m sure was a huge hit in the family.  Pam has six sisters and one brother that annually converge on a Green Bay weekend cottage and have a blast of a time.  Her face lights up when she relays stories of all the fun they have, the making of lasting memories, that will be taken out and dusted off at family gatherings when they laugh and say, “Remember when?”
  

Picture
"Beach Bums" was hooked from a family photo and is 24" x 36" in size. On burlap and mostly a #5 cut. The idea for the rug came from the Riverport Rug Show where someone had displayed a rug of their sisters. This inspired Pam to hook one herself. The siblings had been walking on Crescent Beach when the picture was taken. Pam is #5 from the left.
Picture
"See Turtles Tango" design by Susan Leslie. Hooked for her daughter. 43" x 20"
Picture
"Dawn's Early Morn" by Christine Little. 34" x 26 1/2" with #5 and #6 cuts. I adapted one of my rooster patterns into a farm scene per Pam's request. I named it and was told that Dawn was actually her first name. How appropriate!
Picture
"Jacobean Runner" design by Christine Little. 26" x 71 1/2"
Picture
"Persian Tree of Life" design by Jeanne Field. 31" x 39" on burlap, with #3, #4 & #5 cuts.
1 Comment
<<Previous
    Picture
    Picture
    Picture
    Christine Little has been ranked #5​ out of the 60 top rug hooking bloggers by Rug Hooking Magazine!

    Picture
    Picture
    Max Anderson, Australia, recipient of my Nova Scotia Treasures rug.  An award of excellence for promoting Canada through his writing.  
    Picture
    Picture

    RSS Feed

    Archives

    May 2025
    March 2025
    February 2025
    August 2024
    January 2024
    May 2023
    April 2023
    March 2023
    February 2023
    January 2023
    July 2022
    March 2022
    February 2022
    January 2022
    November 2021
    October 2021
    July 2021
    March 2021
    February 2021
    January 2021
    December 2020
    November 2020
    September 2020
    August 2020
    June 2020
    May 2020
    April 2020
    March 2020
    February 2020
    December 2019
    November 2019
    October 2019
    September 2019
    August 2019
    July 2019
    May 2019
    April 2019
    March 2019
    February 2019
    January 2019
    December 2018
    November 2018
    October 2018
    September 2018
    August 2018
    July 2018
    June 2018
    May 2018
    April 2018
    March 2018
    February 2018
    January 2018
    December 2017
    November 2017
    October 2017
    August 2017
    July 2017
    June 2017
    May 2017
    April 2017
    March 2017
    February 2017
    January 2017
    December 2016
    November 2016
    October 2016
    September 2016
    August 2016
    July 2016
    June 2016
    May 2016
    April 2016
    March 2016
    February 2016
    January 2016
    December 2015
    November 2015
    October 2015
    September 2015
    August 2015
    July 2015
    June 2015
    May 2015
    April 2015
    March 2015
    February 2015
    January 2015
    December 2014
    November 2014
    October 2014
    September 2014
    August 2014
    July 2014
    June 2014
    May 2014
    April 2014
    March 2014
    February 2014
    January 2014
    December 2013
    November 2013
    October 2013
    September 2013
    August 2013
    July 2013
    June 2013
    May 2013
    April 2013
    March 2013
    February 2013
    January 2013
    December 2012
    November 2012
    October 2012

    Picture
    Picture
    Gift Certificates are available for that special rug hooker in your life!  Any denomination, no expiry date! 

    Categories
    (Click on the categories for past blogs)

    All
    Announcements
    Beginner Class
    Christmas
    Colour Planning
    Contests
    Copyright
    Coupon
    Customer Rugs
    Cutter Servicing
    Dyeing
    Equipment
    Featured Hooker
    Giveaway Draw
    Guest Blogger
    Guest Blogger
    Health & Fitness
    Home & Heart
    Hooked Rugs
    Hooking Groups
    Hook In Talk
    Initially Yours
    Jibber Jabber
    Just A Bit Of Fun!
    Life's Experiences
    Life's Experiences
    New Design
    New Ideas
    Pattern Of The Week
    Patterns Hooked
    Pets
    Rants
    Recipes
    Rememberingfbe7326ff7
    Rug Schools
    Show & Tell
    Show-tell
    The Rant
    Tips Technique
    Tips Techniquef0cd117ab4
    Visitors
    Workshops

    Picture
    Picture
    Picture


    Picture
    We have a pot to "Fiz" in!

Shop Hours:
Monday - Friday 10:00 AM - 5:00 PM 
Saturdays 12:00 PM - 4:00 PM
We are closed during ice and snow storms
​so please call ahead.  If school is cancelled we probably are closed as well.  

Toll Free: 1-855-624-0370
Local:  902-624-0370​
[email protected]

498 Main Street
P.O. Box 437
Mahone Bay, N.S.
Canada B0J 2E0

​Follow us and keep up to date
on our specials, new products
​and events!
Picture
Picture
Picture


Home
Shop
Ordering
Blog
Our Story
Workshops

Contact Us


​​​© Copyright 2023 Encompassing Designs. Website by SKYSAIL