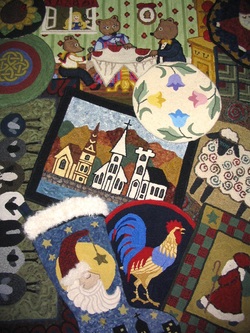
The compass rose is the catalyst behind my company name and the start of my business. Encompassing Designs, a clever suggestion by hubby, encompasses all genres of design these days but my humble beginnings were with the Compass Rose. I looked around and didn't see anyone designing compass patterns so I figured there might be a niche market. I studied old maps and did research on the internet and found compass roses that were unique, very detailed, magnificent works of art. I modified these patterns to come up with the line of designs I sell. Not having to worry about copyright when the designs are from the late 1400's to the 1800's, allowed me to get creative with the patterns and make unique borders to fit. My hubby is an avid sailor and the love of the sea is reflected in our home and the shop. All things in and around the ocean are my favourite topics for design.
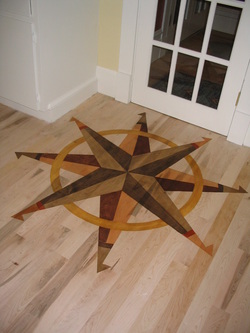
Not only does my passion for the compass rose come alive through rug hooking, I also enjoy staining them on the floors in our home and the two buildings that have housed my shop. The picture on the left is the design from my previous shop and the points of the compass are stylized rug hooks.
They are so incredibly easy to do. All you need is a ruler, a protractor and a straight stick for making circles and a compass to find north. Water based stain is best as it dries quickly and Clean Edge tape prevents bleeding of the stain. Most of these compass roses took less than two hours to create. The only difficult part is being on your knees so grab a cushion. When I first started the business I fully intended to hire myself out to create compasses in client's homes but there was never any time. I helped a few people get started on their own and don't mind dispensing advice if anyone out there is interested.
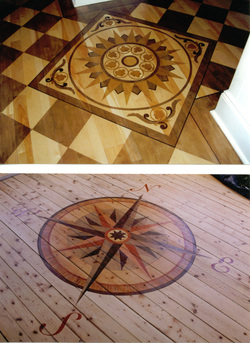
The one on the top right is taken from the pattern Gothic Rose and stained on our kitchen floor and greets visitors as they come in the door. The one on the bottom is my husband's study before the rest of the floor was stained darker. Of course these can only be put on the floor with bare wood. Once sealed with varnish you have to use paint to make the rose, equally beautiful but not has hard wearing as stain.
Not only does my passion for the compass rose come alive through rug hooking, I also enjoy staining them on the floors in our home and the two buildings that have housed my shop. The picture on the left is the design from my previous shop and the points of the compass are stylized rug hooks.
They are so incredibly easy to do. All you need is a ruler, a protractor and a straight stick for making circles and a compass to find north. Water based stain is best as it dries quickly and Clean Edge tape prevents bleeding of the stain. Most of these compass roses took less than two hours to create. The only difficult part is being on your knees so grab a cushion. When I first started the business I fully intended to hire myself out to create compasses in client's homes but there was never any time. I helped a few people get started on their own and don't mind dispensing advice if anyone out there is interested.
The one on the top right is taken from the pattern Gothic Rose and stained on our kitchen floor and greets visitors as they come in the door. The one on the bottom is my husband's study before the rest of the floor was stained darker. Of course these can only be put on the floor with bare wood. Once sealed with varnish you have to use paint to make the rose, equally beautiful but not has hard wearing as stain.
 |  |
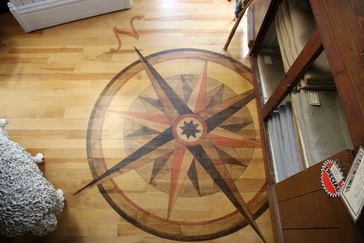
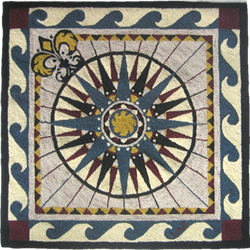
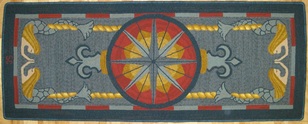
The bottom picture is my current shop. Even though we were in a rush to finish the renovation and move my business in, I took the time to complete this compass rose, my signature of sorts. There are so many variations of the compass rose, the potential designs would be endless. The designs have served the shop well over the years, although it takes a certain individual, usually someone nautically inclined to want to hook these seafaring geometric rugs. Below are a few of the designs we sell at the shop. Everyone needs to know where north is so they are not only beautiful, but practical as well. Square rugs can be displayed with the Fleur-de-lis always pointing north.
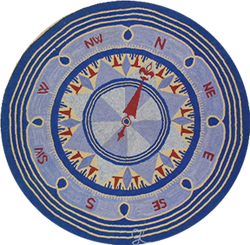 Commodore's Cuff | 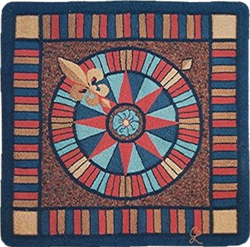 Mexicali Rose | 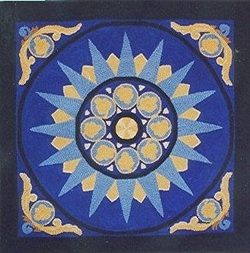 Gothic Revival | 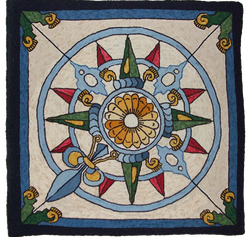 Magellan's Way |
 Red Sky At Night | 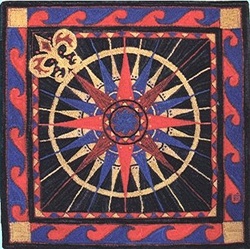 Red Sky At Night | 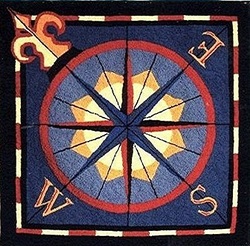 Sunny Day | 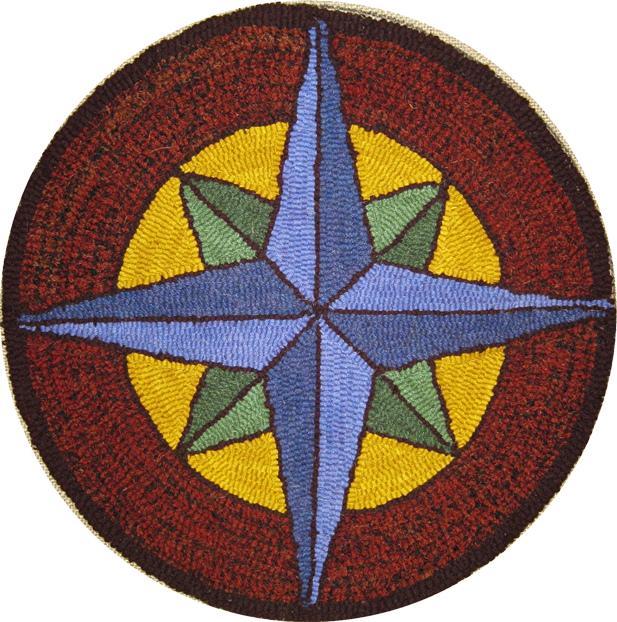 Compass Chair Pad |
 This nautical runner sports mermaids at each end. |  Celtic style, very sassy! |
 Americana Rose | 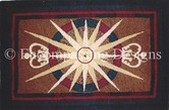 Crowning Touch | 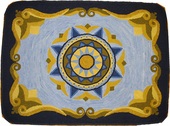 Marjorie Eileen, named after my mother. |
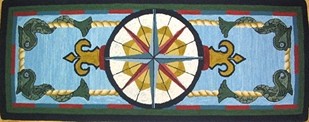
This nautical runner has sea monsters on the two ends.


 RSS Feed