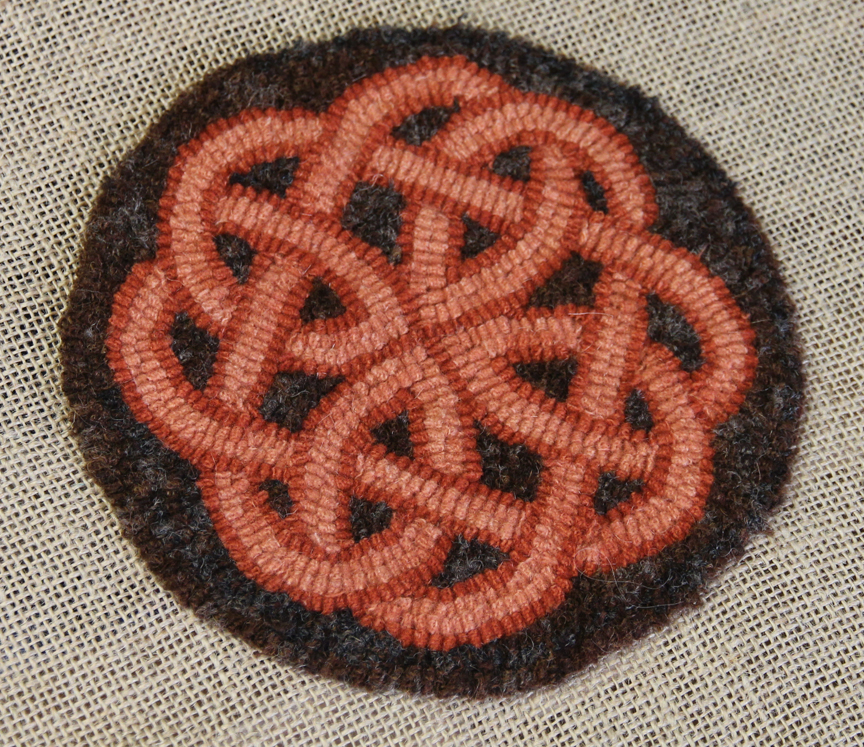
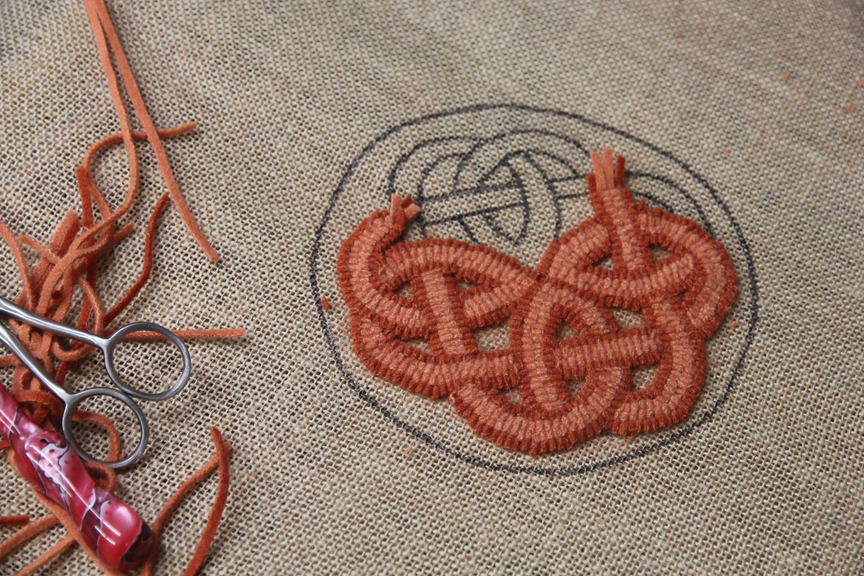
 The finished Knot. Hooking time: 1 1/2 hours. The knot was hooked in #4 and the background plaid was in #5. Finished piece 6" diameter. Hooked on fine weave Scottish burlap. | 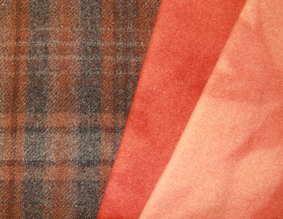 I've been trying to stay away from blues, reds and golds, my favourite colours and expand my horizen. So I thought orange would make a nice change. I have nothing against orange, other than it reminds me of the 70's and my entire house decor, that and harvest gold and green!!! Way too much...needed to move on and the primary colours fit like a glove...my new house decor. Maybe in another decade I'll hang my hat on purple and pink. |
The only difficult part about hooking a Celtic Knot is drawing the design. They aren’t much fun to draw, even with a pattern, oh so many lines! But once that job is out of the way, the hooking can be as difficult as you want it to be or so darn simple you wonder why you hadn’t done it
before!
The little Celtic piece I hooked for this demo came from the Book of Kells, a simple Knot yet full of interwoven charm. This is a simple piece to colour plan, using two colours for the knot and one for the background.
In any rug hooking pattern, each part of every object is broken down and dealt with as an individual unit. The entire pattern is a sum of many parts. For instance, in a pattern of a sunflower, every petal is dealt with as a separate object, hooked one at a time until they all become joined and create a flower. Each petal is outlined and then filled in and then you move to the next and so on. A Celtic knot is also like that. Every link of the knot is to be viewed as a separate object and hooked accordingly. Every time there is a cross over or under, this divides each link from the next and each segment will be viewed as a separate link.
Before you begin you have to determine the cut to be used to fit the design. You can either measure the distance across with a ruler and then figure out what cut will fill the space using four strips or you can work with a visual reference, cut four pieces of various cuts and lay them across the width of the segment to see if they will work. For the demo piece I used a #4 cut and as I went along I made a few corrections to the lines, making them wider if needed by hooking directly on the line etc. (Usually the rule is to stay inside the lines of any object so that it retains the size intended by the designer.) Celtic Knot patterns are usually never perfectly even. Most are hand done so there are variances in the widths so you might need to do a bit of correcting as you go.
For a simplified knot all you need are two contrasting colours or two tones of a single colour, a medium and a dark and a background colour. I used rusty orange wool I had left over from a recent kit and in the photo I showed a couple of other choices. I had so much fun hooking this little piece I thought I might do several more in an array of colours for the shop.
I’ve hooked a few Celtic pieces before and I’ve used a herringbone and a solid for the knots. The Herringbone was darker and did the outlining and the solid filled in the centers. The herringbone also provided a bit of textural interest. I’m a lefty so I’ll talk in lefty terms. I chose my darkest value of rusty orange and hooked along the outside line of one of the segments. I started where one segment crossed over another and left my tail about ½ inch high. Then I chose the lighter value and hooked it up against the first strip, starting at the dissecting line. Do not skip rows here or your knot segment will be wider than planned. Then hook the second lighter strip and follow with the last dark strip. Hooking in this order will allow each segment to be the same size. If you hook the two darker, outer strips first and the drawing isn’t totally even, each link of the knot may not be the same width so you run the risk of either having too little space to put in the two center strips or there could be a gap so they don’t come together properly. This way ensures every part of the knot will be exactly the same width.
Do not cut the beginning tails or ending tails until the surrounding segments are hooked. The extra height allows easy hooking around the finished segments. The ends will stand up straight and be easy to hook around and later when you snip them they will be perfectly embedded
and be a crisp end to that row.
Don't hook the background behind the knot until you finish the segments as they may not be the same size due to corrections to the width as mentioned above. I left them all until the end and did them all at once.
Note: Another tip, if you are a left handed rug hooker it would be best to start from the right side of the segment and work to the left and vice versa for right handed. It is always easier to hook without having your tool over an existing row.
Note: Mix it up a bit. Use the lighter shade on the outside of the Knot for a different look.
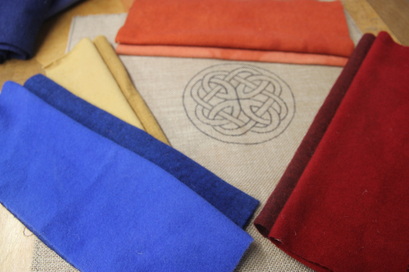
Start with drawing the Knot or purchasing a pattern. Shown are several colour choices, some with herringbones for the darker shade and solid for the lighter. I chose the rusty orange for the demo.
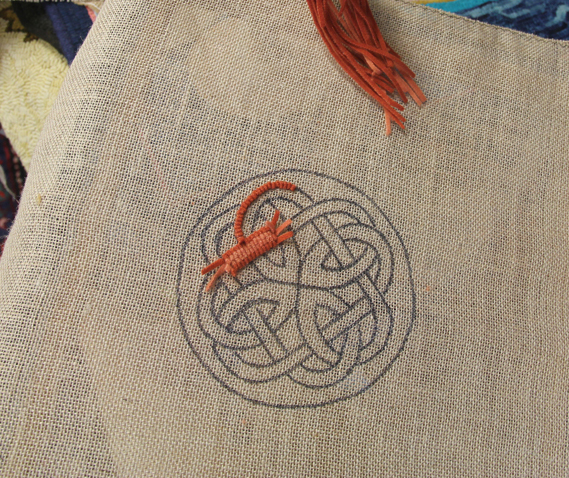 Beginnings...I've hooked a straight segment to start and am now hooking the adjoining link. Note the tail is butted up against the completed segmented and left high. |
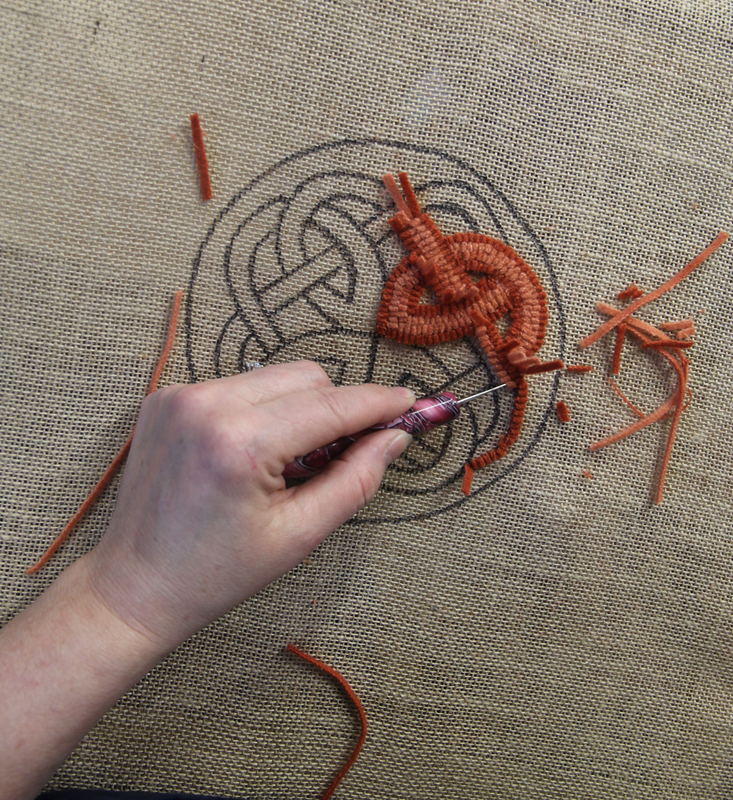 Note I am a lefty working from right to left on the segments. My tails are left high at the start and at the end. Left high they are easier to hook around when doing the next segment and makes for a clean cut. |
 Without thinking about the Knot as a whole, hooking each segment hooks quickly and voila you have a finished Knot before you know it. |
 Celtic Snowflake, done with two different colours for a more dramatic look. The background of the Knot was done in a spot of pale blue and grey and the rest is an over-dyed plaid using County Blue to coordinate. | 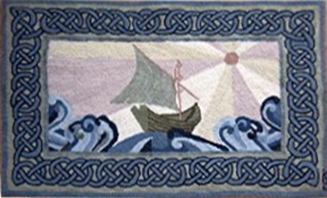 Done as a commission design, this lovely Celtic Boat is framed with an intricate Knot. It took a long time to draw out and match the size the client wanted. I have a lot of respect for the artists who do these designs...patience makes perfect! | 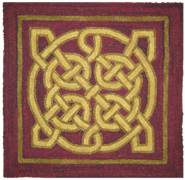 Another simple example. Three colours make up this pillow top. A herringbone for the outline and a solid for the center of the knot. The background was lovely burgundy plaid with a gold fleck through it. |
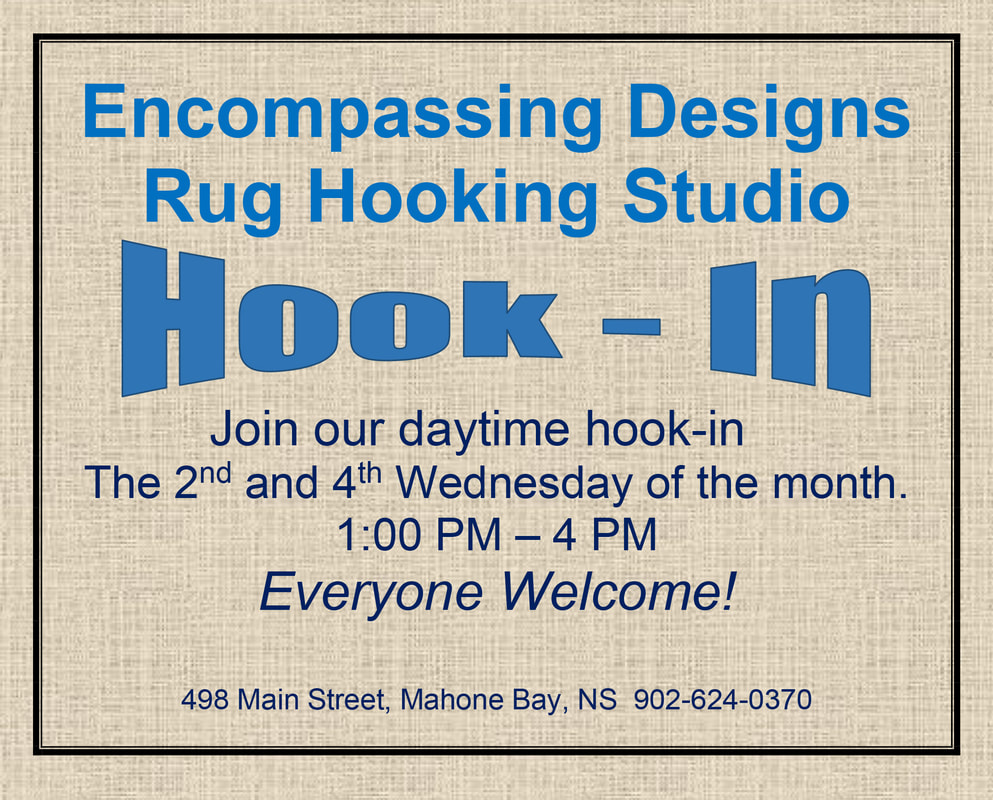


 RSS Feed