Christmas Ornaments 3" - 6" High

Today’s patterns for the challenge are small but there’s 15 of them so it’s a big splash. Sweet seasonal ornaments to hook for your decorated home for Christmas 2018. There’s plenty of time to start and be finished by the time the tree comes into the house but they can be hung anywhere, or given as gifts but I guarantee wherever they end up they will bring Christmas joy.
Don’t fret about hooking small items most of these little darlings can be hooked with a #5-#6 cut for non-detailed areas, but there will be a few small motifs that will need a #3 or #4.
And believe it or not, finishing these little rugs is a walk in the park. No, you don't have to try to fold the backing around all the irregular edges in the usual fashion, this is a quick and easy way to have perfectly cut out shapes.
Hook all the ornaments first, then press them. After steaming, add any bling or items like buttons and beads for sparkle. Then cut them out, leaving a bit of backing around each one, perhaps a half inch. You don’t have to zig zag around each ornament because all the excess will all be cut off.
Use a fabric, fast drying craft glue, one that will dry clear in case some gets accidentally smeared on the front side. On the underside, squeeze glue all along the unhooked edge and the last row of loops. Now smooth out the glue line with a flat edge of plastic cut from an ice cream container and this will make sure a bit of the glue oozes through the unhooked bit of linen, coating it on both sides.
Once the glue is dry, cut along the edge of the last row of loops as closely as possible without nipping the row of loops on the edge.
Sew or glue on a hanger, a piece of jute or ribbon, a few stitches will hold it and you don’t have to be too neat and fussy as this will be covered with the backing material.
For a backing, red plaid shirts from second hand stores, velvet or any Christmas coloured wool would be perfect but try to coordinate the backing with the colours in each ornament for a custom feel. Now place the ornament on the material for a pattern, using chalk or a marker to draw the line then cut them out slightly larger than the shape of the ornament, just so that the wool can be turned under so no fraying will show on the edge. You can glue this directly on the ornament, not at the very edge though, in about an 1/2" so that you have enough room to fold the edge of the wool in so there is a nice fold to sew with. Gluing the fabric to the back is a quick way to attach it so it holds the fabric in place while you sew the edge. The glue dries fast so by the time you've completed all these steps, the first one you worked on will be dry enough to sew the edges together.
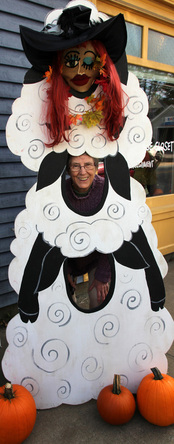
When sewing, fold over the edge and catch the last row of loops and then tug the thread to pull the backing and loop together to close any gaps. It’s slick and easy, I’ve used this technique for all my little Ornamental Santas on display in the shop.
Don’t fret about hooking small items most of these little darlings can be hooked with a #5-#6 cut for non-detailed areas, but there will be a few small motifs that will need a #3 or #4.
And believe it or not, finishing these little rugs is a walk in the park. No, you don't have to try to fold the backing around all the irregular edges in the usual fashion, this is a quick and easy way to have perfectly cut out shapes.
Hook all the ornaments first, then press them. After steaming, add any bling or items like buttons and beads for sparkle. Then cut them out, leaving a bit of backing around each one, perhaps a half inch. You don’t have to zig zag around each ornament because all the excess will all be cut off.
Use a fabric, fast drying craft glue, one that will dry clear in case some gets accidentally smeared on the front side. On the underside, squeeze glue all along the unhooked edge and the last row of loops. Now smooth out the glue line with a flat edge of plastic cut from an ice cream container and this will make sure a bit of the glue oozes through the unhooked bit of linen, coating it on both sides.
Once the glue is dry, cut along the edge of the last row of loops as closely as possible without nipping the row of loops on the edge.
Sew or glue on a hanger, a piece of jute or ribbon, a few stitches will hold it and you don’t have to be too neat and fussy as this will be covered with the backing material.
For a backing, red plaid shirts from second hand stores, velvet or any Christmas coloured wool would be perfect but try to coordinate the backing with the colours in each ornament for a custom feel. Now place the ornament on the material for a pattern, using chalk or a marker to draw the line then cut them out slightly larger than the shape of the ornament, just so that the wool can be turned under so no fraying will show on the edge. You can glue this directly on the ornament, not at the very edge though, in about an 1/2" so that you have enough room to fold the edge of the wool in so there is a nice fold to sew with. Gluing the fabric to the back is a quick way to attach it so it holds the fabric in place while you sew the edge. The glue dries fast so by the time you've completed all these steps, the first one you worked on will be dry enough to sew the edges together.
When sewing, fold over the edge and catch the last row of loops and then tug the thread to pull the backing and loop together to close any gaps. It’s slick and easy, I’ve used this technique for all my little Ornamental Santas on display in the shop.


 RSS Feed