By Guest Blogger Mary Doig
How to Make a Christmas Stocking
Of note:
If your stocking pattern is not already on red dot transfer material, see instruction number 5 below and make a template of it before you start hooking.
A warning – I am NOT a seamstress, so there may be easier or better ways to assemble a stocking. However, this system works for me, and I hope it works for you!
1. Pattern and swatches are ready to go. Linen is zigzagged twice approx 0.5” from the pattern lines. To prevent raveling of the pattern, raw edges are zigzagged once. Swatches are labeled with the dye formula, which makes it easier to dye more if the material runs out.
2. Hooking is in progress. I am generally happy with how the colours are working out, although I think the strong purple line in the center of the starfish is too much. Eventually it is changed to a beaded line of medium and light purple.
3. Hooking is finished and has been pressed.
4. Beading is finished. New glass beads and pearls from a broken strand add some bling.
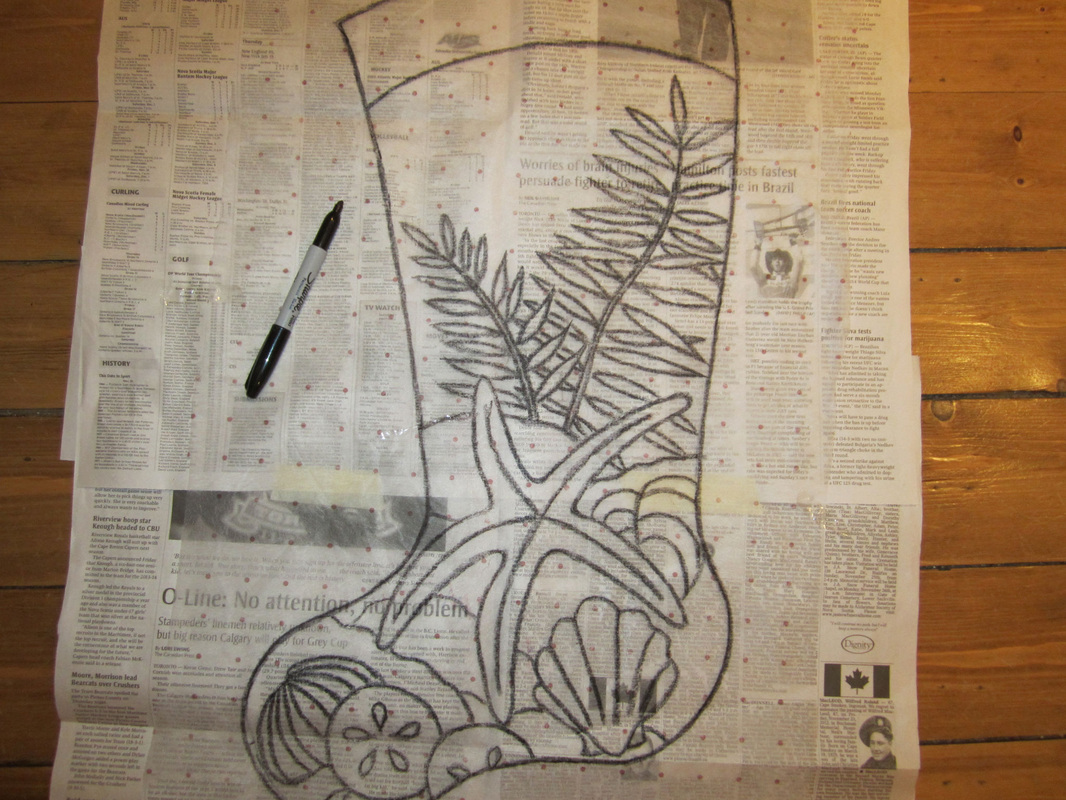
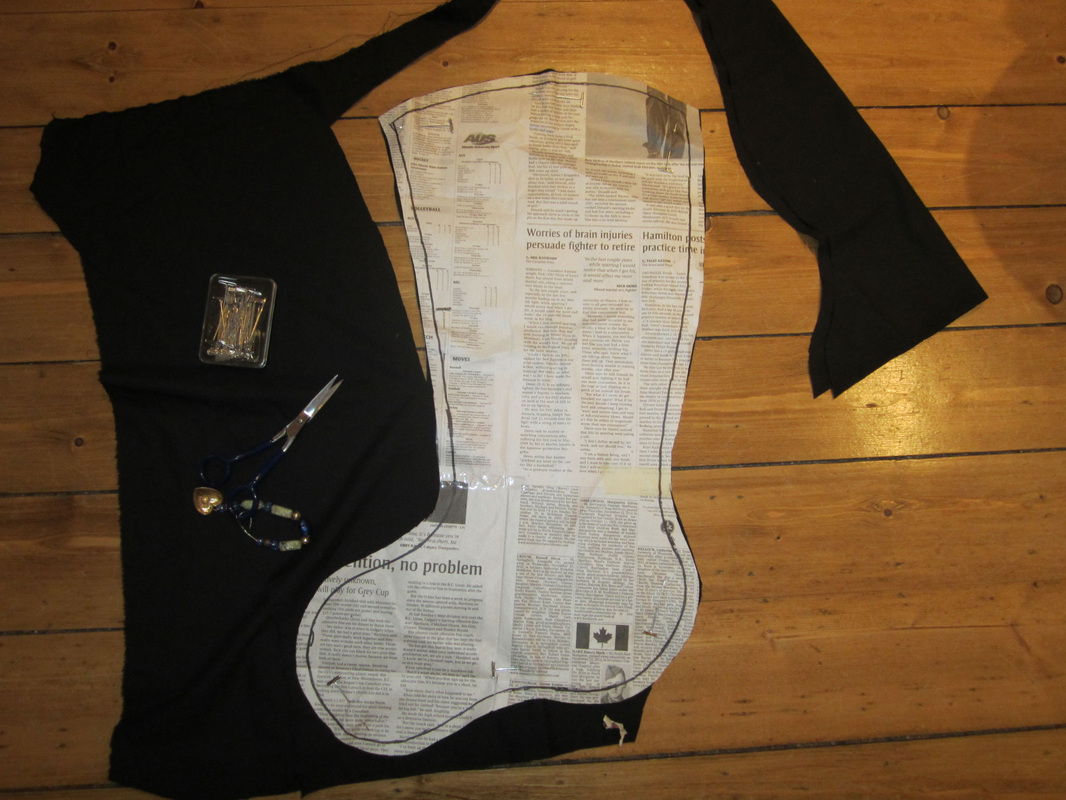
5. Make a template for the stocking backing, by copying from the red dot pattern to newspaper, tracing around the stocking outline with sharpie marker to transfer the outline. If you have not made your own pattern, I would advise copying its outline to red dot before you start hooking, using a china marker so as not to mar the pattern, and then use the red dot to complete this step.
6. Cut out the newspaper template, adding ½” for seam allowance.
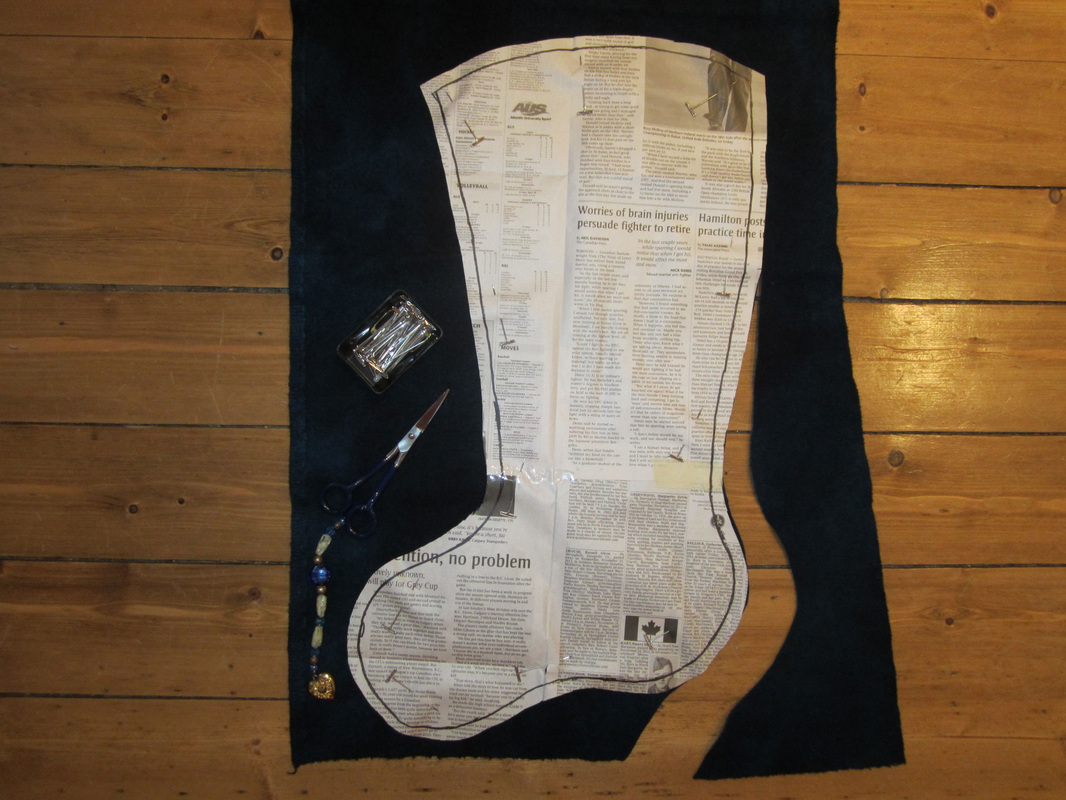
7. Place the template on the material you are using for your stocking backing. I use a piece of wool that has been dyed the main colour of my stocking. Pin it in place and cut around the template.
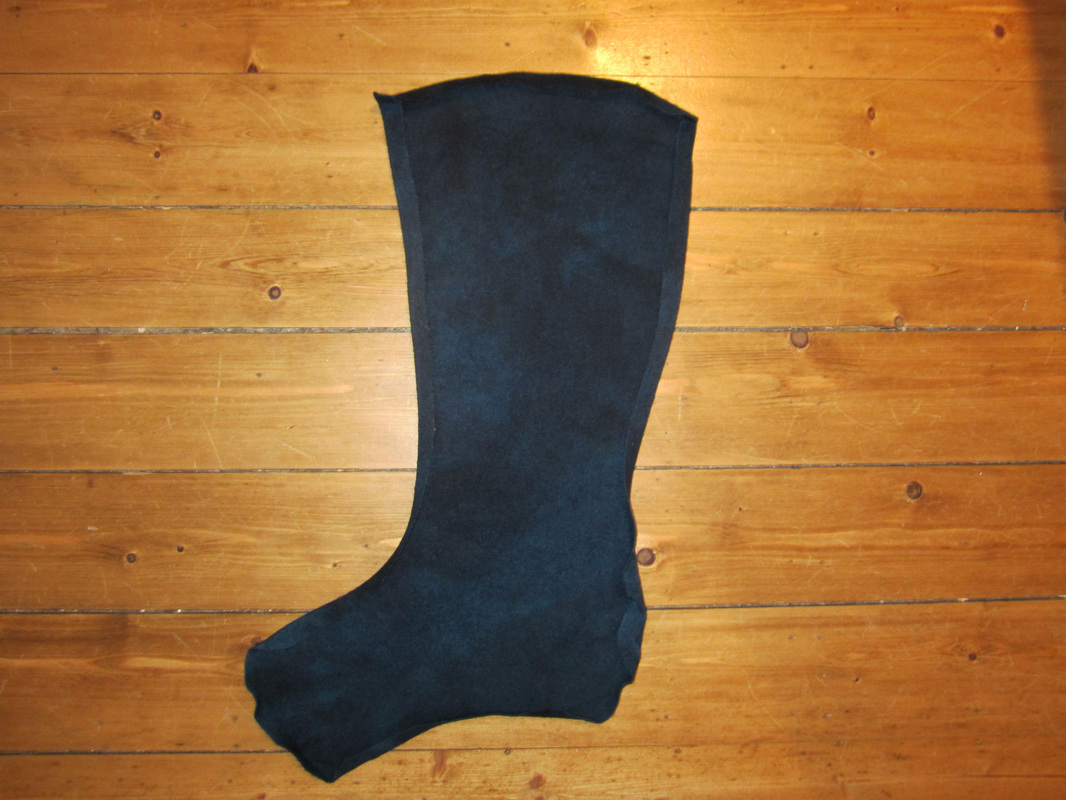
8. The stocking backing is ready for assembly.
9. Cut the lining from a piece of cotton, doubled over. Place template on cotton and pin in place. Cut around template.
10. Two pieces of stocking lining are ready for assembly.
11. Tear one 10” x 2.5” piece of material for tab. I tear the material because it automatically finds the straight of grain. I use the cotton lining fabric for the tab. You may prefer to use wool.
12. Cut excess linen away from the stocking front. I cut about ¼” beyond the zigzagging around the stocking. Make nicks through the zigzagging at the curviest parts, which will help in the next step when you press the linen to the wrong side.
13. Press excess linen to the wrong side of stocking front.
14. Stitch excess linen using a running stitch, to hold it in place. Use a neutral colour thread and don’t poke the needle all the way through the hooking. Stitching should not be visible on the right side of the stocking front. On the way around the stocking, while stitching, reinforce the places that you have nicked through the zigzagging, to ensure that they won’t fray.
15. Press ½” to the wrong side of stocking backing.
16. Pin the stocking front and backing together, with wrong sides together.
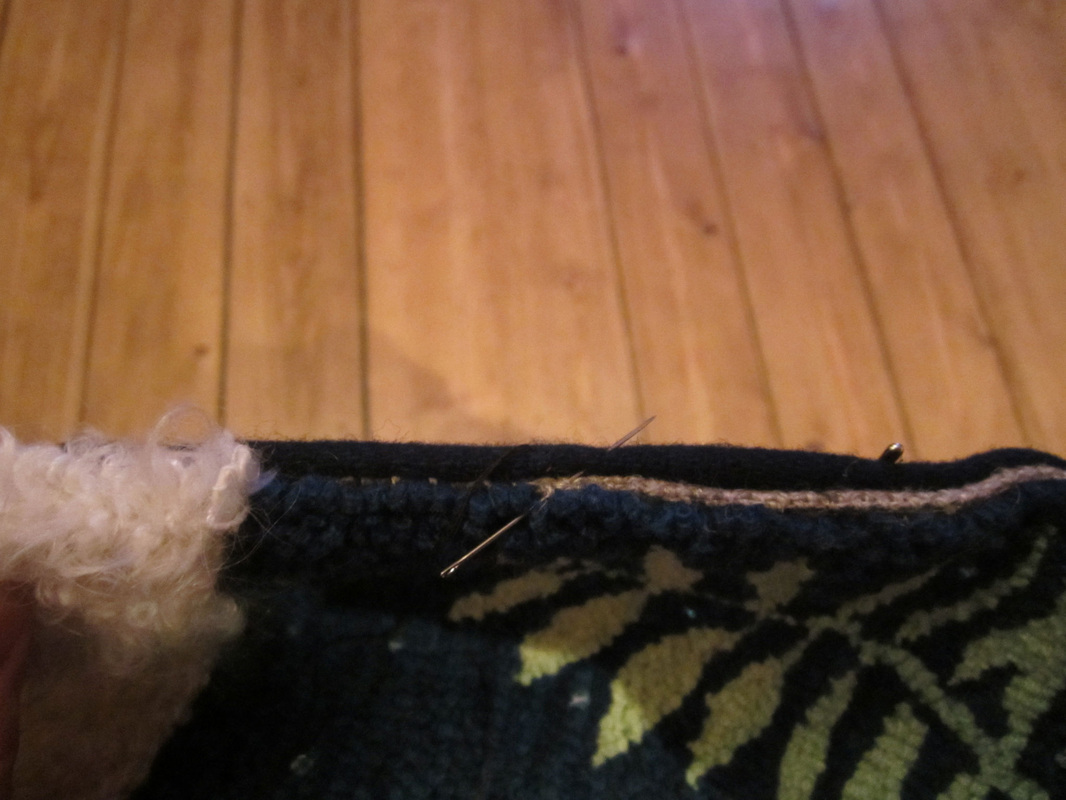
17. By hand, slip stitch the front to the back, stitching as close to the hooking as possible.
18. Lining and tab: Press ½” to the wrong side at the top of each lining piece. With right sides together, stitch ½” seam allowance on sewing machine, from the right hand top around to the left hand top of the lining, leaving the top open. For tab, fold right sides together and stitch ½” across top and down the side, leaving bottom open. Turn right side out (a chopstick is helpful for this) and press.
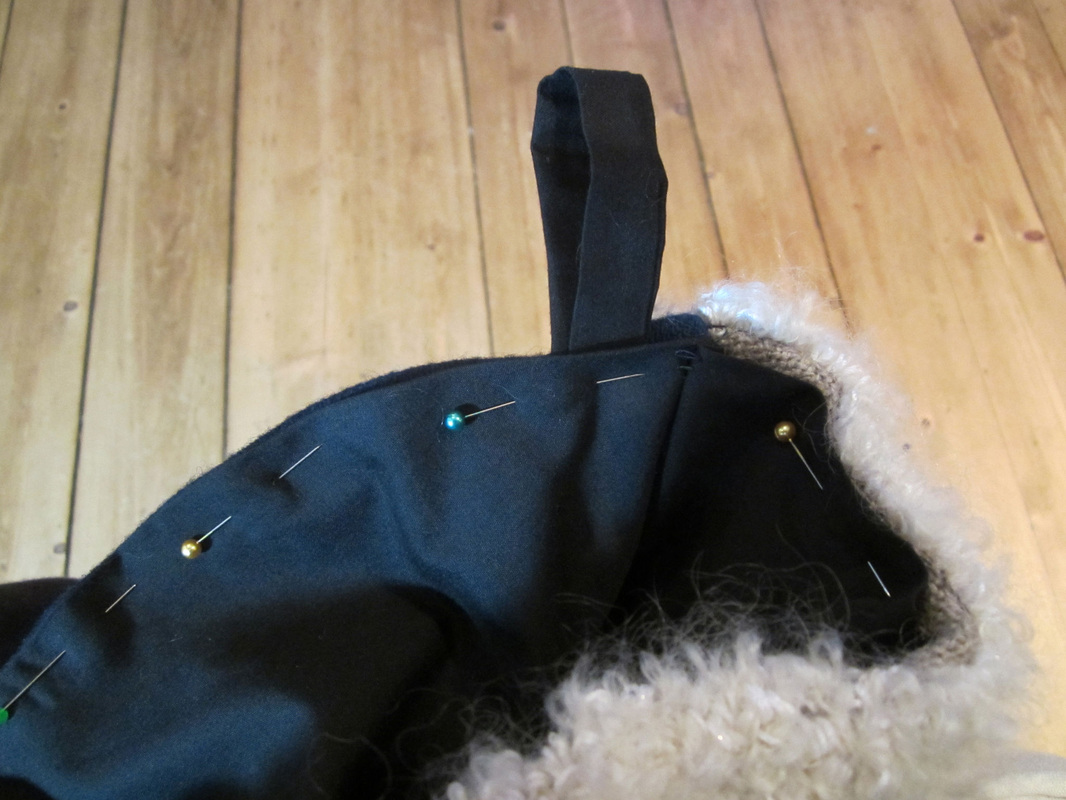
19. Insert lining into the stocking, with wrong sides together. Double the tab over to form a loop and slip it in between lining and backing. Slipstitch together by hand, around the top of the stocking and through the tab, so the tab is secure.
20. Tack at the heel, instep and toe by stitching a couple of stitches through the backing, lining and front. This should be invisible. It helps to hold the lining down inside the stocking.
21. Stocking is finished!
How to Make a Christmas Stocking
Of note:
If your stocking pattern is not already on red dot transfer material, see instruction number 5 below and make a template of it before you start hooking.
A warning – I am NOT a seamstress, so there may be easier or better ways to assemble a stocking. However, this system works for me, and I hope it works for you!
1. Pattern and swatches are ready to go. Linen is zigzagged twice approx 0.5” from the pattern lines. To prevent raveling of the pattern, raw edges are zigzagged once. Swatches are labeled with the dye formula, which makes it easier to dye more if the material runs out.
2. Hooking is in progress. I am generally happy with how the colours are working out, although I think the strong purple line in the center of the starfish is too much. Eventually it is changed to a beaded line of medium and light purple.
3. Hooking is finished and has been pressed.
4. Beading is finished. New glass beads and pearls from a broken strand add some bling.
5. Make a template for the stocking backing, by copying from the red dot pattern to newspaper, tracing around the stocking outline with sharpie marker to transfer the outline. If you have not made your own pattern, I would advise copying its outline to red dot before you start hooking, using a china marker so as not to mar the pattern, and then use the red dot to complete this step.
6. Cut out the newspaper template, adding ½” for seam allowance.
7. Place the template on the material you are using for your stocking backing. I use a piece of wool that has been dyed the main colour of my stocking. Pin it in place and cut around the template.
8. The stocking backing is ready for assembly.
9. Cut the lining from a piece of cotton, doubled over. Place template on cotton and pin in place. Cut around template.
10. Two pieces of stocking lining are ready for assembly.
11. Tear one 10” x 2.5” piece of material for tab. I tear the material because it automatically finds the straight of grain. I use the cotton lining fabric for the tab. You may prefer to use wool.
12. Cut excess linen away from the stocking front. I cut about ¼” beyond the zigzagging around the stocking. Make nicks through the zigzagging at the curviest parts, which will help in the next step when you press the linen to the wrong side.
13. Press excess linen to the wrong side of stocking front.
14. Stitch excess linen using a running stitch, to hold it in place. Use a neutral colour thread and don’t poke the needle all the way through the hooking. Stitching should not be visible on the right side of the stocking front. On the way around the stocking, while stitching, reinforce the places that you have nicked through the zigzagging, to ensure that they won’t fray.
15. Press ½” to the wrong side of stocking backing.
16. Pin the stocking front and backing together, with wrong sides together.
17. By hand, slip stitch the front to the back, stitching as close to the hooking as possible.
18. Lining and tab: Press ½” to the wrong side at the top of each lining piece. With right sides together, stitch ½” seam allowance on sewing machine, from the right hand top around to the left hand top of the lining, leaving the top open. For tab, fold right sides together and stitch ½” across top and down the side, leaving bottom open. Turn right side out (a chopstick is helpful for this) and press.
19. Insert lining into the stocking, with wrong sides together. Double the tab over to form a loop and slip it in between lining and backing. Slipstitch together by hand, around the top of the stocking and through the tab, so the tab is secure.
20. Tack at the heel, instep and toe by stitching a couple of stitches through the backing, lining and front. This should be invisible. It helps to hold the lining down inside the stocking.
21. Stocking is finished!
 1. Pattern and swatches are ready to go. Linen is zigzagged twice approx 0.5” from the pattern lines. To prevent raveling of the pattern, raw edges are zigzagged once. Swatches are labeled with the dye formula, which makes it easier to dye more if the material runs out. | 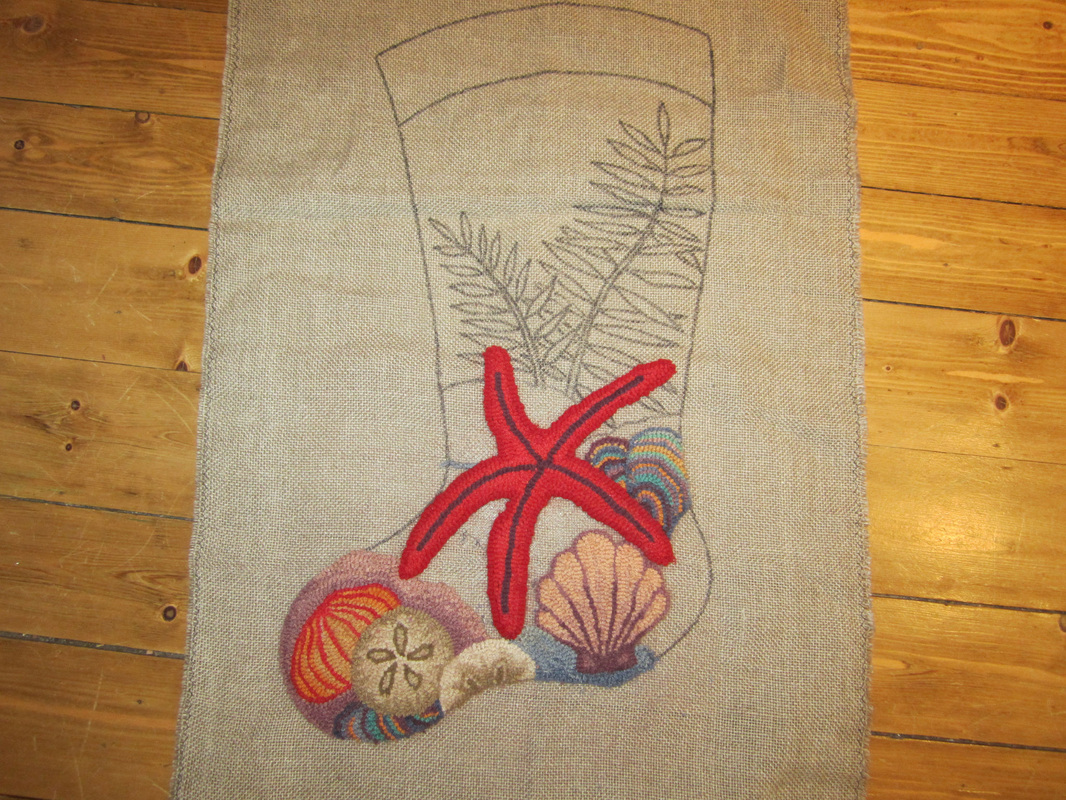 2. Hooking is in progress. I am generally happy with how the colours are working out, although I think the strong purple line in the center of the starfish is too much. Eventually it is changed to a beaded line of medium and light purple. |
 3. Hooking is finished and has been pressed. |  4. Beading is finished. New glass beads and pearls from a broken strand add some bling. |
 5. Make a template for the stocking backing, by copying from the red dot pattern to newspaper, tracing around the stocking outline with sharpie marker to transfer the outline. If you have not made your own pattern, I would advise copying its outline to red dot before you start hooking, using a china marker so as not to mar the pattern, and then use the red dot to complete this step. | 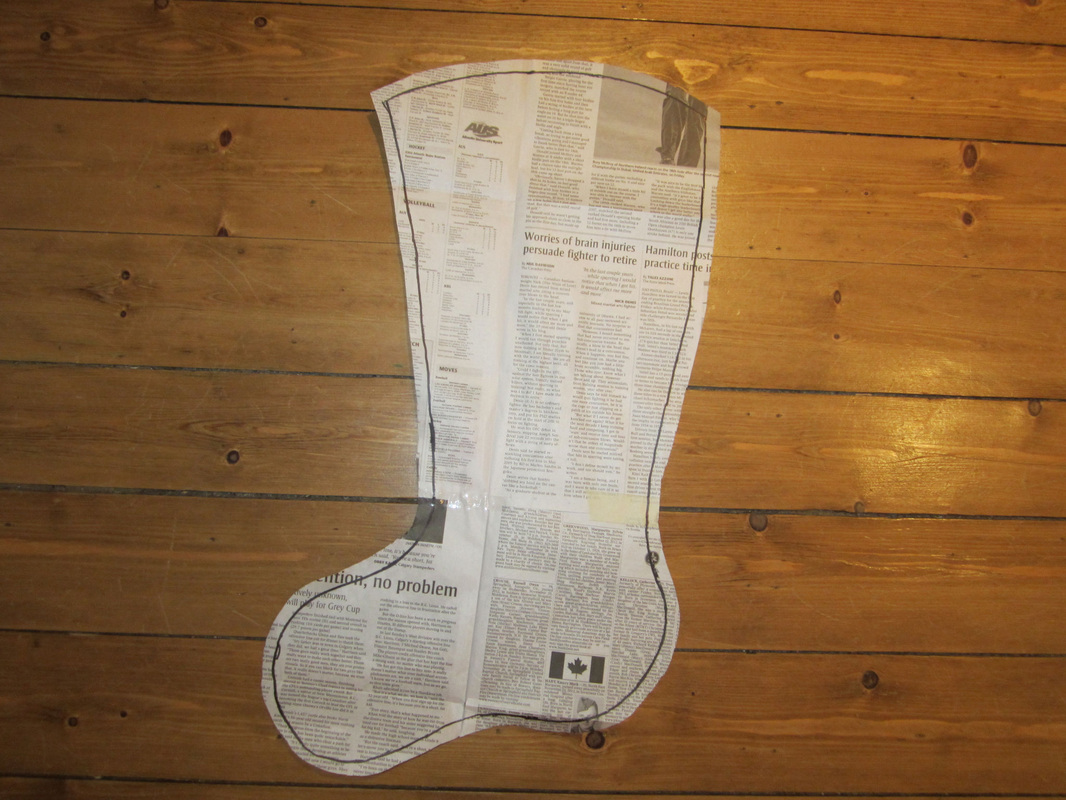 6. Cut out the newspaper template, adding ½” for seam allowance. |
 7. Place the template on the material you are using for your stocking backing. I use a piece of wool that has been dyed the main colour of my stocking. Pin it in place and cut around the template. | 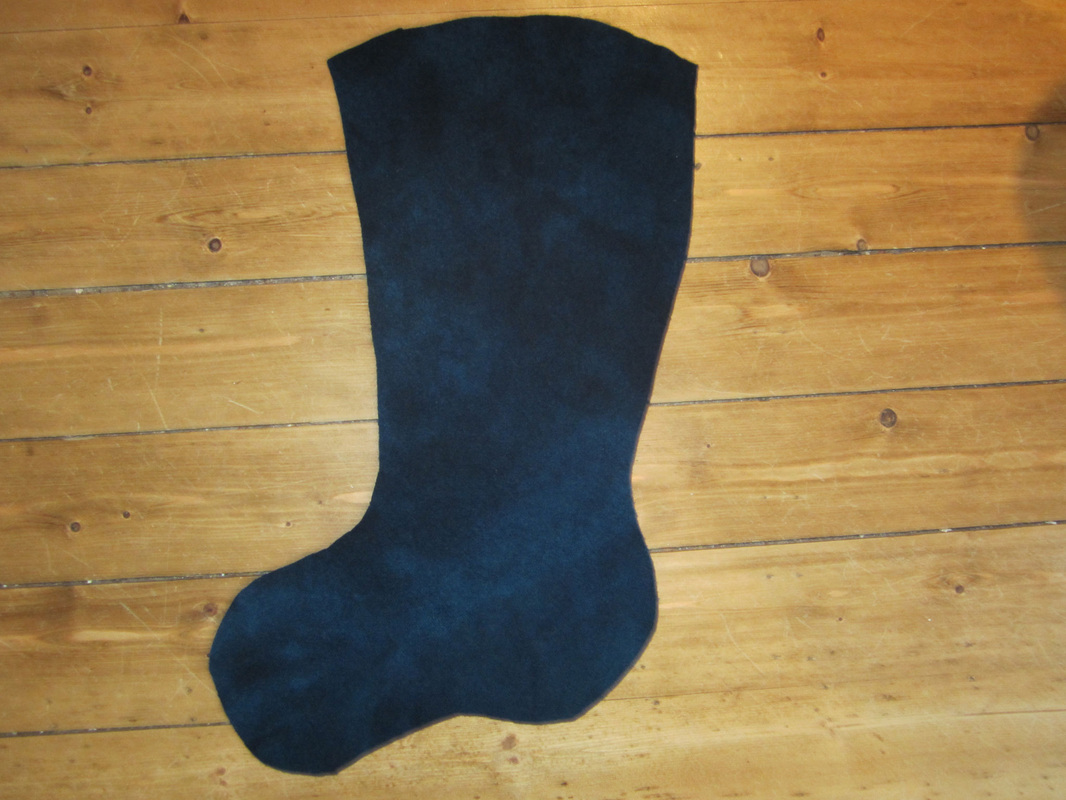 8. The stocking backing is ready for assembly. |
 9. Cut the lining from a piece of cotton, doubled over. Place template on cotton and pin in place. Cut around template. | 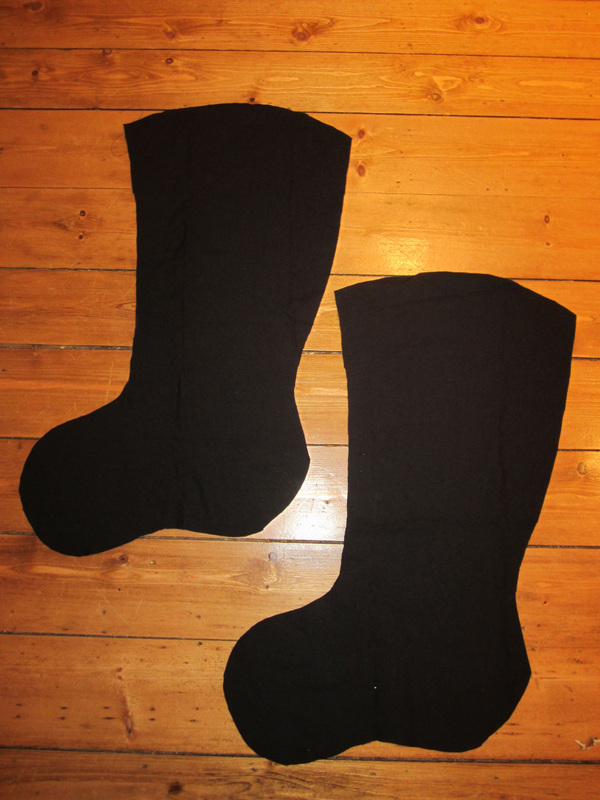 10. Two pieces of stocking lining are ready for assembly. |
 11. Tear one 10” x 2.5” piece of material for tab. I tear the material because it automatically finds the straight of grain. I use the cotton lining fabric for the tab. You may prefer to use wool. |  12. Cut excess linen away from the stocking front. I cut about ¼” beyond the zigzagging around the stocking. Make nicks through the zigzagging at the curviest parts, which will help in the next step when you press the linen to the wrong side. |
 13. Press excess linen to the wrong side of stocking front. |  14. Stitch excess linen using a running stitch, to hold it in place. Use a neutral colour thread and don’t poke the needle all the way through the hooking. Stitching should not be visible on the right side of the stocking front. On the way around the stocking, while stitching, reinforce the places that you have nicked through the zigzagging, to ensure that they won’t fray. |
 15. Press ½” to the wrong side of stocking backing. | 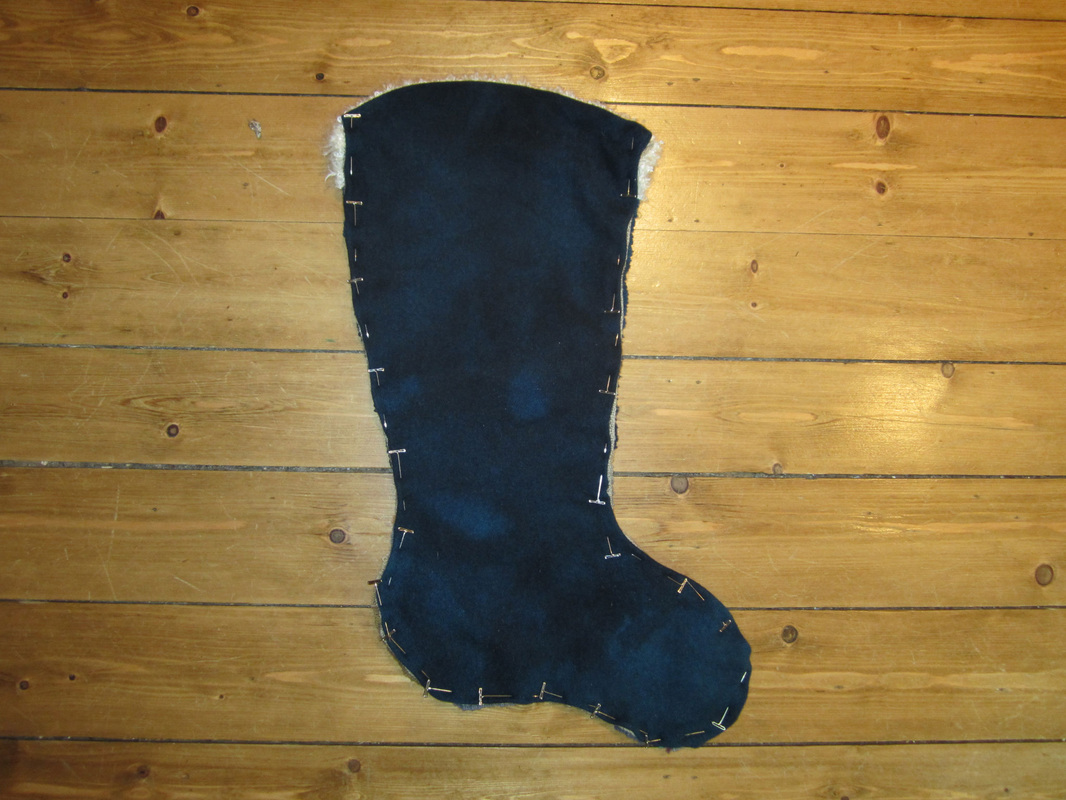 16. Pin the stocking front and backing together, with wrong sides together. |
 17. By hand, slip stitch the front to the back, stitching as close to the hooking as possible. | 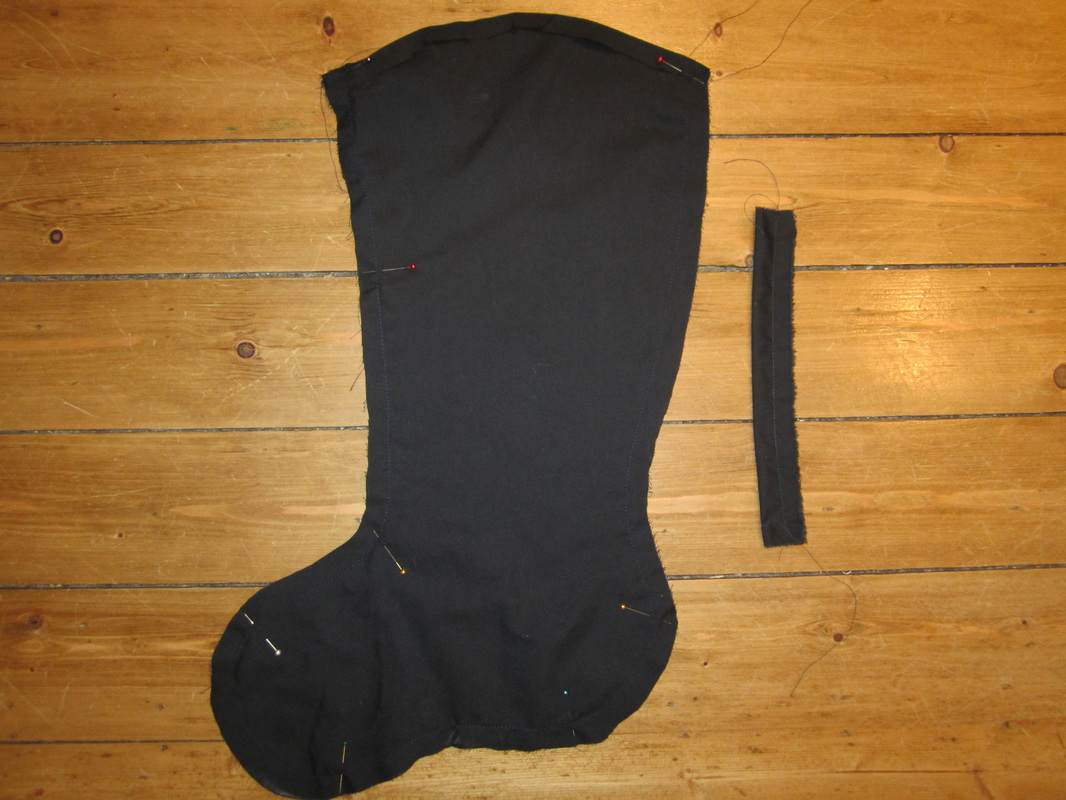 18. Lining and tab: Press ½” to the wrong side at the top of each lining piece. With right sides together, stitch ½” seam allowance on sewing machine, from the right hand top around to the left hand top of the lining, leaving the top open. For tab, fold right sides together and stitch ½” across top and down the side, leaving bottom open. Turn right side out (a chopstick is helpful for this) and press. |
 19. Insert lining into the stocking, with wrong sides together. Double the tab over to form a loop and slip it in between lining and backing. Slip stitch together by hand, around the top of the stocking and through the tab, so the tab is secure. |  20. Tack at the heel, instep and toe by stitching a couple of stitches through the backing, lining and front. This should be invisible. It helps to hold the lining down inside the stocking. |
 21. Stocking is finished! |


 RSS Feed