Encompassing Designs
  • Home
  • Shop
    • Kits
    • Patterns >
      • Christine Little >
        • Signature Designs
        • New Designs
        • Seasonal Designs
      • Deborah Sweet
      • Susan Leslie
      • Patricia Perry
      • William Morris
    • Supplies >
      • Backings
      • Frames
      • Hooks
      • Books
      • Extra
    • Wool >
      • Abrashed
      • Custom Dyeing
      • Dyed Bundles
      • Dyed Curly Mohair
      • Dyed Spots
      • Dyed Values
      • Dyed Yarn
      • Jacquard Dice Dyes
      • Natural & Colours
      • Plaids & Textures
      • Dye Books & Swatches
  • Ordering
  • Blog
  • Workshops
  • Our Story
  • Contact Us

How to hook rope using three or six value swatches.

7/19/2017

13 Comments

 
Picture
Picture
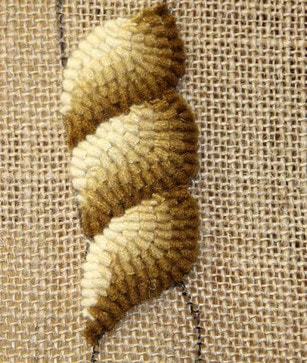
Hooked by Janet Delo
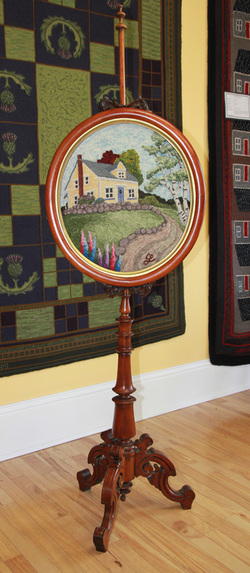
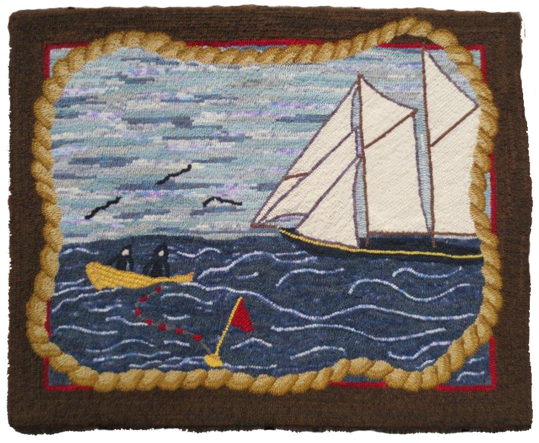
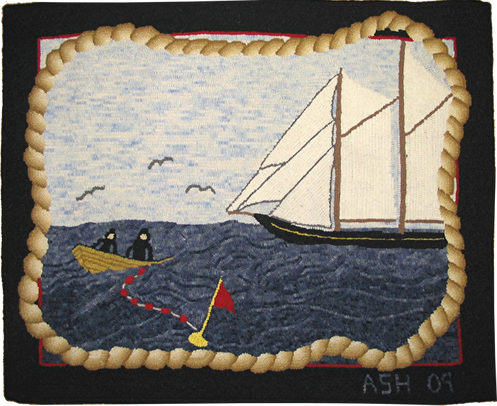
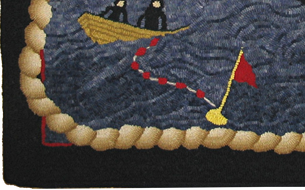
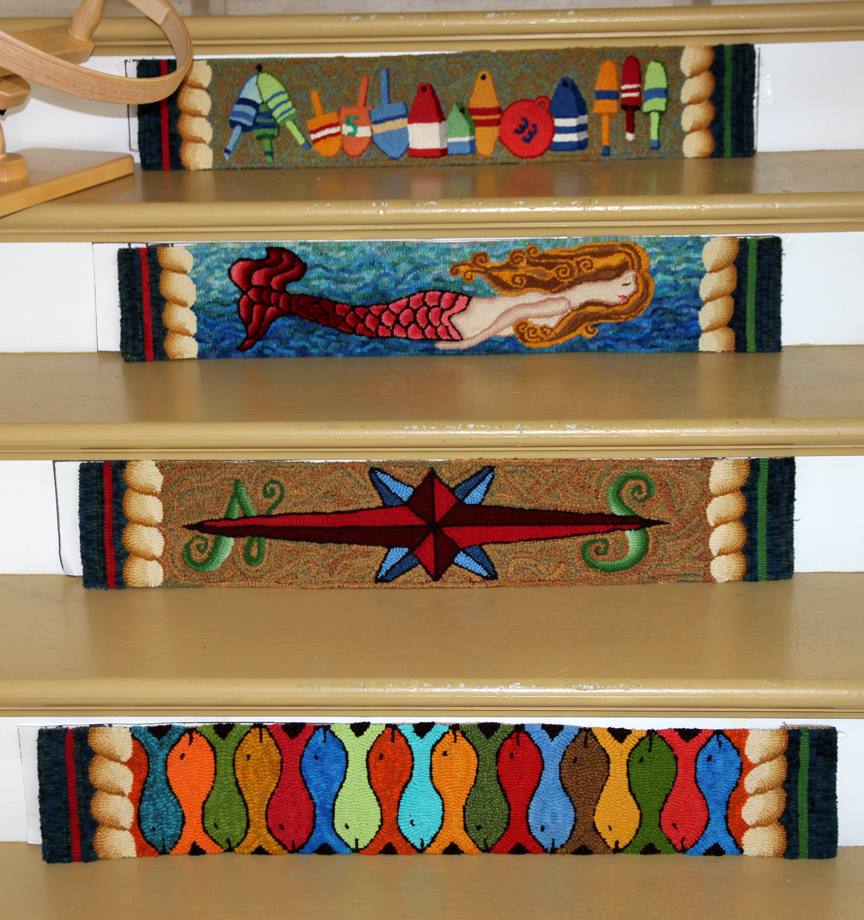
Since I’ve been working on the Nautical Stair Risers and hooking a rope edge as a constant to unite them all, I’ve been asked often how this is done so effectively.  Hooking rope may look daunting but it’s incredibly simple.  You can use either three values or six values or anything in between.   If using three values you will hook only one row of the darkest value for the shadow in the crease of the twist and then graduate the other two values until the area is filled in. In these two examples of our pattern Grand Banks Schooner, the above picture was hooked with a three value swatch and the bottom one is hooked with a six value. Both are equally effective and beautiful.  
Picture
Picture
Hooked by Anne Holmes
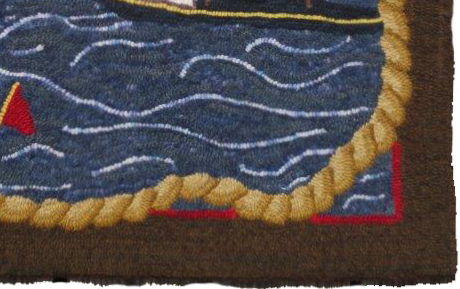
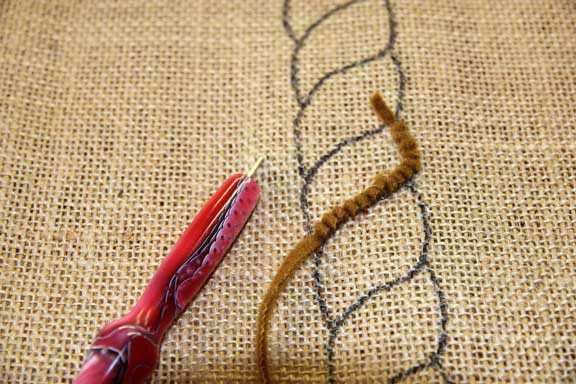
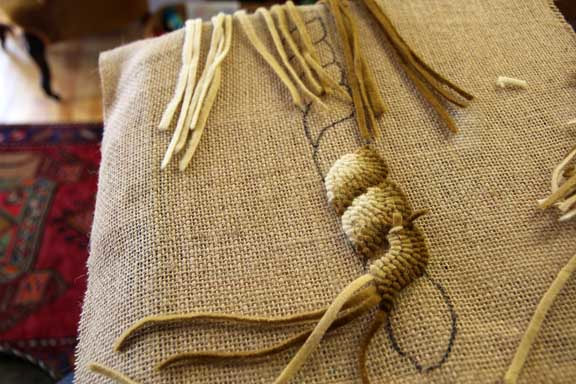
Once you have established the width of your rope place some cut worms to figure out how wide your strips will need to be to fill the space. For the size of my riser rope borders I use a #5 cut and they fill in perfectly.  I do use more of the lightest value on the inside edge, giving it more than just the one strip to provide the highlight as if the sun is shining down on it.  

Both of the schooner projects were hooked using "Ganache" for the rope; a fabulous caramel hue that gives an aged patina you’d see in old rope. This dye formula hasn't made it into any of our dye books so I'm sharing it with you below.  For my stair risers I’ve used our new formula “Straw” from our dye book, DYE ME TO THE MOON, a bit brighter considering the risers are in the shadow of the tread end and I wanted them to stand out as much as possible. 
Picture
Picture
Picture
Picture
Picture
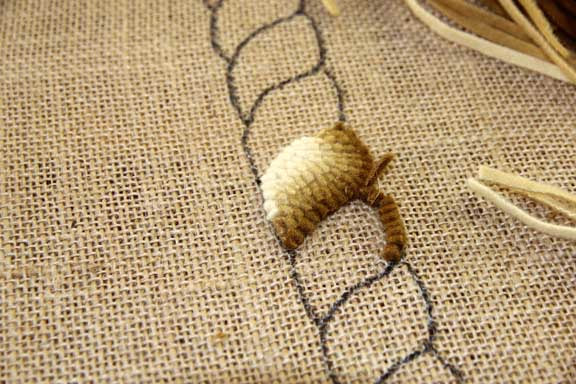
Ganache (Using Majic Carpet Dyes)

1/4   tsp Yellow
1/16  tsp Chocolate Brown
1/16  tsp Seal Brown

For a 3 Value swatch, mix in 2 cups of boiling water, pour off 1/3 for the lightest value, 2/3 for the medium value and the 1 cup remaining for the darkest value.  


For 6 Values u
se 1/2 cup replacement method. This recipe makes around 7-8 sets of 3" x 11" size pieces, so you would have to alter the formula by dividing it in half for 4 sets and again for 2 sets.  
The first thing you will assess is where you want your light source to come from.  One side of the rope will be the shadow side and that will be consistent throughout the entire length.  Usually the darker side is best put on the outer edge of the rope but it would depend on your design and what elements are in it.  For example if you are hooking something with a sun, then your shadow on the rope would be at the farthest point away.   I always like my borders to be darker than my center colours and the shadow on the outer edge will help for the eye to detect the graduating darker edge and flow from the darkest to the lightest bits from the outside to the center. 

The values run from dark to light, 6th value being the darkest.  The first line hooked is the 6th value and runs along the inside bottom of the curve of the rope.  It starts under the rope segment before it and all the way to the bottom where it joins with the next segment in the line. 

Now hook the 5th in the same way. When hooking the 4th value don't take it directly to the bottom, stop short a few loops which will allow the lighter values #3, #2 and #1 to be on the outside of the curve and act as the highlight.  
Picture
Picture
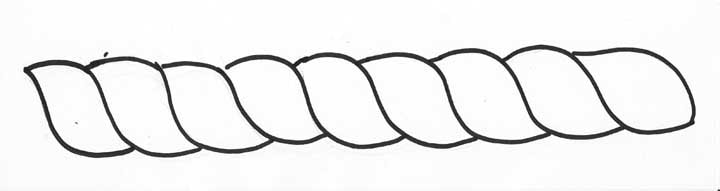
Here is a template to use by right clicking to save to your computer and then print off and blow up to the size needed, then repeat the pattern to cover the area.  
13 Comments
Janet Delo
7/19/2017 03:20:41 pm

Great lesson indeed.Many thanks for the specifics.I am not sure if I did mine the way you gave the lesson,but I tried my best.Cheers from Janet

Reply
Jeanette
7/19/2017 03:30:35 pm

A great tutorial on hooking as well as dyeing. Thanks so much!

Reply
Jeanette
7/19/2017 03:53:13 pm

Thank you for sharing this. I have always loved that look and wondered how it was done.

Reply
Cathy
7/19/2017 03:53:56 pm

Thank you, Christine, for your help on my rope on my paddle rug.Shane did an awesome job with the dying.

Reply
Wanda
7/19/2017 03:54:36 pm

Looks awesome...will have to try sometime!

Reply
Cathie
7/19/2017 04:35:14 pm

Great lesson! I have saved this article to try sometime.

Reply
Wanda
7/20/2017 06:28:49 am

Looks awesome...will have to try sometime!

Reply
Jo-Anne
7/20/2017 06:29:36 am

Beautiful work. Thank you for showing Us!

Reply
Rhoda
7/20/2017 06:30:11 am

Your risers are beautiful.
I like the rope explanation .

Reply
Jen
7/20/2017 06:30:49 am

Great tutorial.

Reply
Carolyn
7/20/2017 06:31:24 am

Beautiful.....love the shading....

Reply
Kim
7/20/2017 06:31:57 am

Fabulous!

Reply
Marye
7/20/2017 07:56:30 pm

Thanks for the explanation both written and visual, a huge help!

Reply


Leave a Reply.

    Picture
    Picture
    Picture
    Christine Little has been ranked #5​ out of the 60 top rug hooking bloggers by Rug Hooking Magazine!

    Picture
    Picture
    Max Anderson, Australia, recipient of my Nova Scotia Treasures rug.  An award of excellence for promoting Canada through his writing.  
    Picture
    Picture

    RSS Feed

    Archives

    January 2023
    July 2022
    March 2022
    February 2022
    January 2022
    November 2021
    October 2021
    July 2021
    March 2021
    February 2021
    January 2021
    December 2020
    November 2020
    September 2020
    August 2020
    June 2020
    May 2020
    April 2020
    March 2020
    February 2020
    December 2019
    November 2019
    October 2019
    September 2019
    August 2019
    July 2019
    May 2019
    April 2019
    March 2019
    February 2019
    January 2019
    December 2018
    November 2018
    October 2018
    September 2018
    August 2018
    July 2018
    June 2018
    May 2018
    April 2018
    March 2018
    February 2018
    January 2018
    December 2017
    November 2017
    October 2017
    August 2017
    July 2017
    June 2017
    May 2017
    April 2017
    March 2017
    February 2017
    January 2017
    December 2016
    November 2016
    October 2016
    September 2016
    August 2016
    July 2016
    June 2016
    May 2016
    April 2016
    March 2016
    February 2016
    January 2016
    December 2015
    November 2015
    October 2015
    September 2015
    August 2015
    July 2015
    June 2015
    May 2015
    April 2015
    March 2015
    February 2015
    January 2015
    December 2014
    November 2014
    October 2014
    September 2014
    August 2014
    July 2014
    June 2014
    May 2014
    April 2014
    March 2014
    February 2014
    January 2014
    December 2013
    November 2013
    October 2013
    September 2013
    August 2013
    July 2013
    June 2013
    May 2013
    April 2013
    March 2013
    February 2013
    January 2013
    December 2012
    November 2012
    October 2012

    Picture
    Picture
    Gift Certificates are available for that special rug hooker in your life!  Any denomination, no expiry date! 

    Picture

    Categories
    (Click on the categories for past blogs)

    All
    Announcements
    Beginner Class
    Christmas
    Colour Planning
    Contests
    Copyright
    Coupon
    Customer Rugs
    Cutter Servicing
    Dyeing
    Equipment
    Featured Hooker
    Giveaway Draw
    Guest Blogger
    Guest Blogger
    Health & Fitness
    Home & Heart
    Hooked Rugs
    Hooking Groups
    Hook In Talk
    Initially Yours
    Jibber Jabber
    Just A Bit Of Fun!
    Life's Experiences
    Life's Experiences
    New Design
    New Ideas
    Pattern Of The Week
    Patterns Hooked
    Pets
    Rants
    Recipes
    Rememberingfbe7326ff7
    Rug Schools
    Show & Tell
    Show-tell
    The Rant
    Tips Technique
    Tips Techniquef0cd117ab4
    Visitors
    Workshops

    Picture
    Picture
    Picture


    Picture
    We have a pot to "Fiz" in!

Shop Hours:
Monday - Friday 10:00 AM - 5:00 PM 
Saturdays 12:00 PM - 4:00 PM
We are closed during ice and snow storms
​so please call ahead.  If school is cancelled we probably are as well.  

Toll Free: 1-855-624-0370
Local: 1-902-624-0370​
encompassingdesigns@gmail.com

498 Main Street
P.O. Box 437
Mahone Bay, N.S.
Canada B0J 2E0

​Follow us and keep up to date
on our specials, new products
​and events!
Picture
Picture
Picture


Home
Shop
Ordering
Blog
Our Story
Workshops

Contact Us


​​​© Copyright 2023 Encompassing Designs. Website by SKYSAIL