Let me first say that I would rather hold a rug hook anyday
to a sewing needle!
Steps:
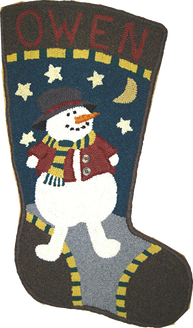
1. Hook the stocking
2. Leave 1 ¼” edging for finishing
3. Insert cording and whip the stocking with a 2 ply yarn
4. Choose a suitable backing, wool preferably, and cut all around the shape of the stocking ½” larger than the stocking itself, except for the top you can leave 2”. You need to cut out two pieces if you want the stocking to be lined. I use a wool skirt for my backings because I recycle the waist band to use as the hanging tab. Remember I don’t like sewing!
5. Put the two cut pieces of wool together and fold the edge over by ½”. Nestle it tightly up against the whipped edging from the back of the stocking and push your needle through until it comes out the crevice between the last row of hooking and the whipped edge on the top part of the stocking. Your stitches, embedded in the crevice, will be nicely hidden on the front side of the stocking.
6. Fold the extra amount you left for finishing the top down and inside on the front and back side of your stocking. The front can be sewn into up against the back side of the whipping just like the sides, in the crevice.
7. Attach a tab for hanging on the top left side.
I like to leave a 2” opening at the top left side of my stockings between the front lining and the backing. This is to allow for extra opening space to put in those larger presents. I then attach my shirt waist band to the back of this opening and the other end to the front.
Voila a finished stocking my way – Bonnie Duncan



 RSS Feed


