Buyer beware, patterns are not all created equal. Stamped patterns have no regard for matching the lines of the grain on the warp and weft. Anyone who has hooked a pattern off grain will tell you it's work. Some people try to straighten them which can be frustrating. All the correcting lines muddy the pattern so it is a mess to decipher and hook. Patterns that are stamped tend to be the same price as hand drawn so don't throw good money after bad. Of course if you truly love the design you are stuck with what you get but the experience will be less than charming. Sometimes stamped patterns are faded so that you can barely make out the lines so before you begin to hook it, you have to get out the marker and darken it yourself. You should not have to do this after paying good money for the pattern.
Today I am going to explain step by step how to draw a design on a backing so that you can have the optimal rug hooking experience.
How to Transfer a Design From Red Dot to a Backing
First you will need to cut your piece of backing. If you pattern measures 22” x 30” the backing size should be 30” x 38”. This will allow for an excess of 4” per side to fit in a hoop or on a gripper frame and later for trimming and finishing. If you should purchase a pattern with very little excess edge, or if you are working with a smaller scrap, you can sew a piece of material to the edge so the pattern fits on the frame.
You always want to be careful cutting the backing to minimize fraying. Any cuts made crooked across the gain will fray like mad and you could lose a great deal of the border needed for binding the edge. Always zig zag the outside edges of the cut burlap to prevent fraying. (Some people use masking tape to protect the edge or duct tape).
Measure where you want to make the cut and use a pair of scissors to snip about an inch. Then pick up one of the backing fibers to the left or right of the cut and pull it through like a draw string all the way to the other side. Once this one strand is removed it will be very clear where to cut with your scissors. This is far easier and faster than trying to follow the straight of the grain with your scissors and your eye.
Below is the anal person’s guide to pattern transfer. If you are artistic and not uptight about marker mess, you can draw directly on the backing, although if you want to draw straight lines within the pattern or put on a border the same rules will apply.
1. First draw your design on paper. This allows you to make all changes that are easily corrected. Working directly on the backing with a marker will make mistakes permanent.
2. Secure the drawing to the table with tape to prevent slipping. Now place the red dot medium over your drawing and secure with stick pins or tape to the paper drawing. This prevents any slipping between the two layers as it can get annoying always trying to match up the lines once the red dot shifts.
3. You will be able to see your drawing through the red dot very clearly. Trace over all the lines of your pattern with either a pencil, pen or ultra-fine tipped marker. (An ultra-fine tipped marker works best because it flows over the red dot without having to apply pressure. Now your design will be on the red dot medium.
4. The Red dot medium has red dots that can be used to line up straight lines for borders etc. I don’t usually bother with this as most of my designs lines are not the exact place where the dots lay.
5. Markers do not have a long shelf life. Especially if you are tracing over burlap’s rougher surface. A heavy hand and too much pressure will wear the tip down faster. Linen patterns maximize the use of the marker as the surface is softer. Be prepared to go through one marker for a large pattern, maybe even crack open a second. Once the tip is worn off you can still use the marker for darkening lines until it dries out.
6. Position the red dot over your backing and secure it with stick pins.
7. Trace over the lines with a Sharpie marker or any marker with a point. The dye from the marker will bleed through the red dot to the backing. (We use Sharpie markers as they have a finer point and less odor. Anyone with allergies or sensitivities to strong smells will prefer them. If bothered by the marker wear a carbon filter mask, purchased at any hardware store.)
8. After you have traced over all the lines remove the red dot and you should see a perfect replica of your pattern. Now go over the lines on the backing to darken them. Don’t press too hard with the marker when working directly on the burlap as it is a rough surface and will wear off the tip fairly quickly. The tip is what gives you a fine line on your design, keeping it neat and detailed. Once the marker gets too dull it will make wider lines and if you are drawing smaller objects they will appear less defined and muddy. Note: Except for straight lines or borders all of the lines of a pattern can be transferred in this way.
9. When you have a straight line border or straight lines inside the pattern design, those lines will need to be drawn by hand with a pencil so they are straight on the grain. For single borderlines. If you have a design with a border that is 15” x 15” you would leave at least 3-4 inches along the outside edge so that the pattern will fit in your frame. This would mean that you are working with a piece of backing that is 19” x 19”. Take a ruler and measure in 4”. Find the closest hole/channel, take a pencil and drag it along the backing in that channel until it reaches 15” in length. Pay close attention as any distraction can make the pencil jump the channel into another line. Go over that channel the second time with the pencil to make the valley even more defined so later when you drag your marker through it will stay on the line. Then make the second side of your border until you reach 15”. Do the third side of the border and then close off with the fourth side. This will give you a nice straight edge of your pattern and make hooking so much easier.
10. All internal lines of the design have to be drawn by pencil as well. You can do this by dragging your pencil down the line on the red dot. The pencil will find the nearest channel and as you drag it down the line it will leave a dull pencil mark right on the backing. When you lift up the red dot you will see where to go over the area one more time with the pencil or use a marker to darken the line.
11. All geometric patterns like inch mats and anything with squares or straight lines are drawn by hand by dragging a pencil along the grain. Make sure the pencil is not too sharp or it won’t make the channel wide enough. After you have your lines drawn you can then drag your marker along those pencil lines to darken them. Hooking straight lines is so much easier than trying to hook a line that goes to the left and then the right of the grain.
There you go...101 of pattern transferring
 Measuring out and drawing in the border lines. This pattern has several borders and each have to be measured out and then drawn with a pencil first and then filled in with marker. | 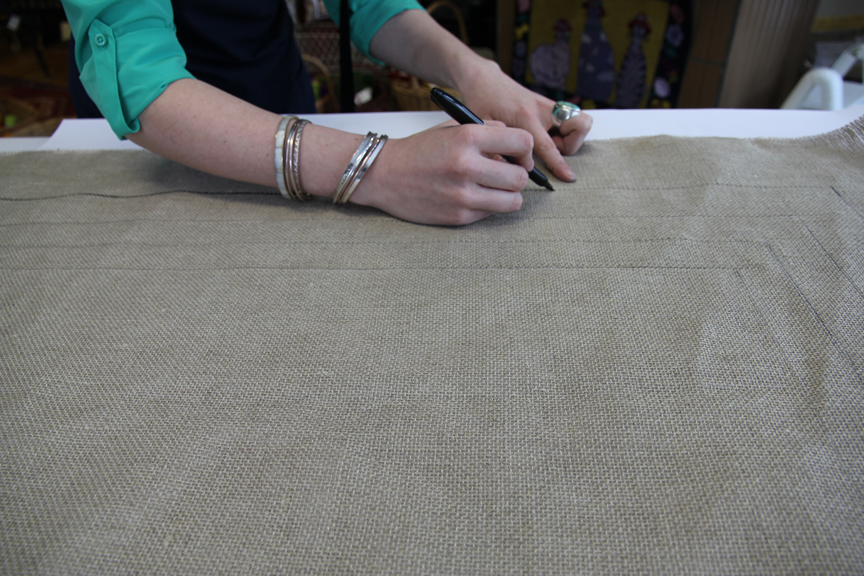 More darkening of lines. |
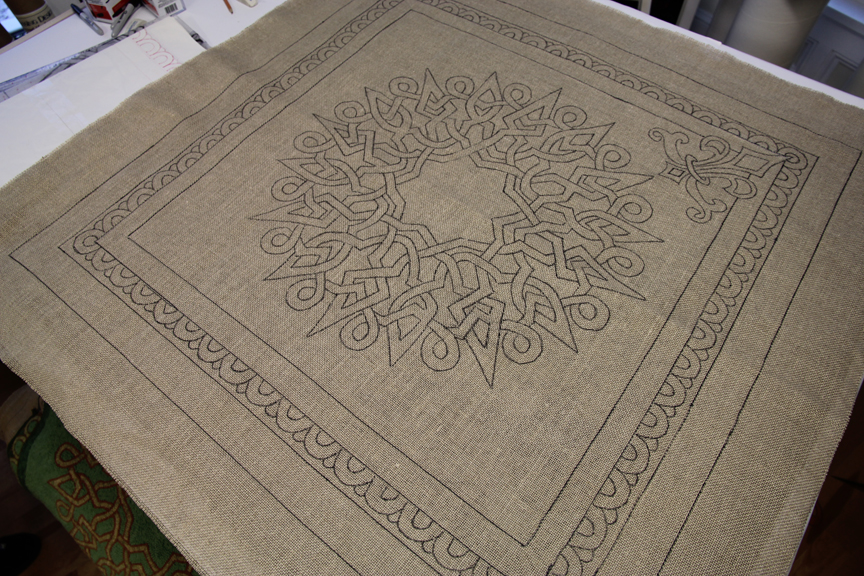
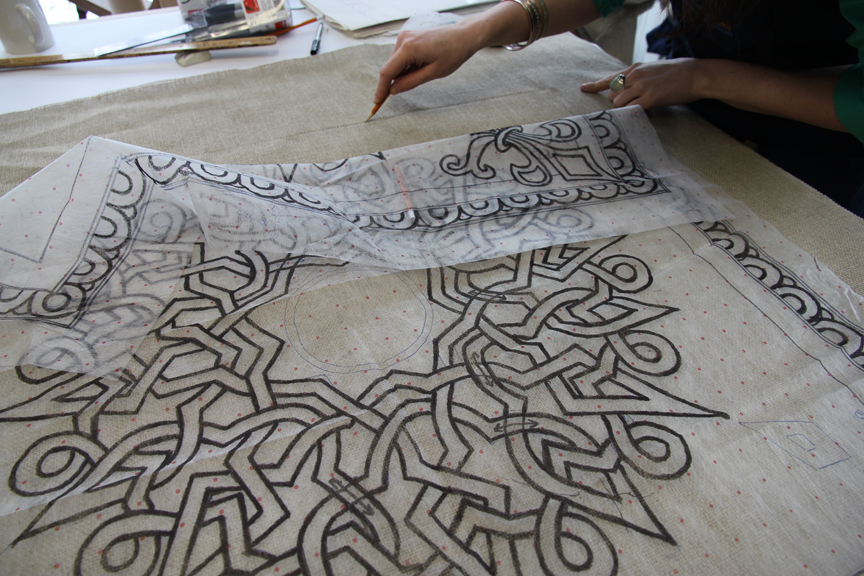 Working with the red dot medium to make sure all the lines are in the right place. You overlay the red dot periodically to check the lines before darkening with a marker. Pencil lines can be erased if necessary but marker lines can't. | 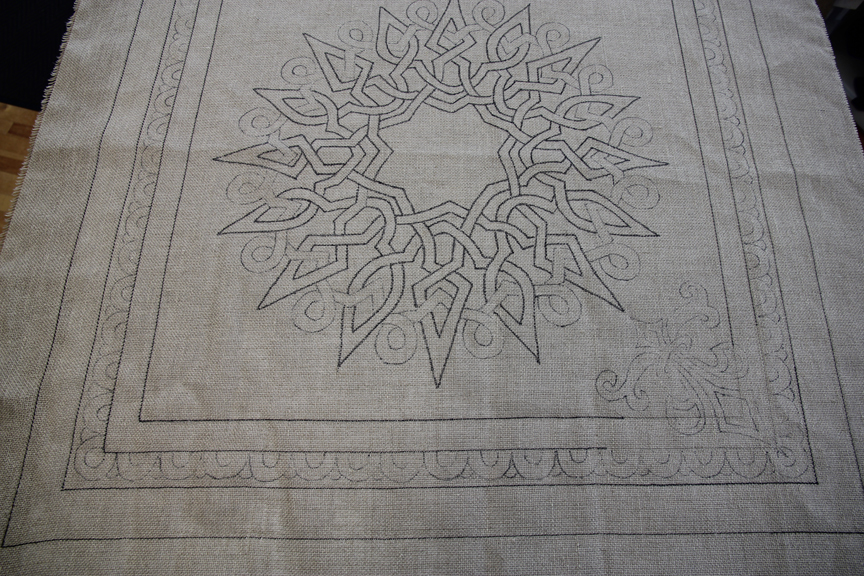 The lines are all down and now I am in the process of darkening in the center rose, Fleur-de-lis and border. |
 Rose Of Thorns, one of the first compass rose patterns I designed back when my business had training wheels. A bit on the Celtic side this piece is stunning with its Egg & Dart border to match. I started hooking this piece in 2000 and it is 3/4 down. Drawing out this pattern for an order inspired me to dig out the rug and entertain thoughts of finishing it. The finished rug is 36" x 36". Of course if you have a pattern with multiple borders such as the one in the photos above, it is always best to work from the inside to the outside. Cut out your backing, find the middle and lay your red dop on top and position so that it's centered. You can check by measuring each edge of the pattern to the edge of the backing to make sure it is equal on all sides...at least 4" away from the last line of the border. Then where the first inside line begins make a mark in one corner by dragging the pencil over the red dot to make a small mark that will show through on the backing. Then lift the red dot and draw the entire line by dragging it to the next corner area, checking where the line will end my putting the red dot back down. Repreat to do all sides. Measure with a ruler to check before you darken these lines to make sure they haven't gone wonky somewhere. Always double check all your lines to make sure they are where they are supposed to be. Another tip...when dragging the marker along the channel hold it straight up, so that the tip fits nicely in the groove. If you drag it on the diagonal it is more likely to jump the line. The red dot can make about 15-20 patterns before it gets too ratty to use. |


 RSS Feed